Login
Navigate to http://162.214.228.102/~sbwaustr/wp-admin/
this will be updated to https://sbwaustralia.com.au/wp-admin
Enter Username and Password provided separately
Click Login
Collections - How to add a new collection
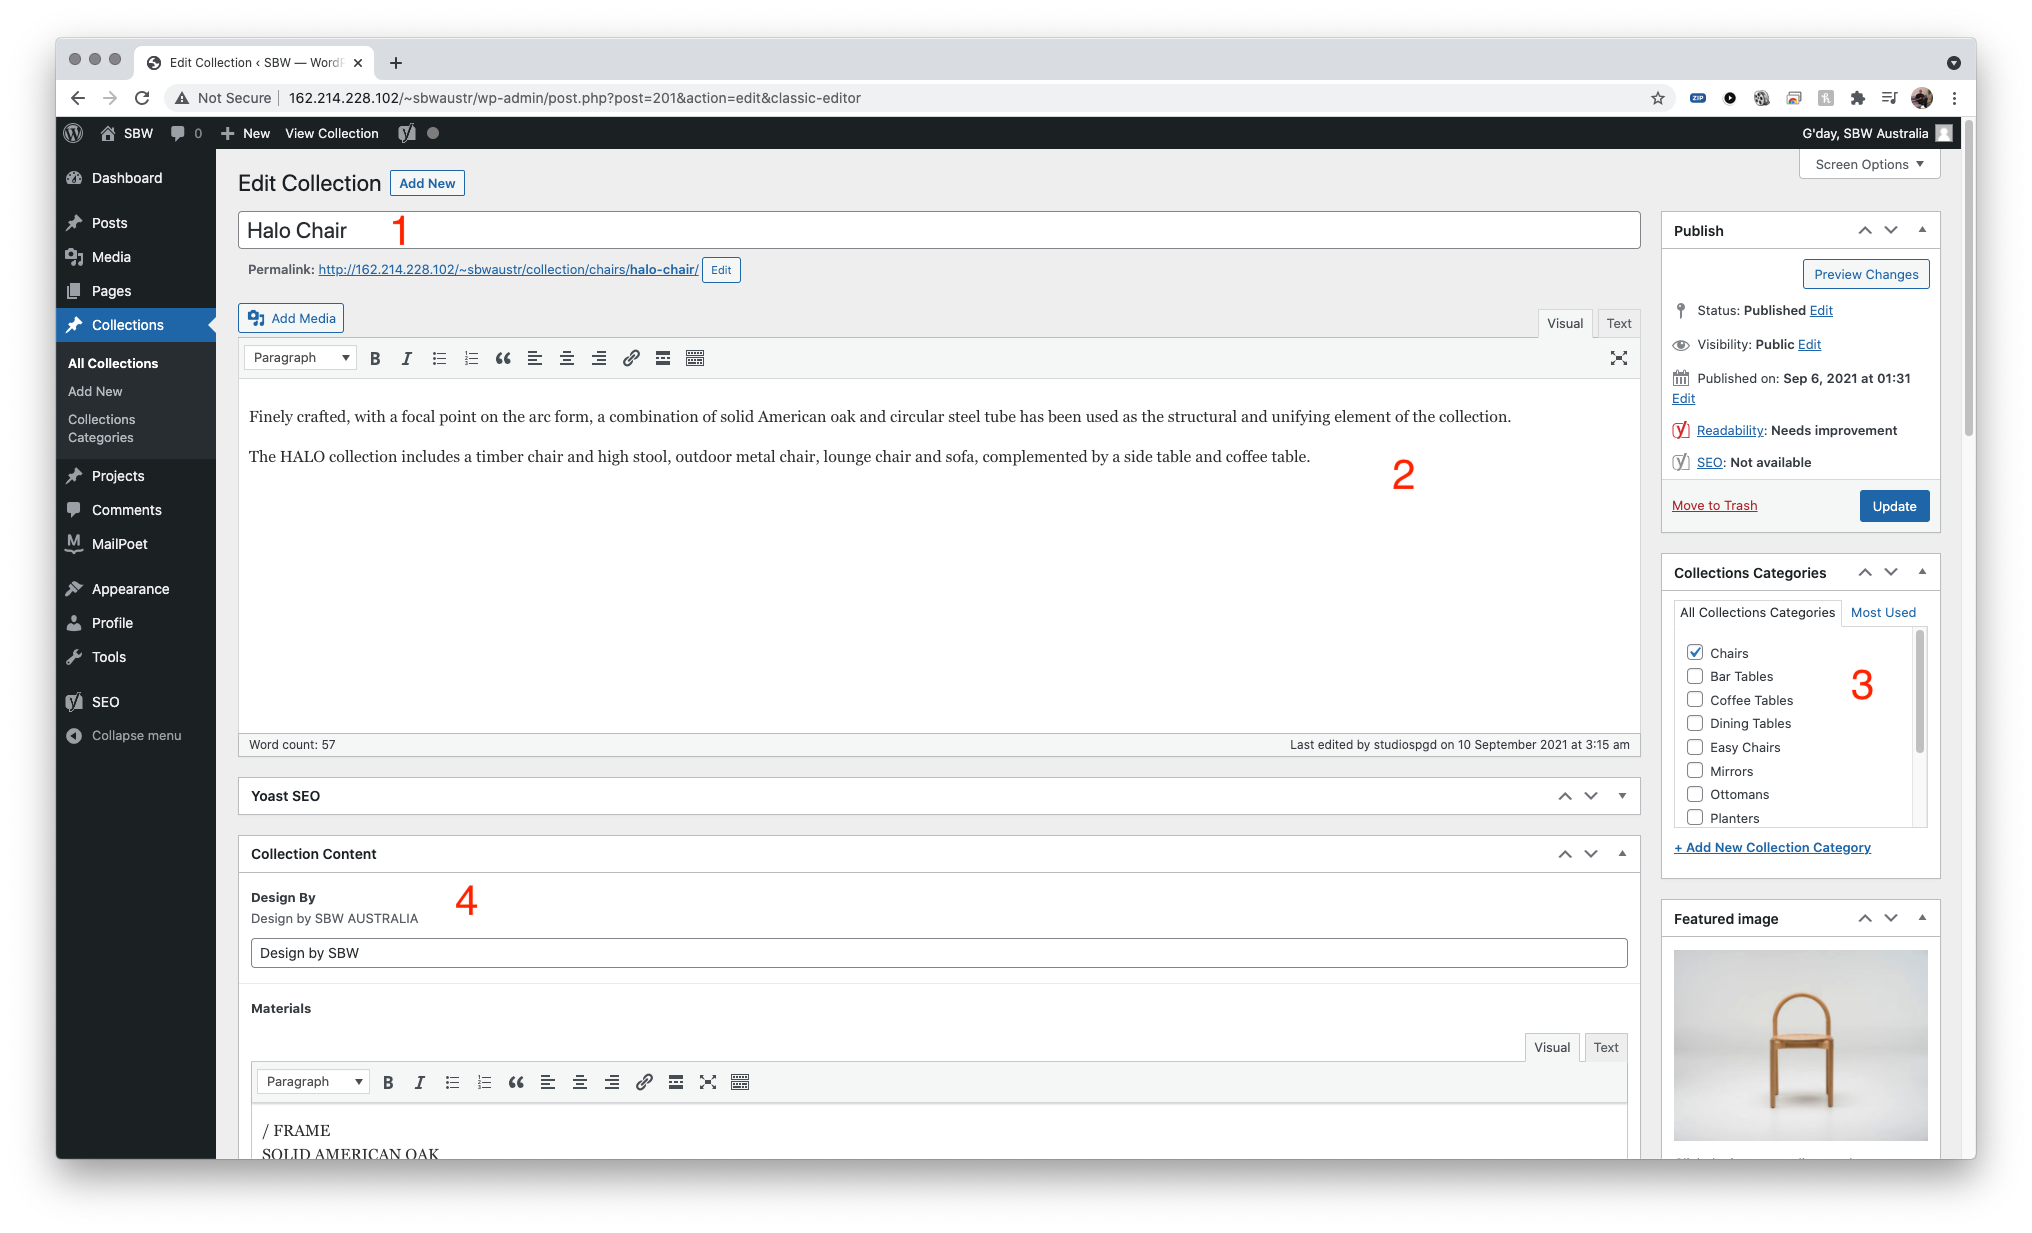

Navigate to Collections > All Collections > Add New
- Enter Collection Title, this will be displayed under the image on all collections page
- enter description – text only
- choose the category of this collection from this list
- enter sub title of this description – e.g design by sbw
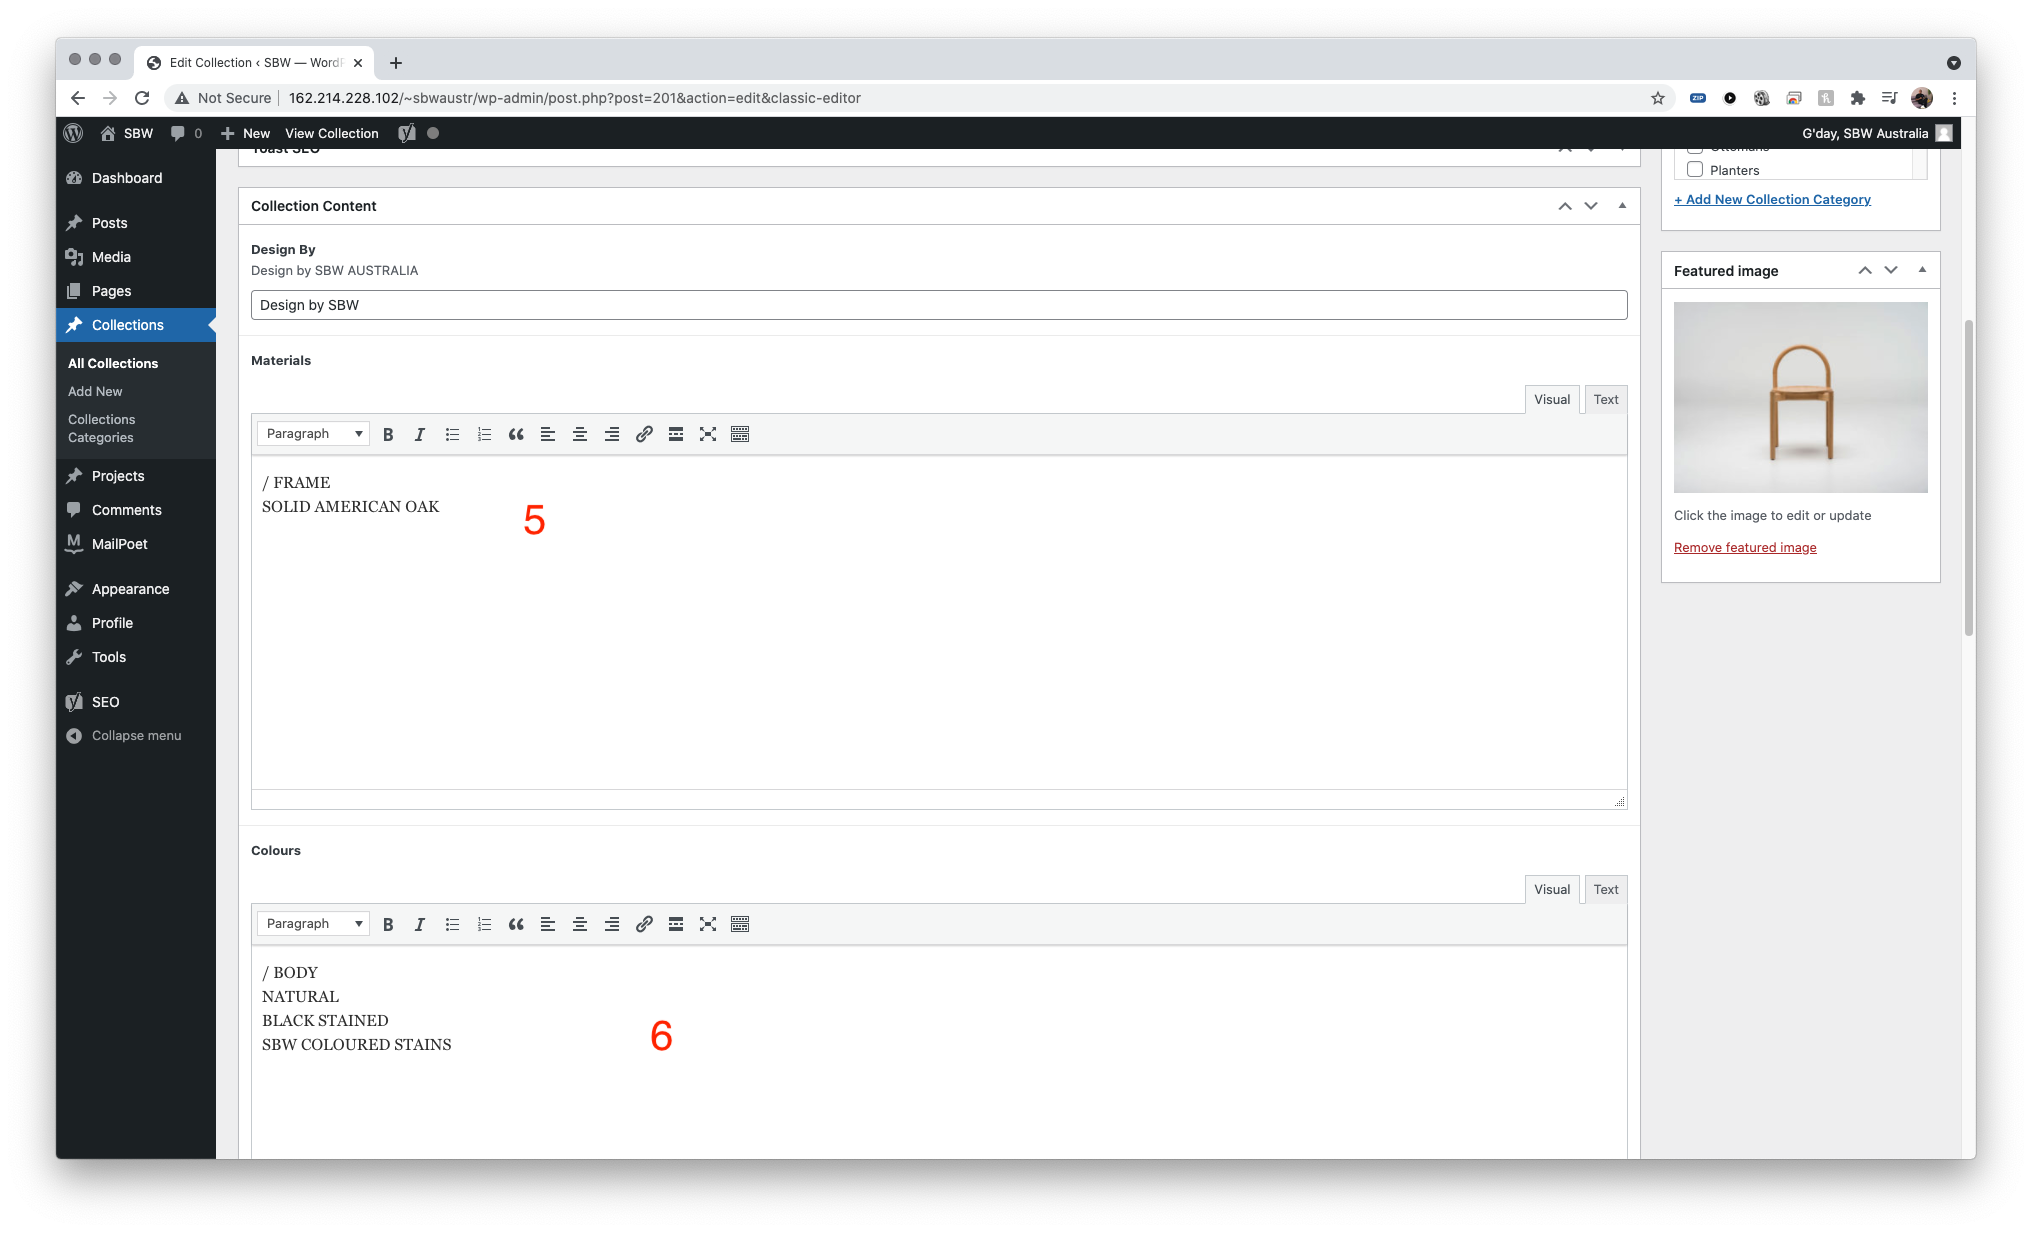
- enter materials for this collection – followed current style of text entered
- enter colours available for this collection*
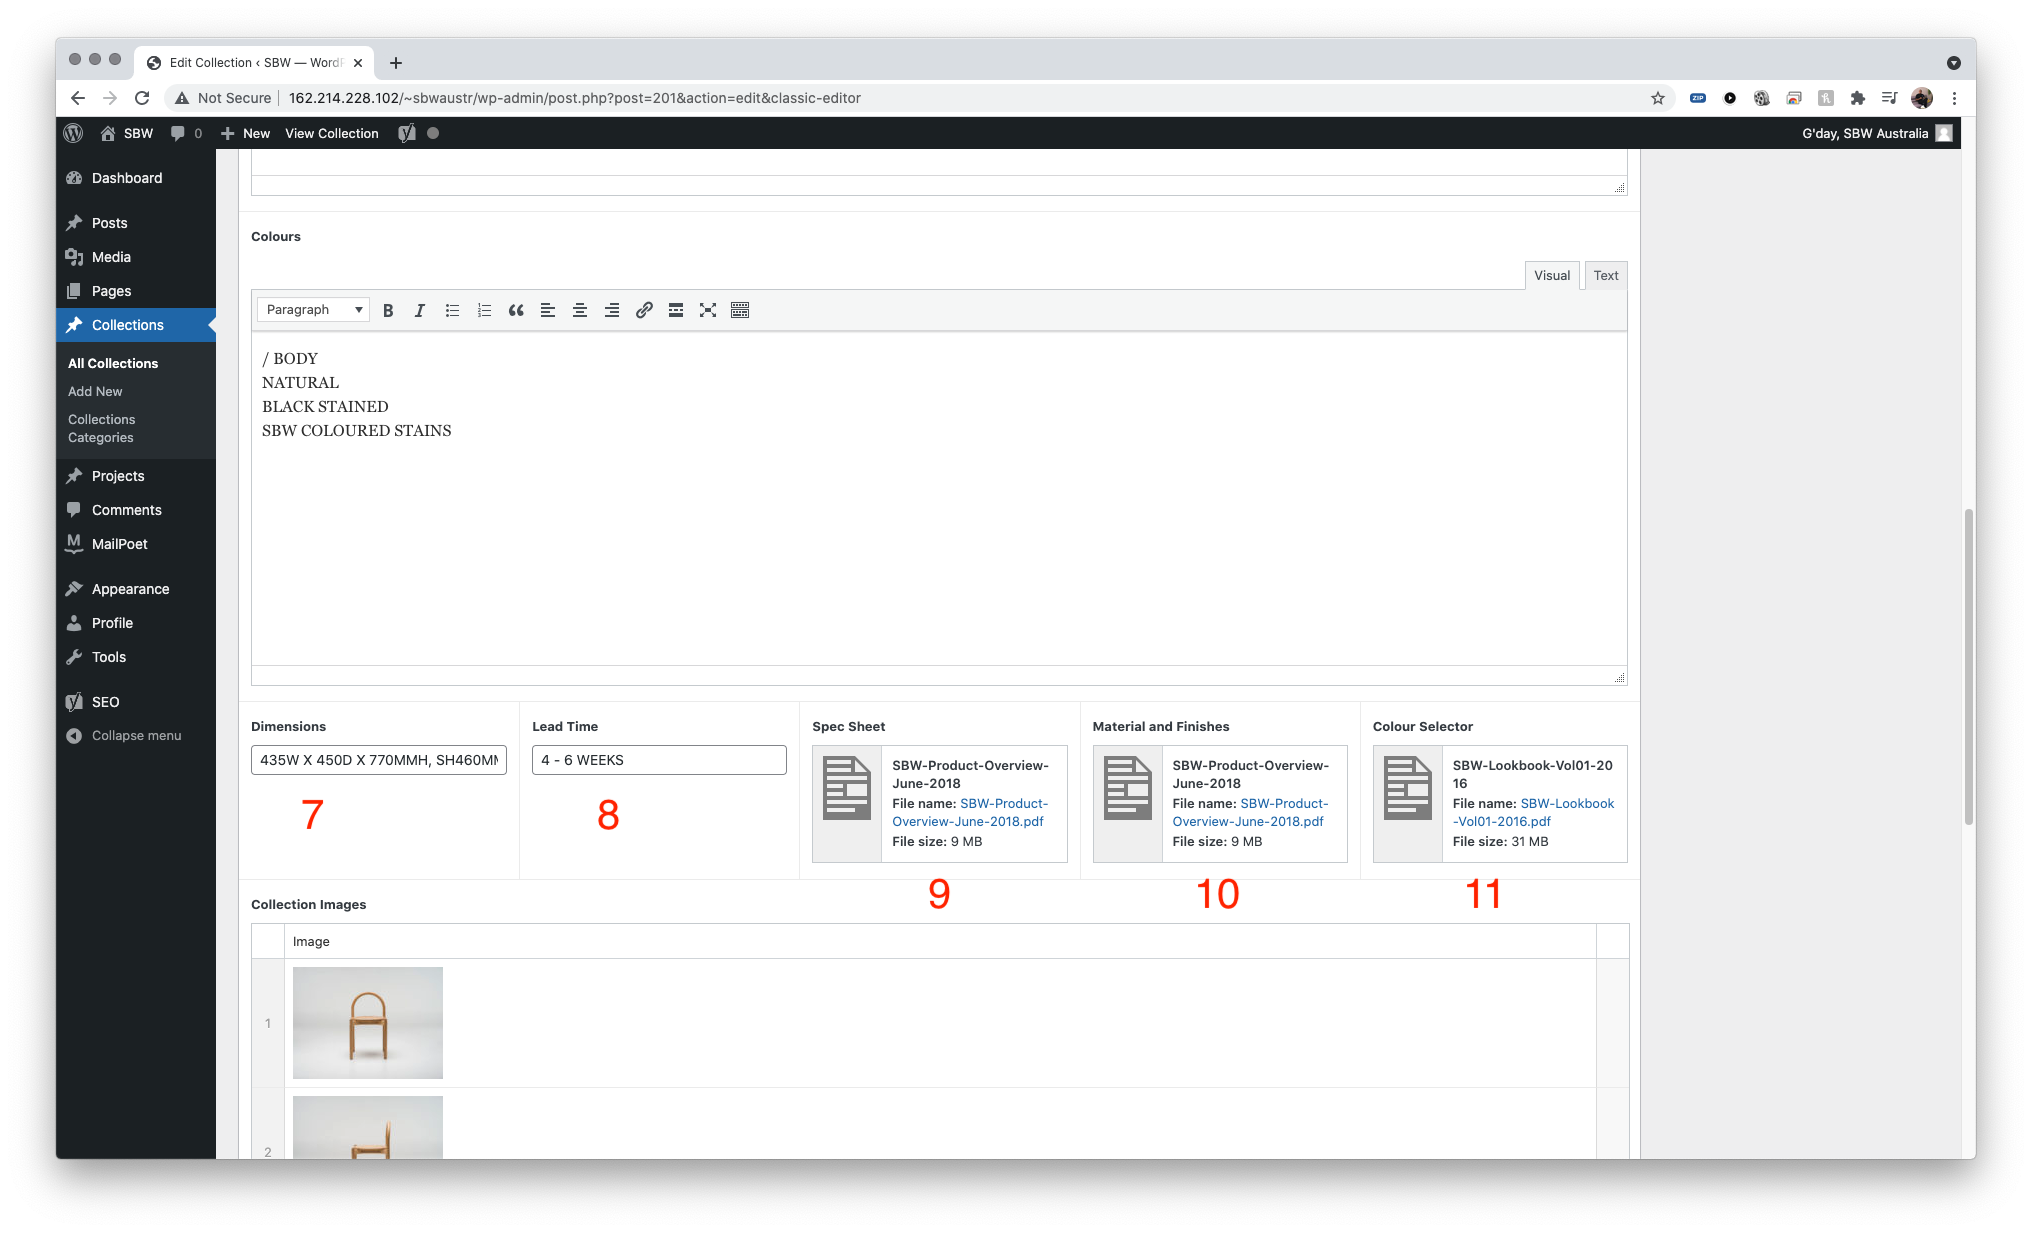
- enter dimensions*
- enter lead time*
- upload spec sheet PDF*
- upload material and finishes*
- upload colour selector*
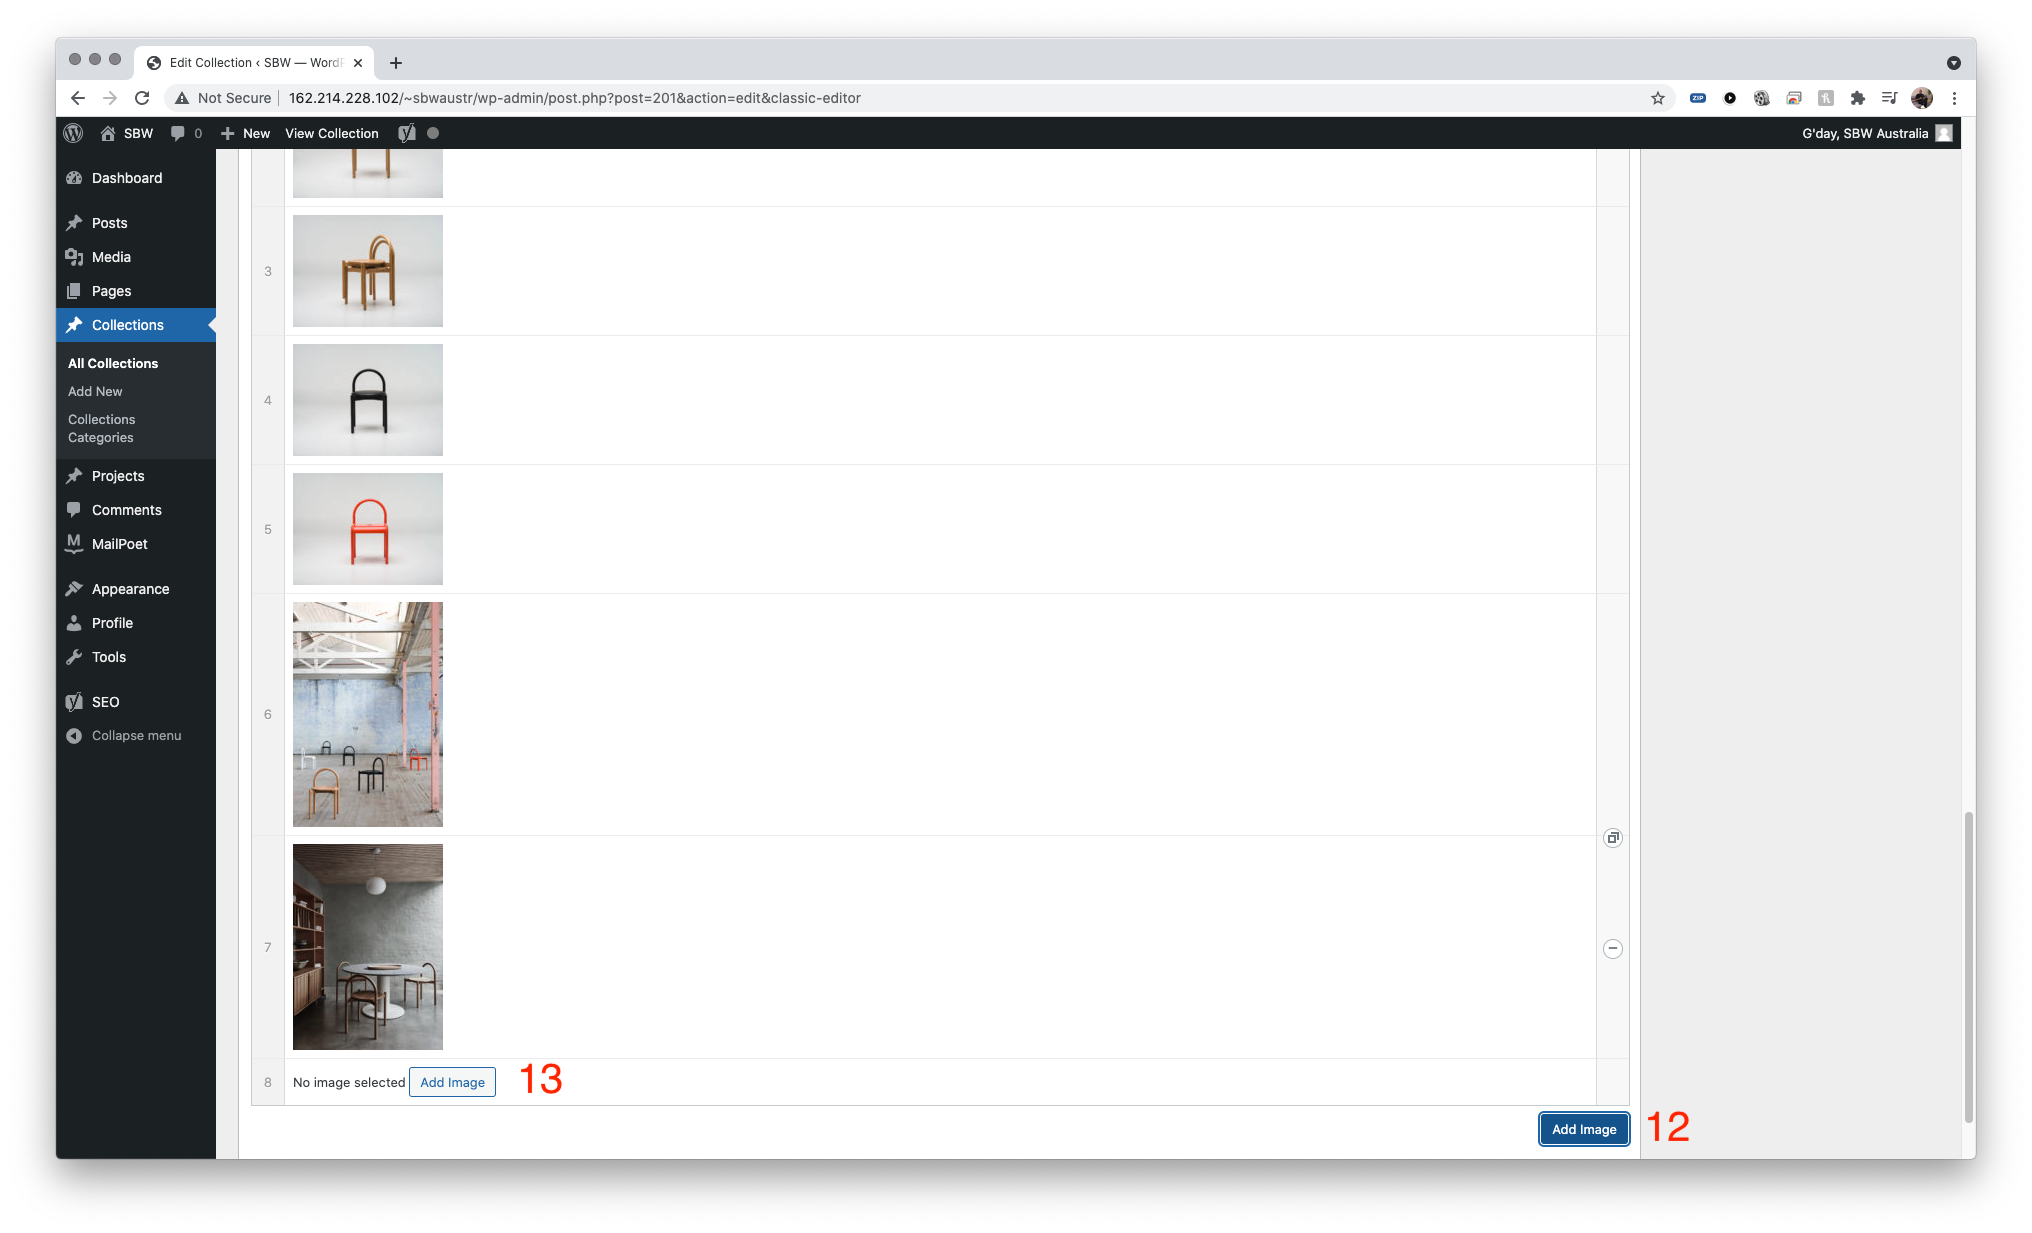
- click on Add Image button, a new row should appear
- click on add image button inside this row
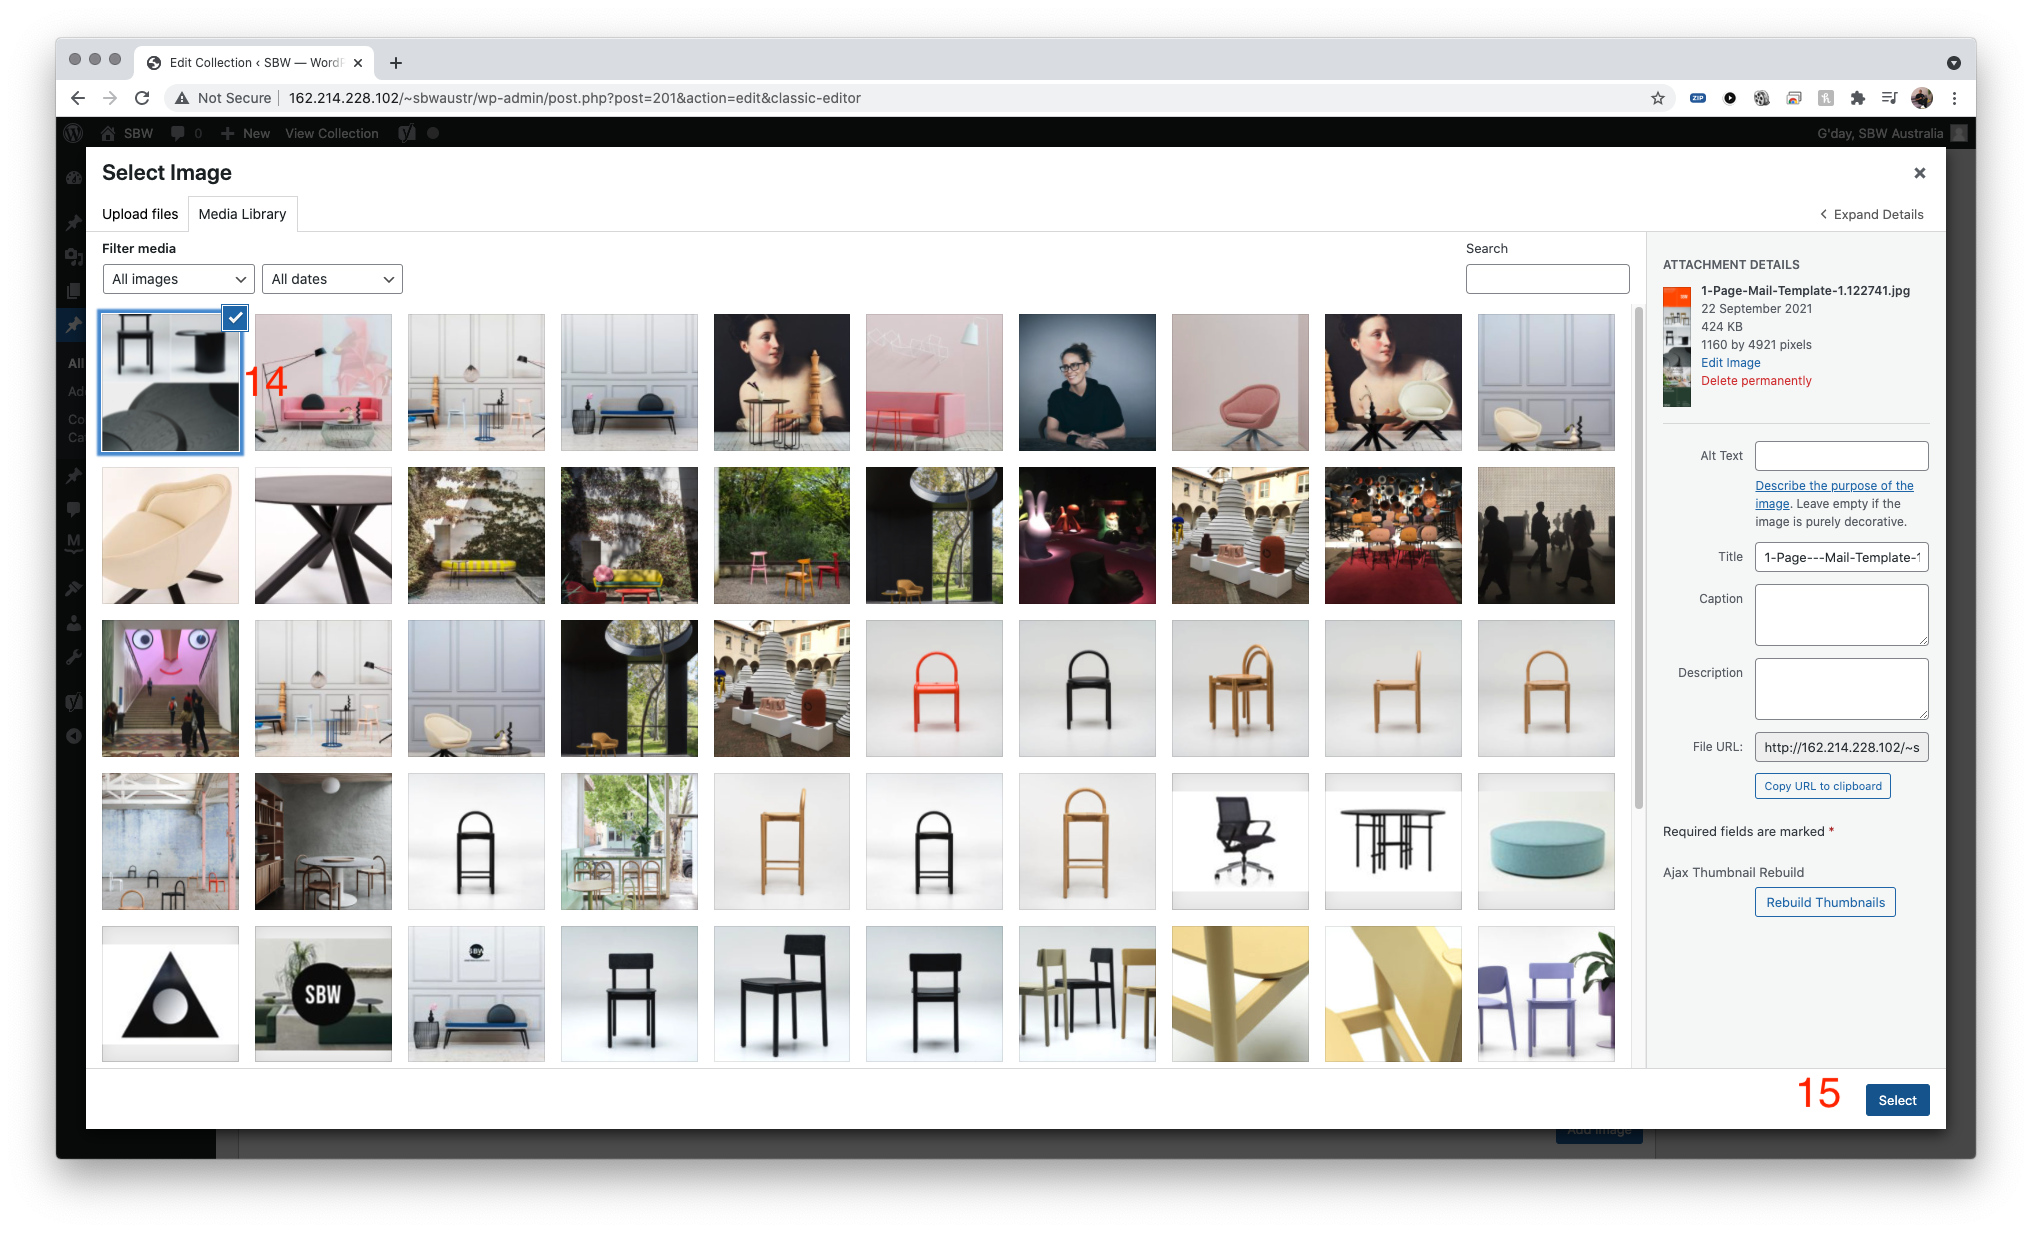
- a pop up will appear, you can drag and drop images to be added. ensure that image(s) to be displayed has a blue tick on top right corner
- click select. this should display all images selected in multiple rows
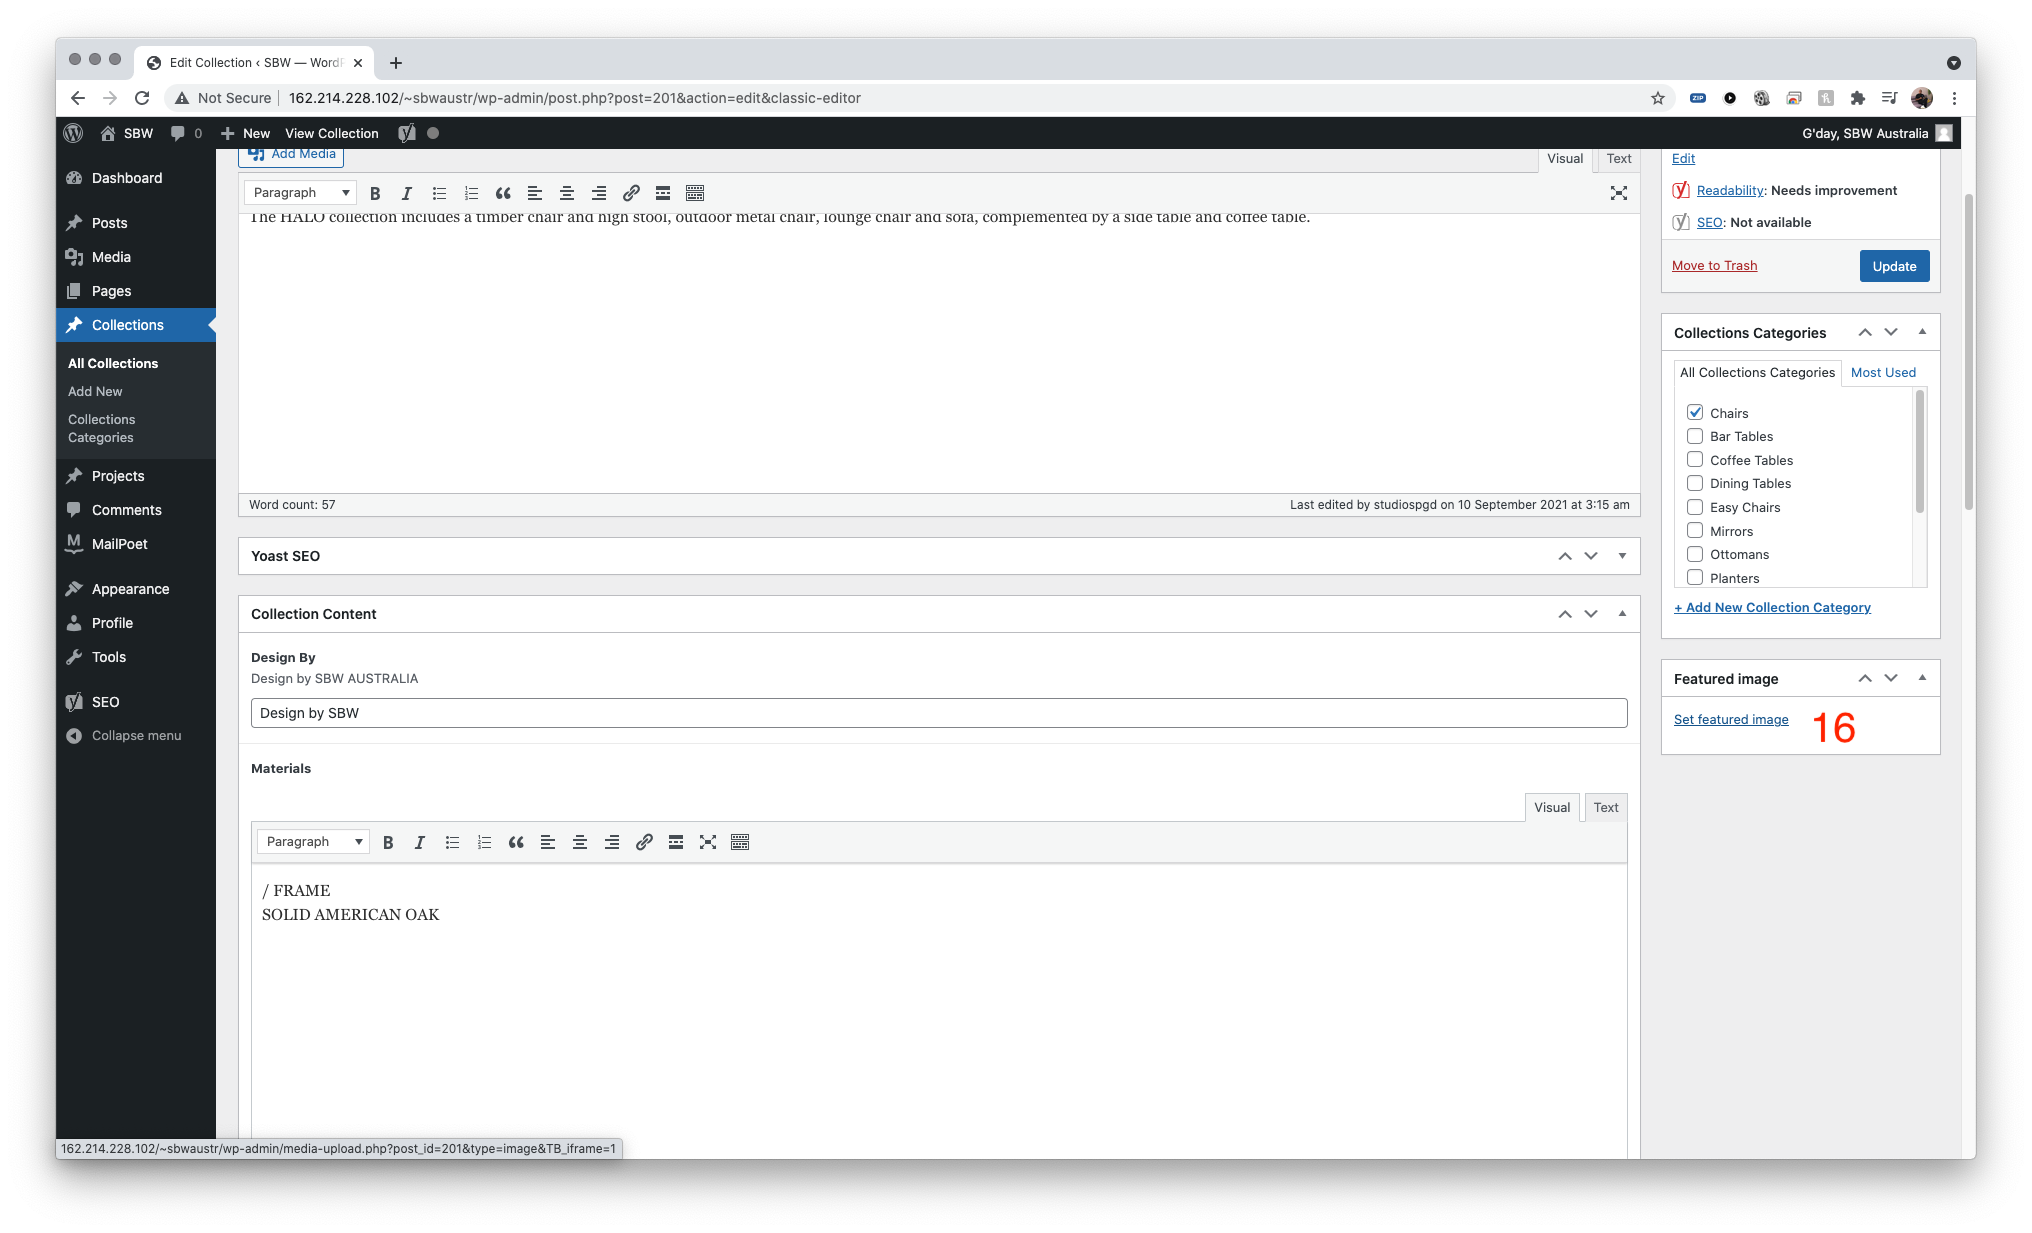
- scroll up, see FEATURED IMAGE on right hand side, click on set featured image
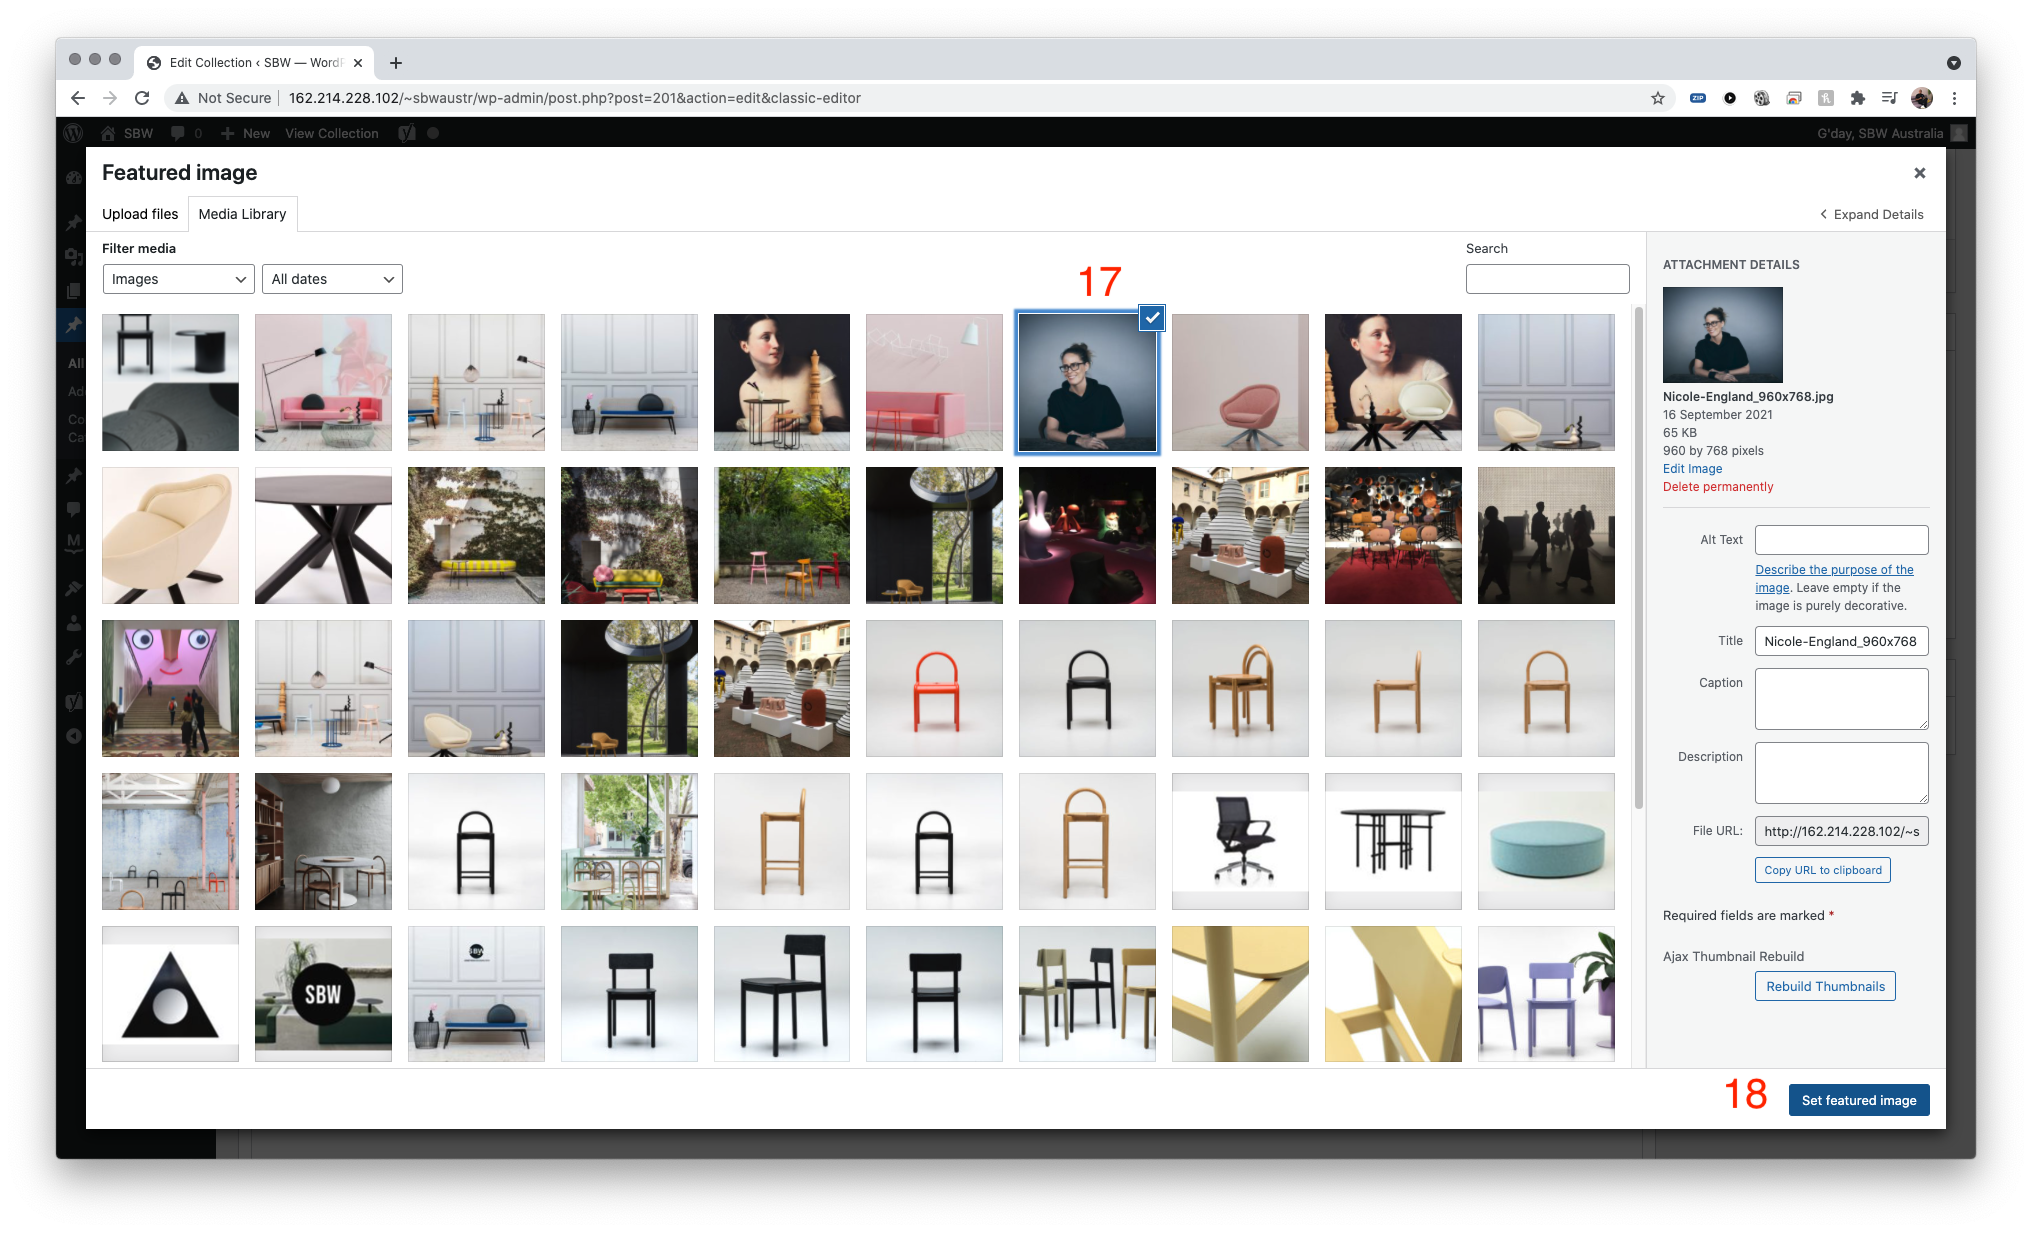
- a pop up will again appear as per step 14, select the image to be set as featured thumbnail, ensure a blue tick is displayed on top right
- click set featured image
- scroll page back up, click Publish (if new collection) or Update (if updating existing collection)
*field will not be displayed if left blank
PS: process of uploading PDF for spec sheets etc is the same as uploading Image.
Single Project - How to add a new project
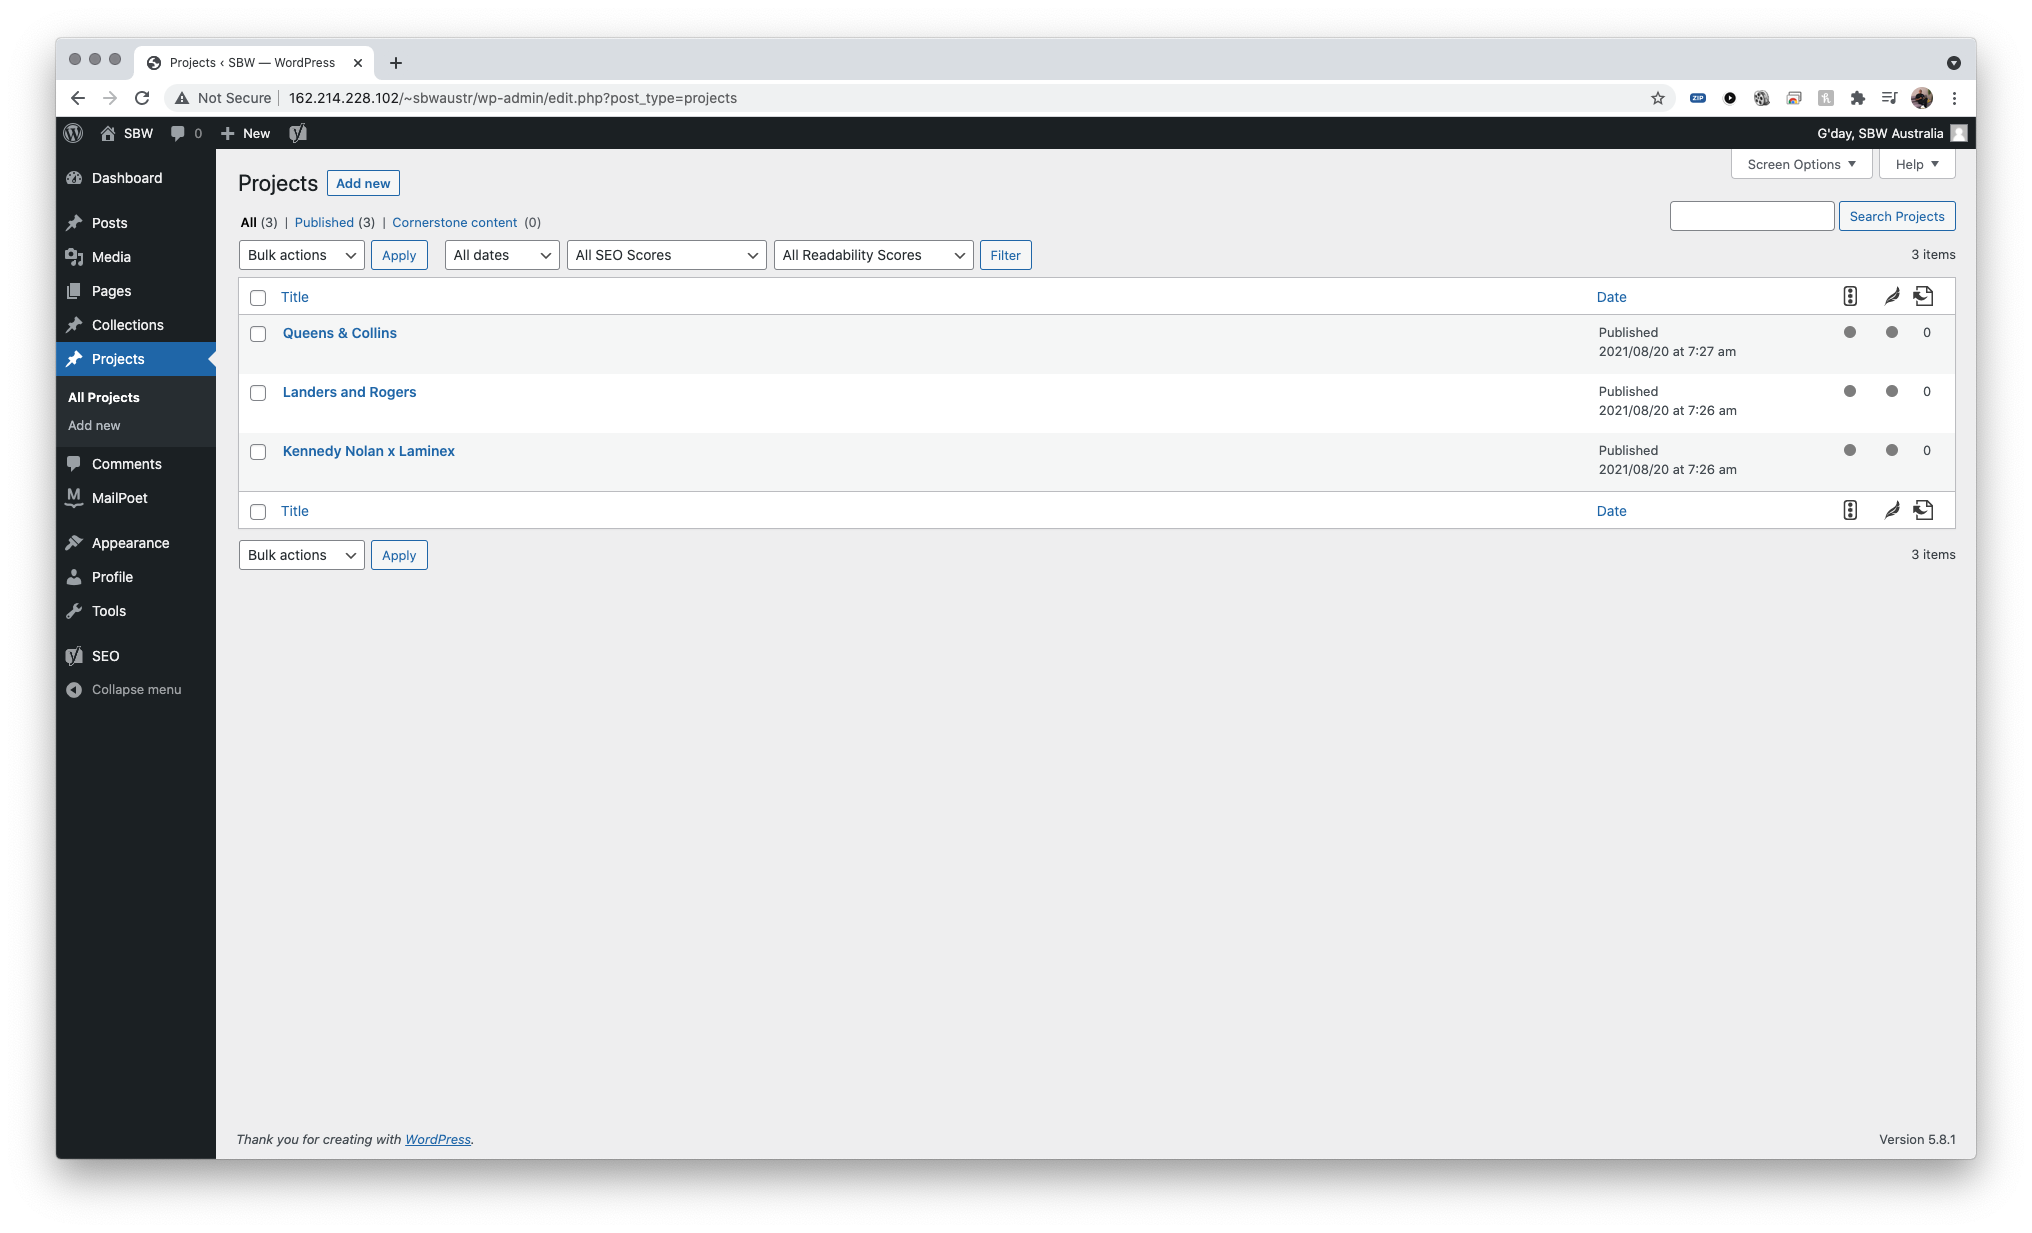


Navigate to Projects > All Projects > Add New
- Enter project title – this will be displayed under the image in the all projects page
- enter details of the project – following current convention
- select featured products in this project, by clicking on the item on the left column
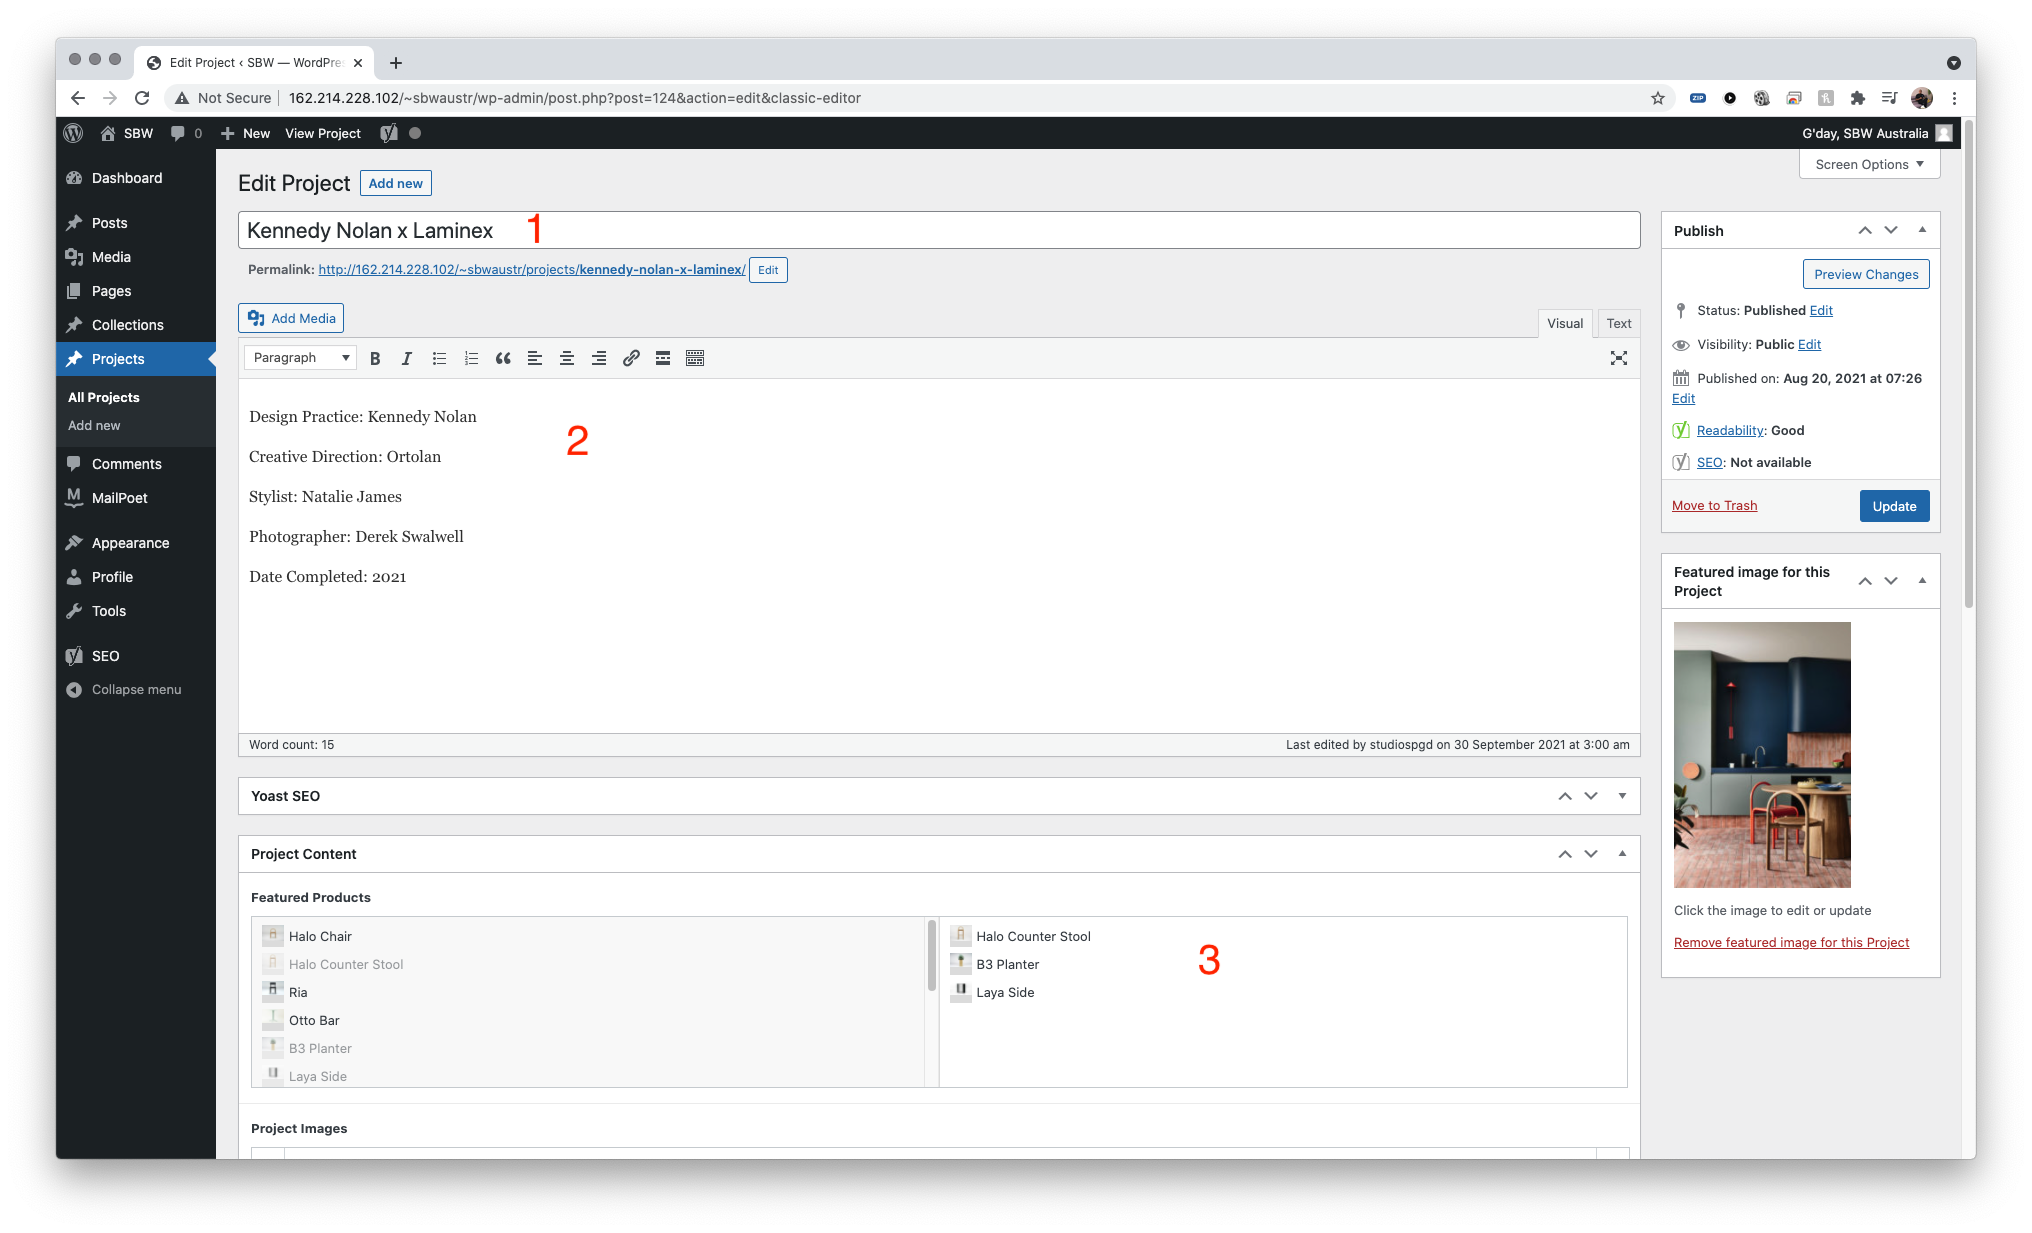
- scroll to the images section, click on blue Add Images button to add a row
- click on Add Image button inside this row, a pop up should appear
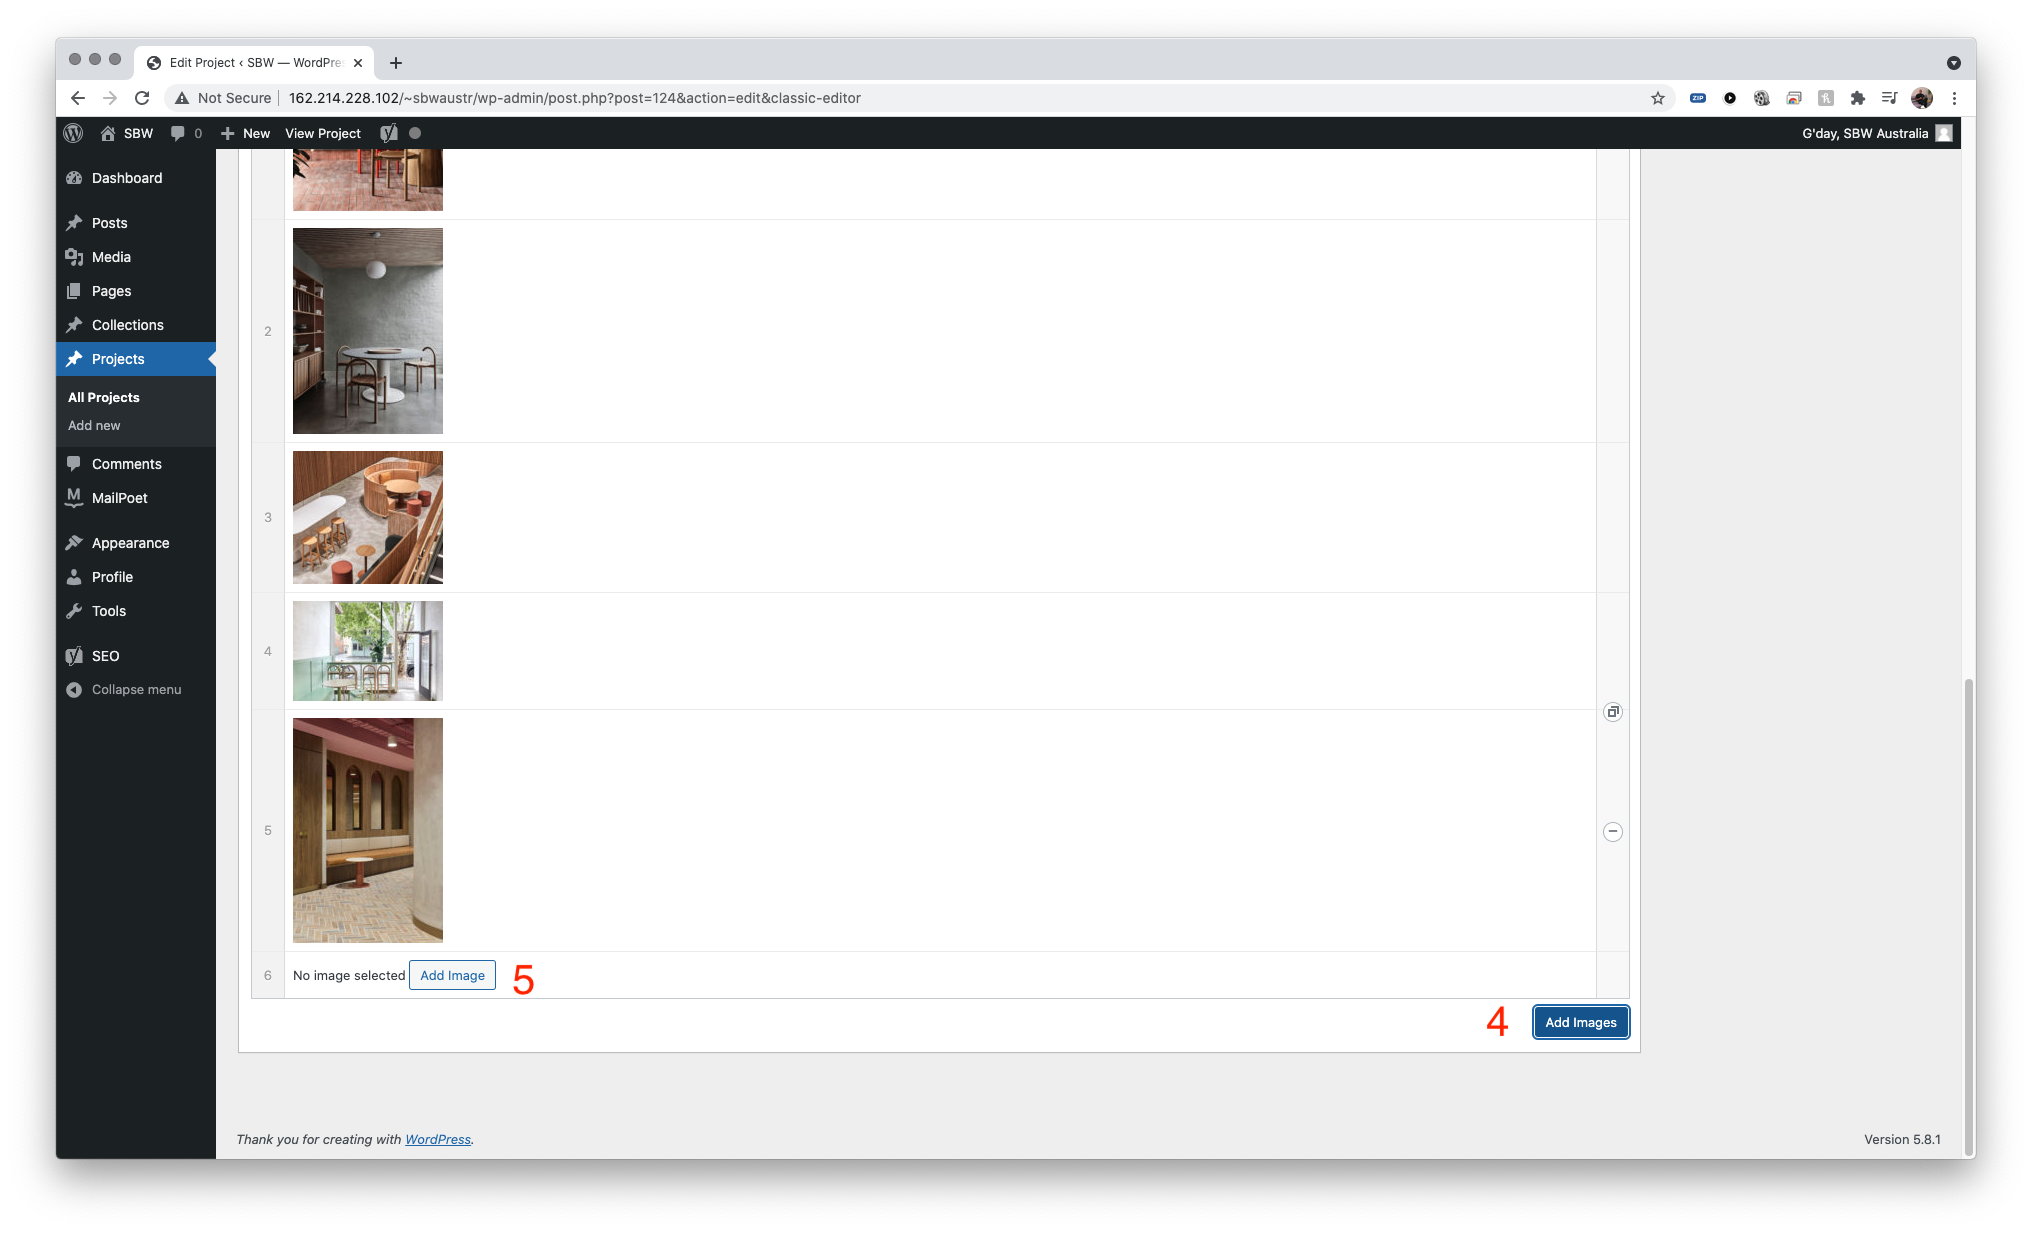
- select images you want to be displayed, ensure there are tick on the right hand side top corner
- click select to insert these images – they should all display in multiple rows
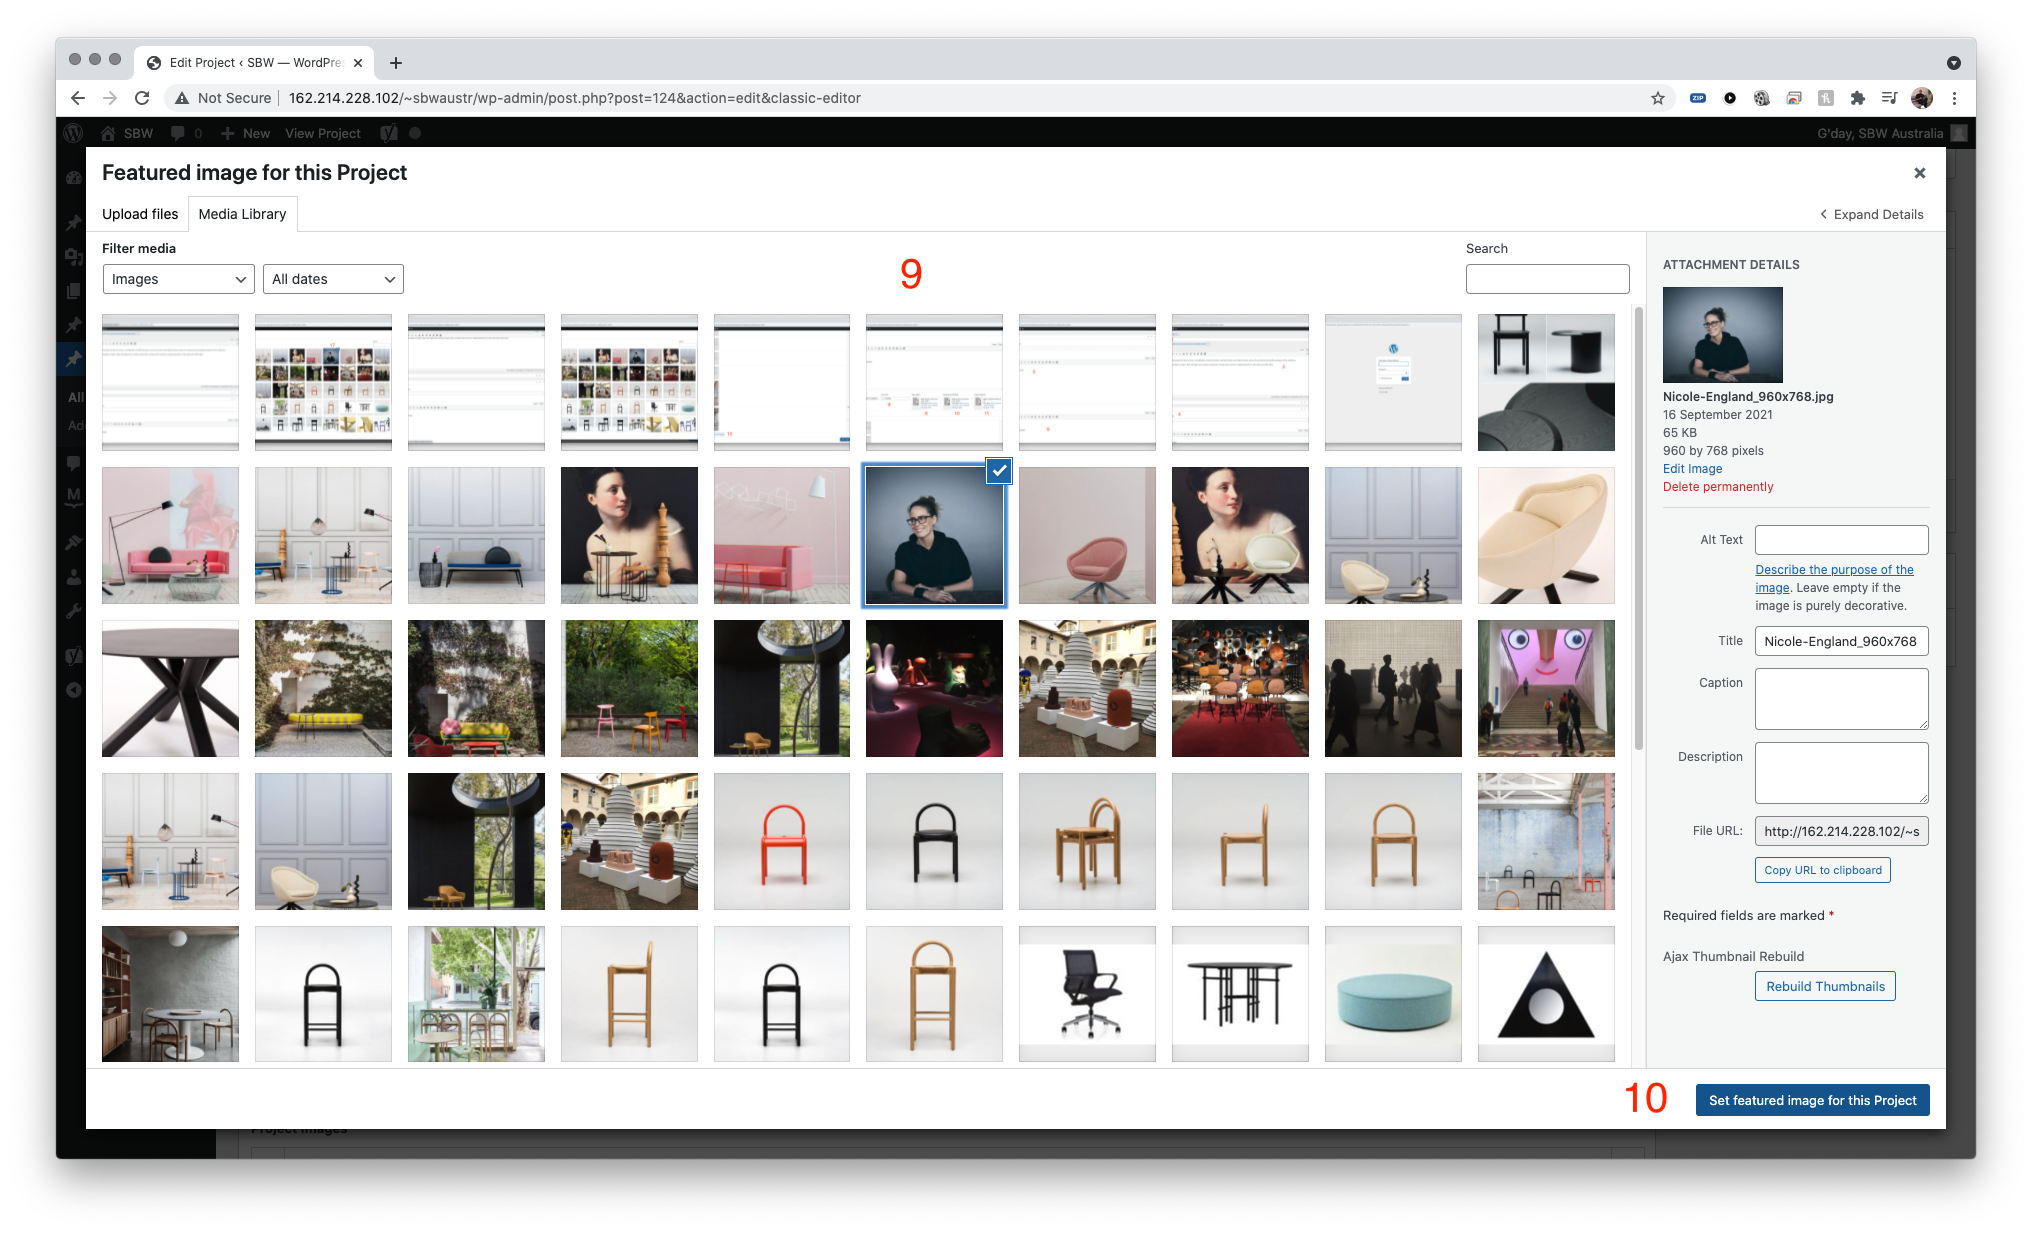
- scroll up to Featured Image for this project, click on set featured image
- a pop up will be displayed, select the image you want to use. ensure there is a tick on top right hand corner
- click set featured image for this project
- once done, scroll up and click Publish (for new project) or Update (when updating existing project)
Single Journal Post (Internal) - How to add new journal post

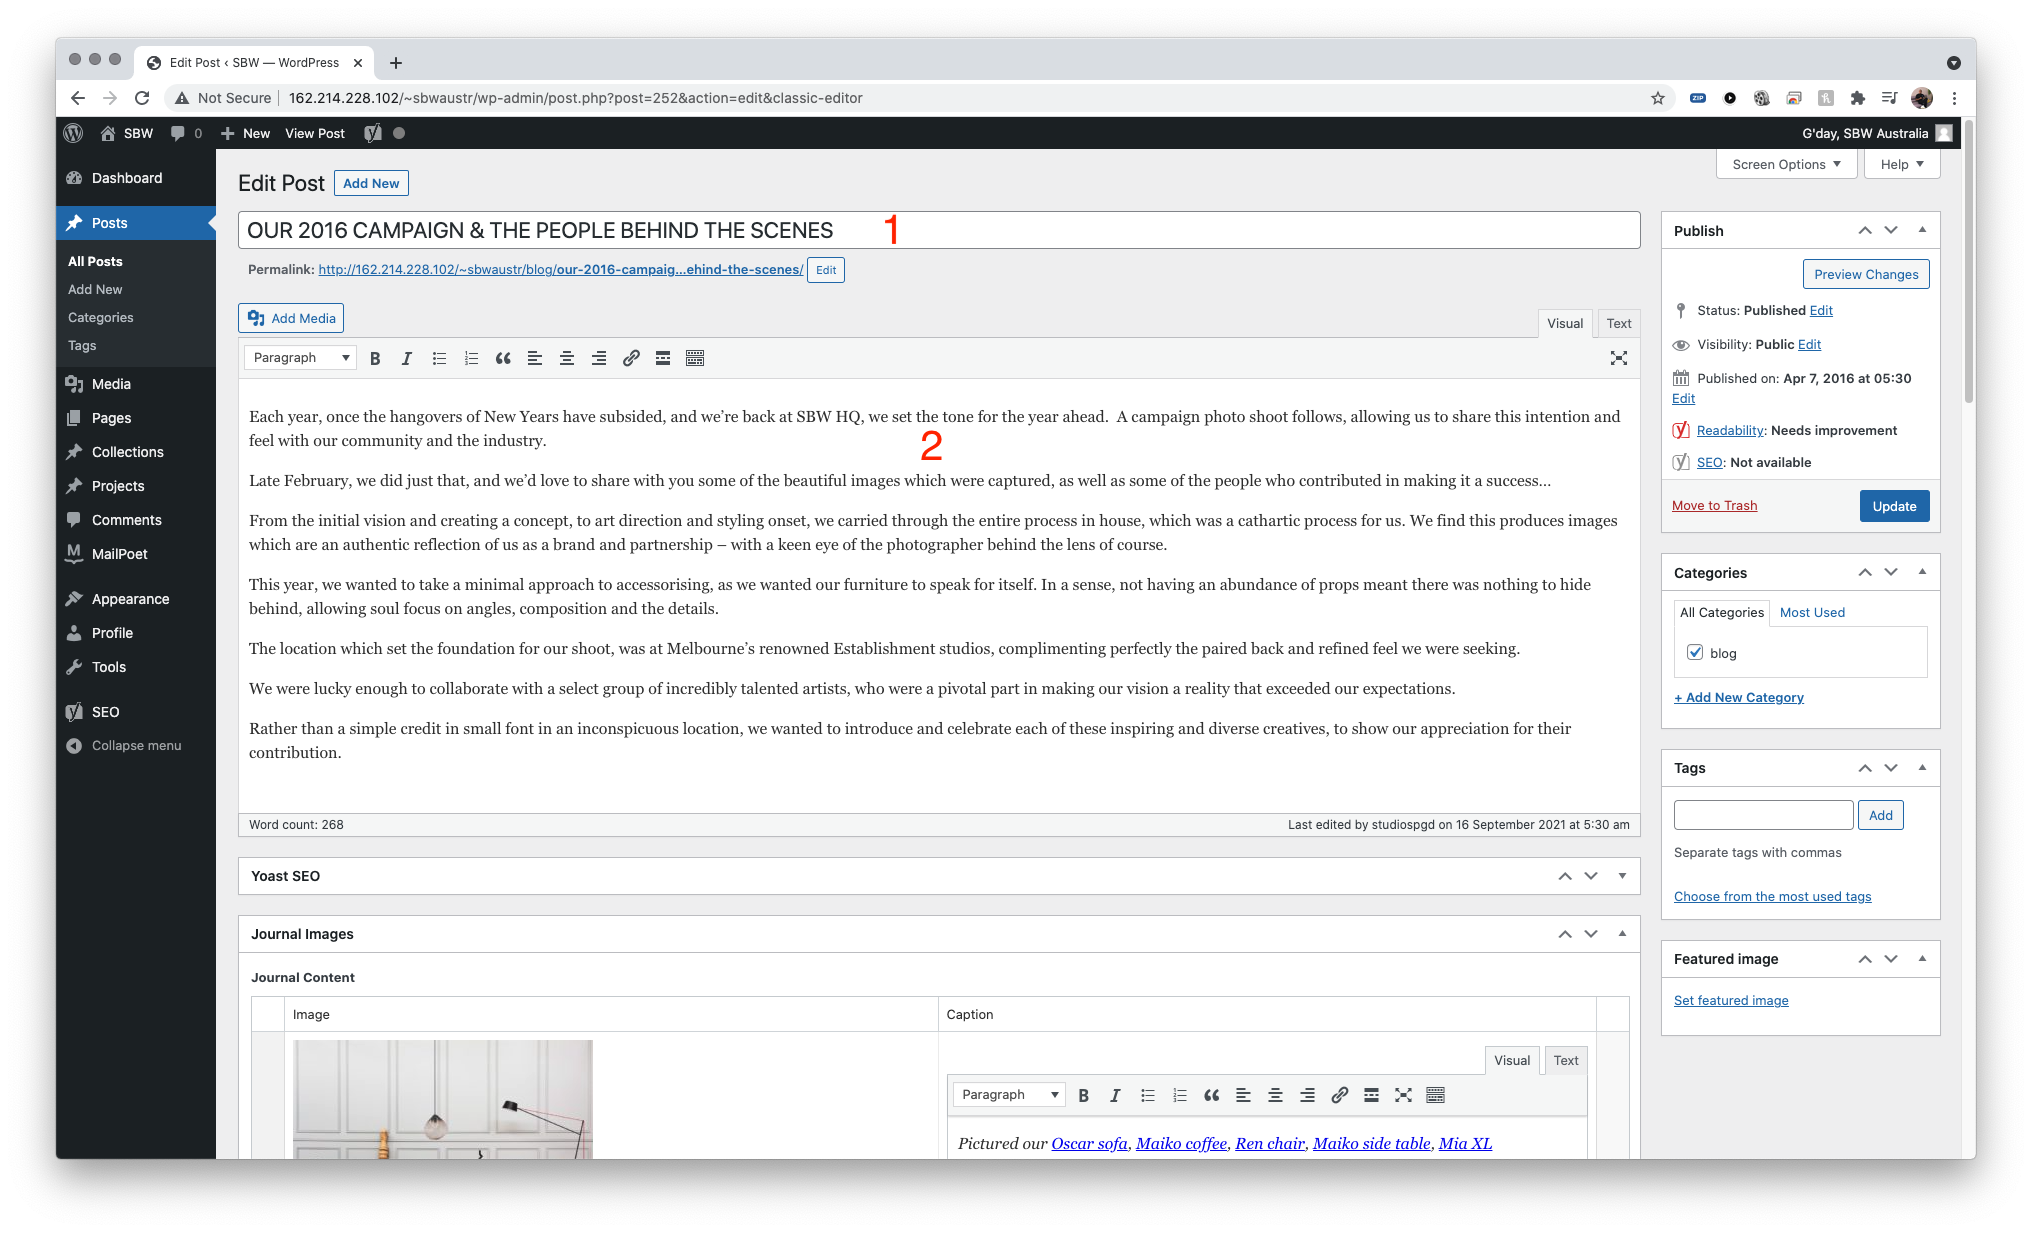
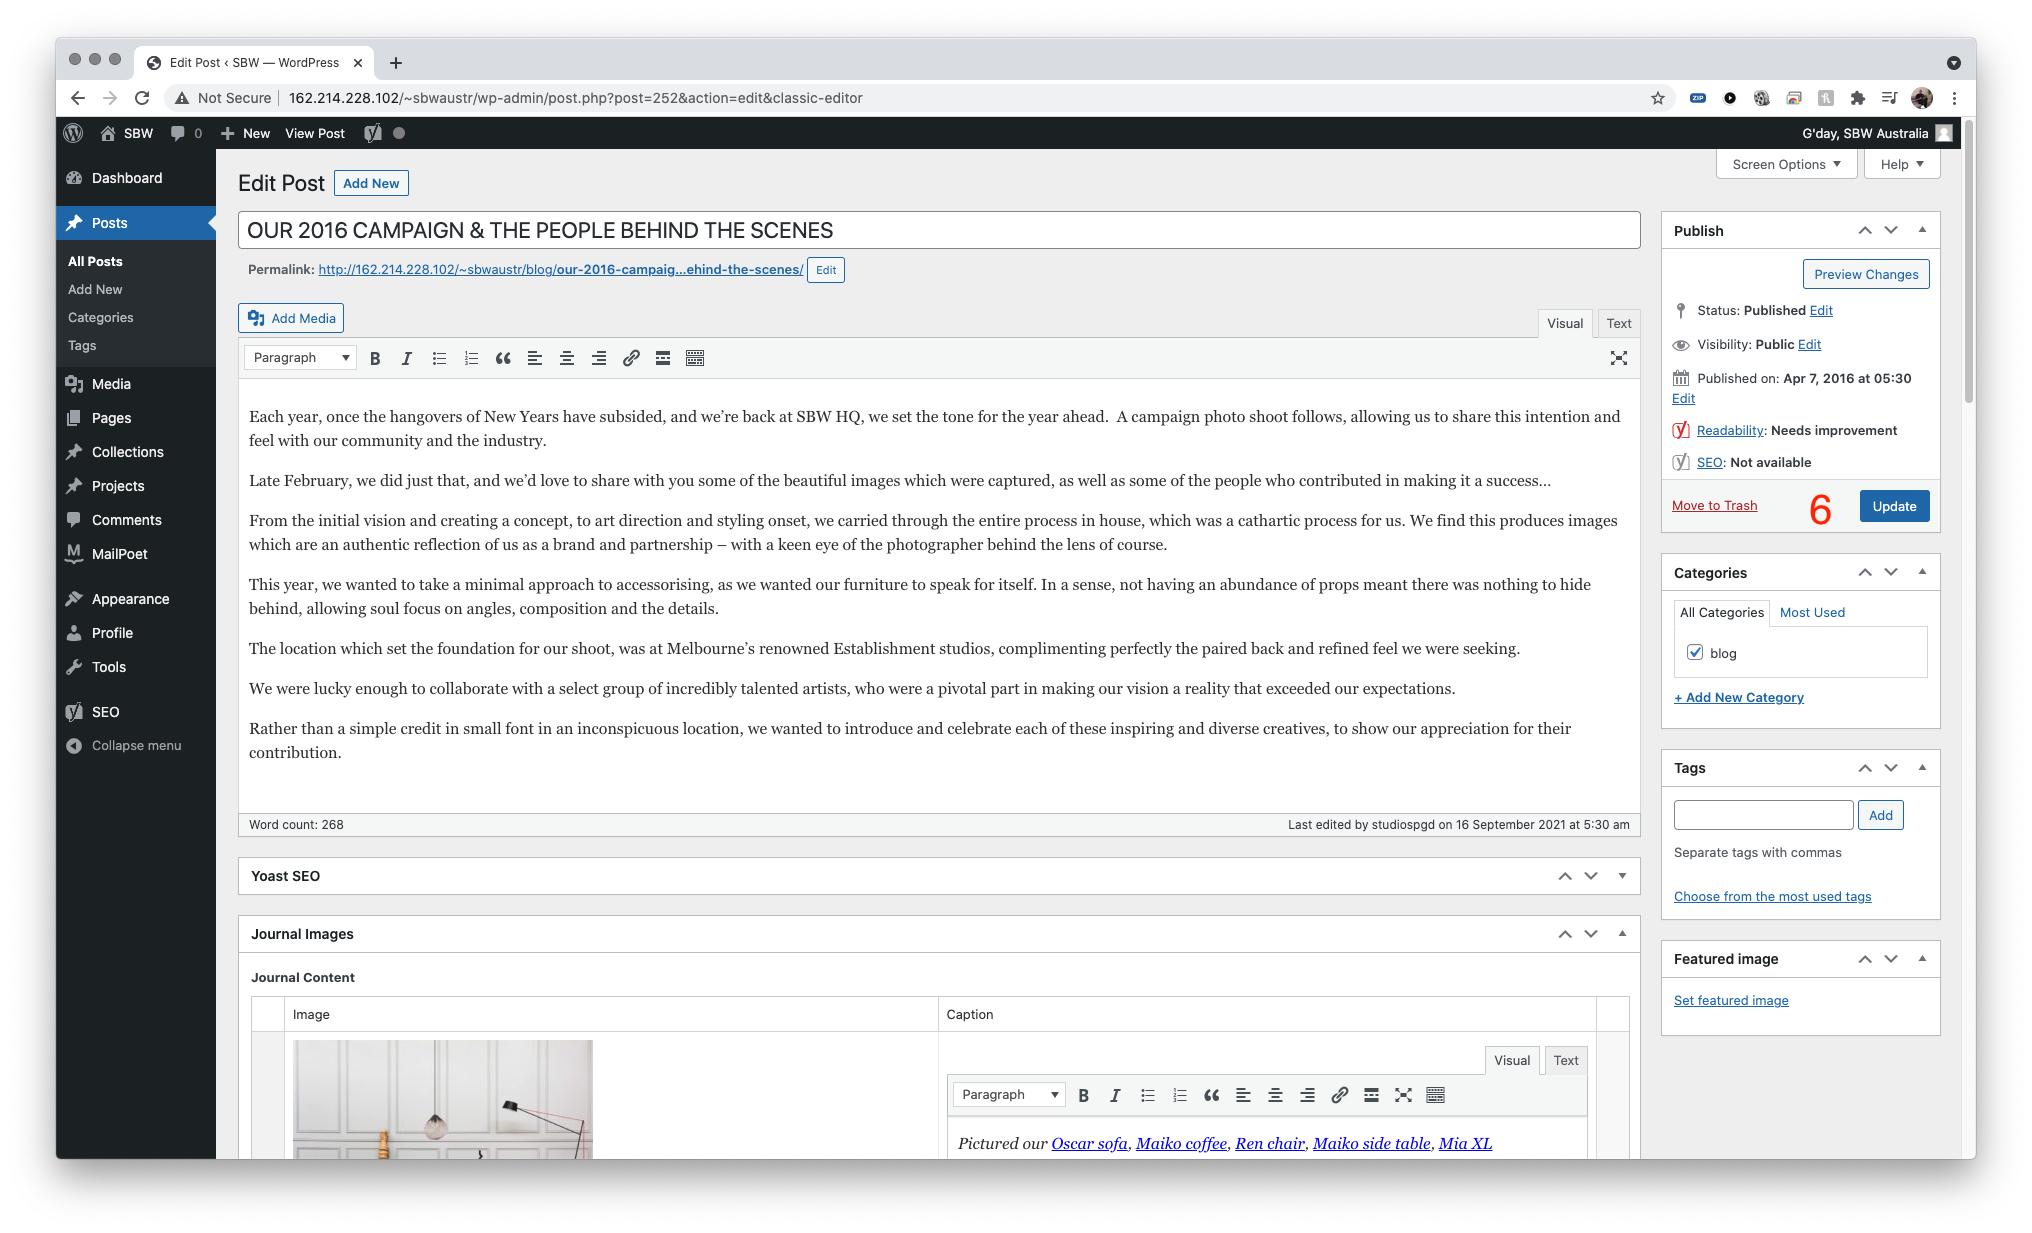
Navigate to Posts > All Posts > Add New
- Enter the journal title – this will be displayed under the image on Journals page
- enter a description of the journal post
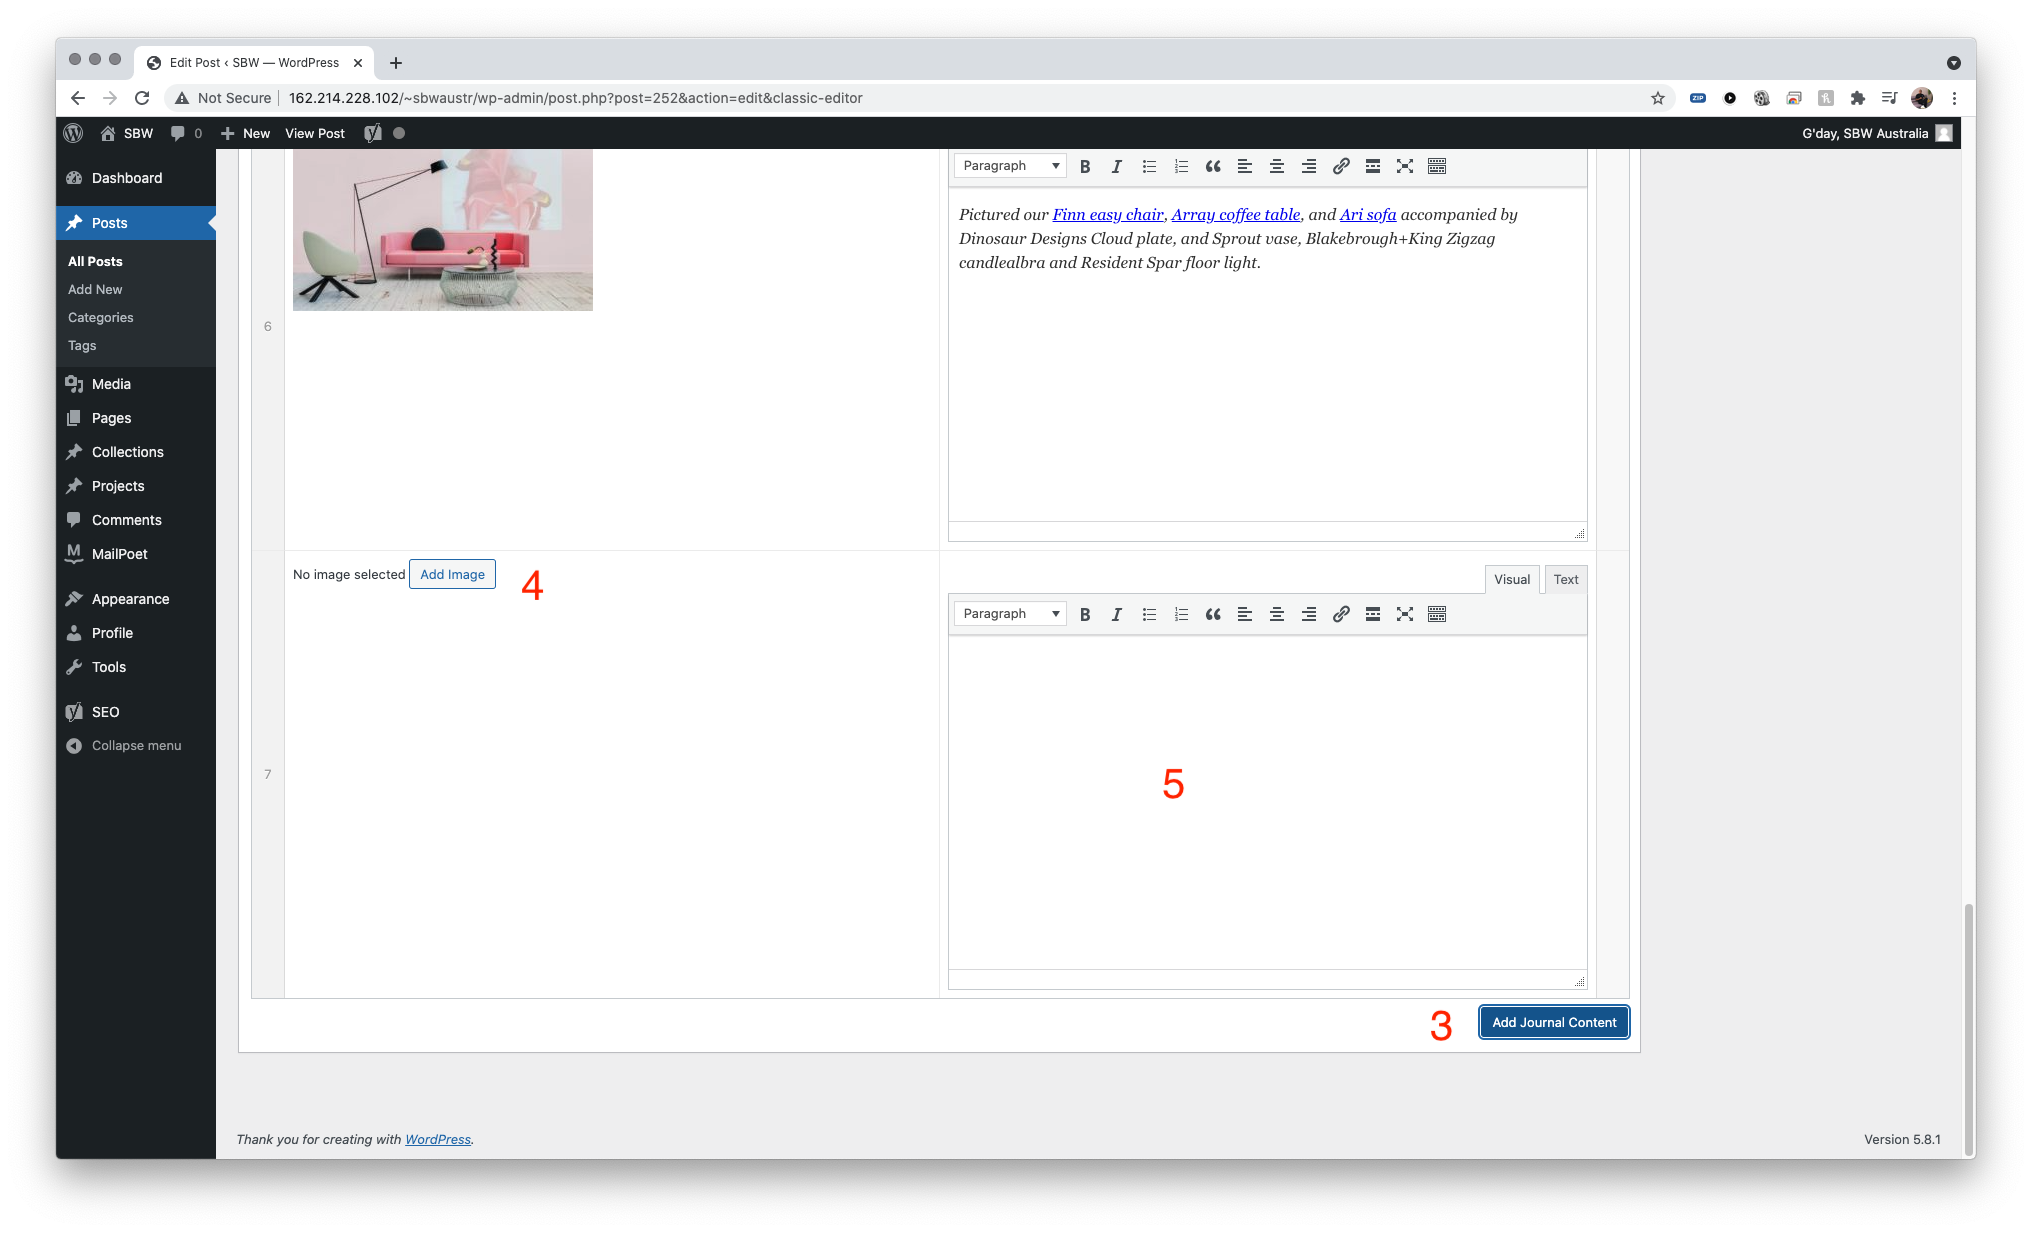
- scroll down to the content section. click on ADD JOURNAL CONTENT to add a new row
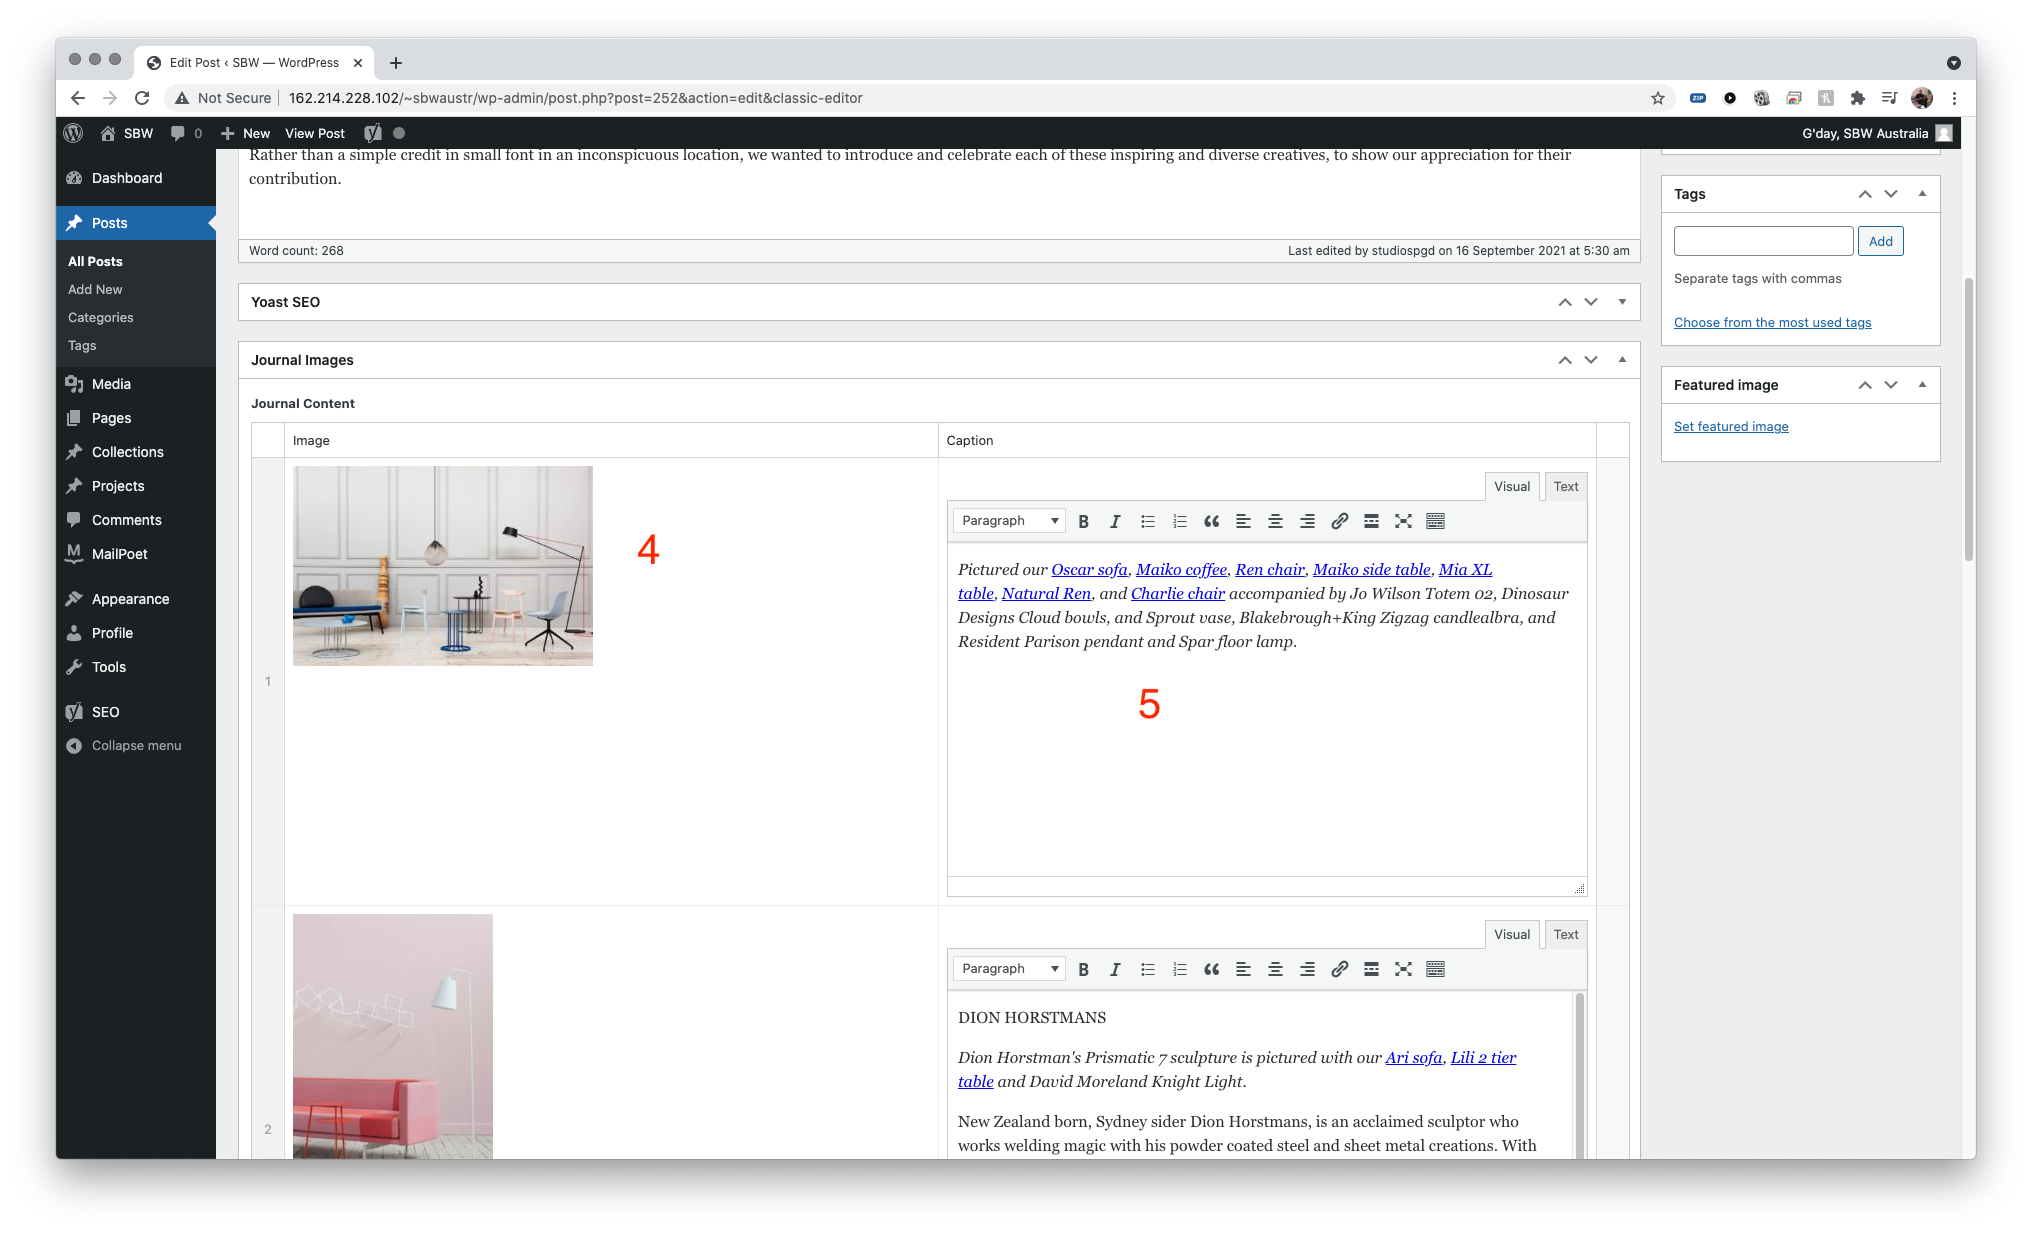
- add Image on this row – a pop up will appear that will allow you to select an image, ensure theres a tick on the selected image. click Select to insert image (example shown)
- enter caption of selected image – if no caption entered it will not display anything (example shown)
- Once done click Publish (for new content) or Update (when updating existing content)
*Not necessary to choose category as it will set to blog as default.
Journal Page - displaying new journal entry

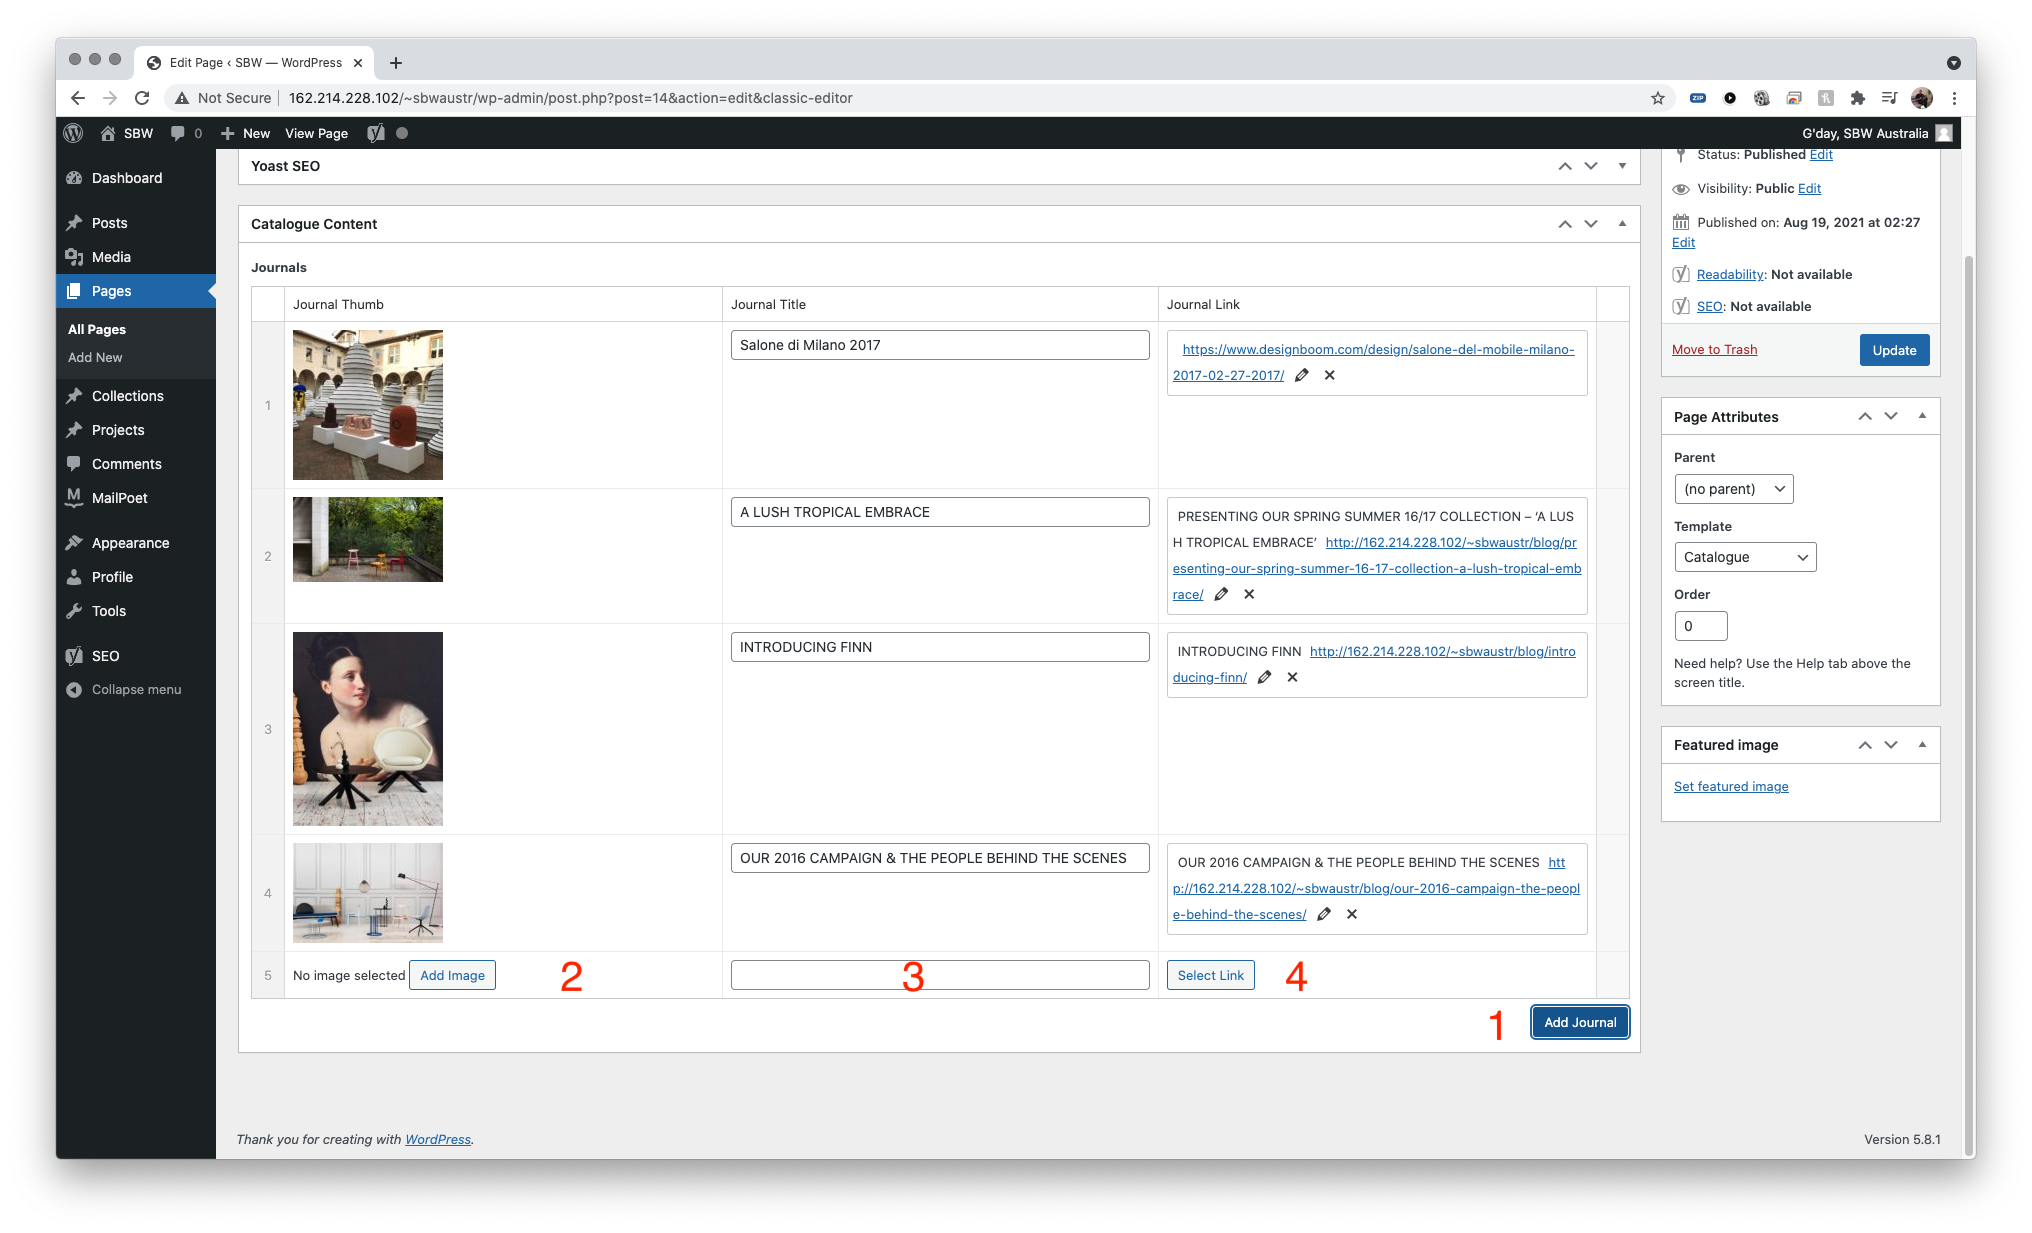
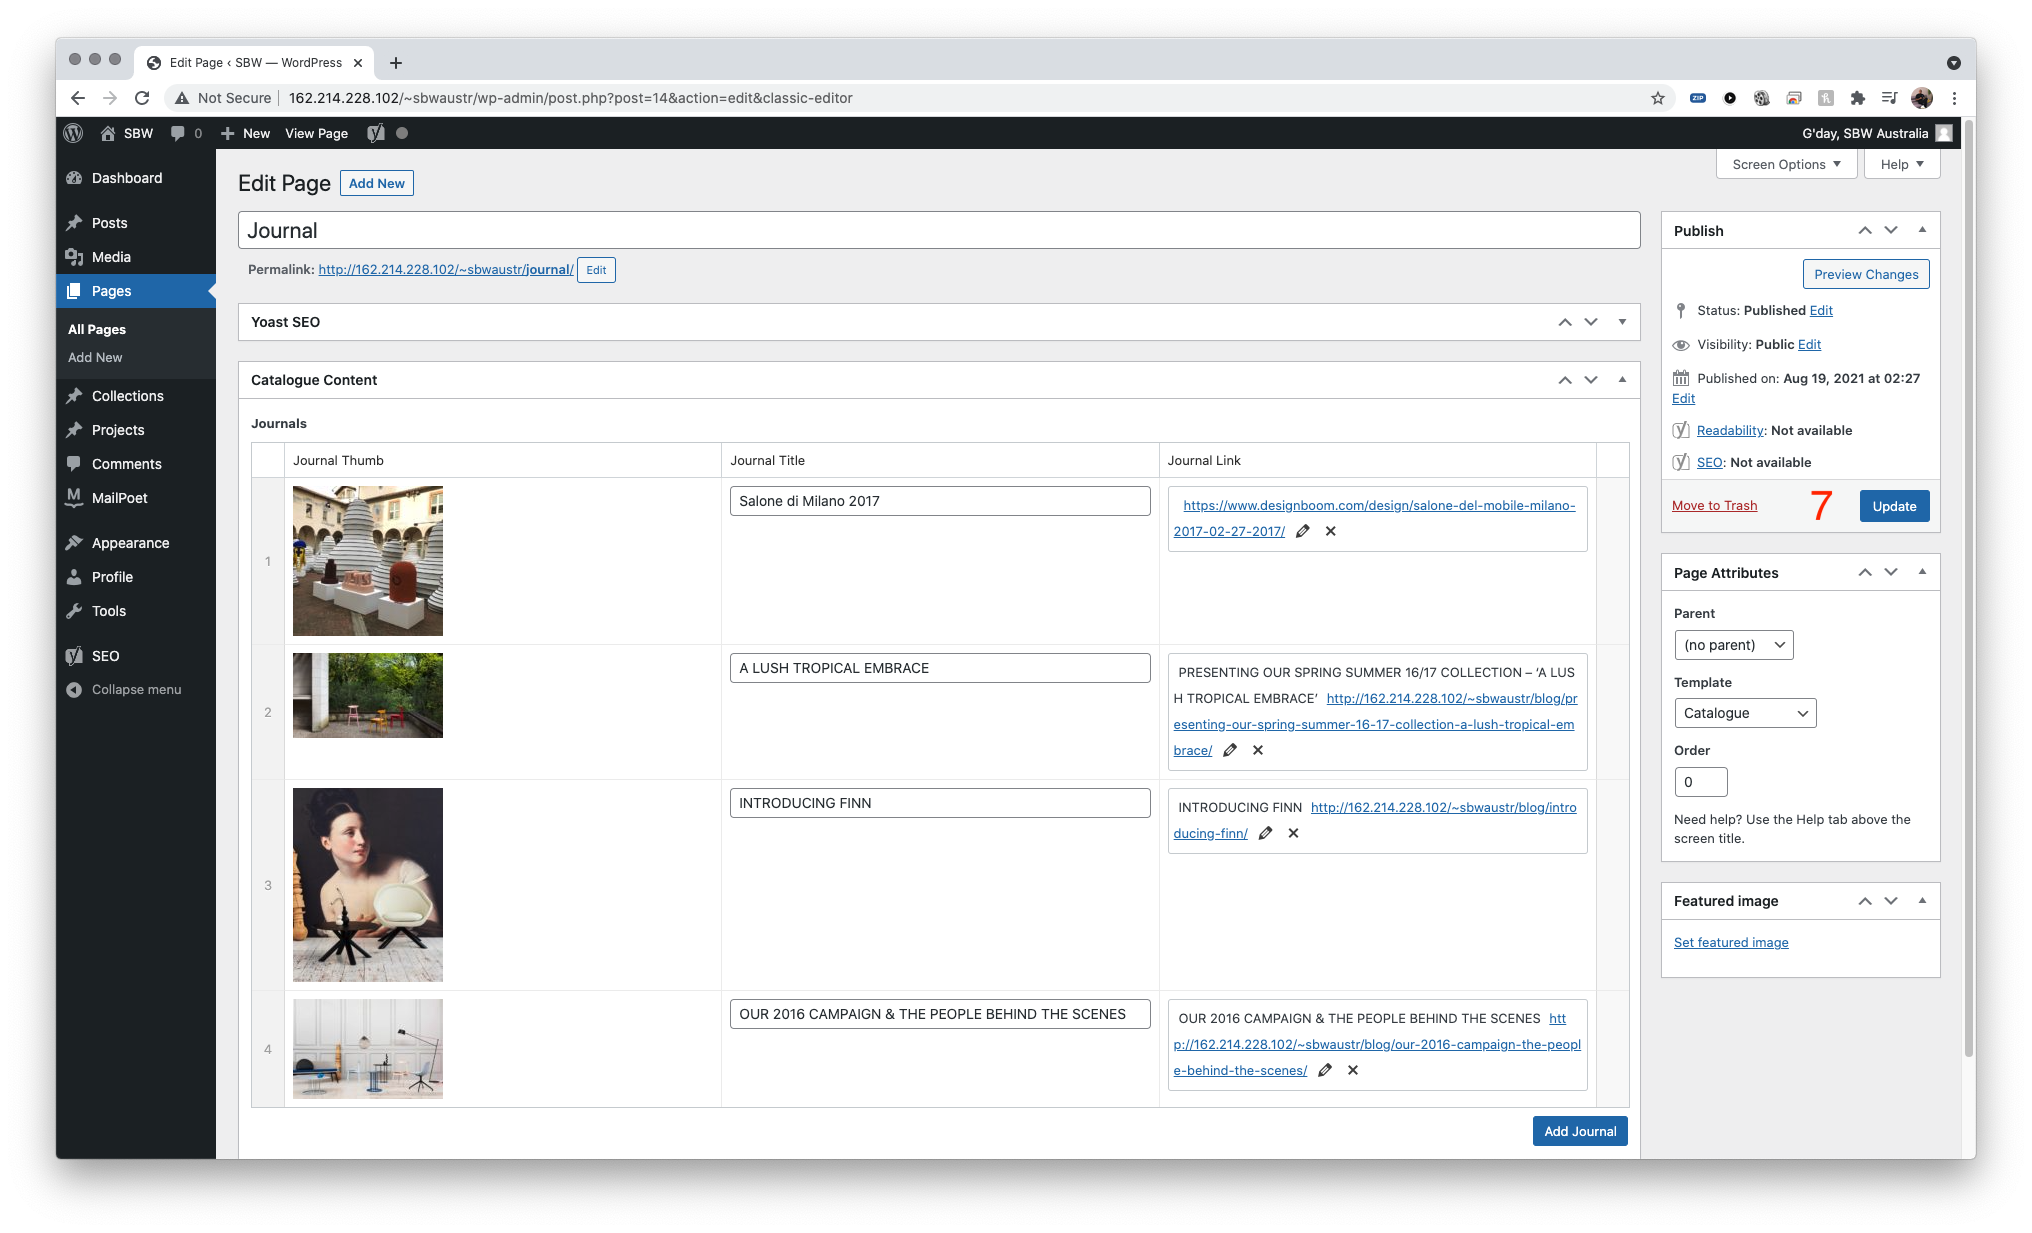
This is the page where all journals are displayed.
Navigate to Pages > All Pages > Journal
- Click on the ADD JOURNAL button to add a new row of content
- click on ADD IMAGE to insert image into this row – process is the same as previous sections
- Enter caption of this journal content
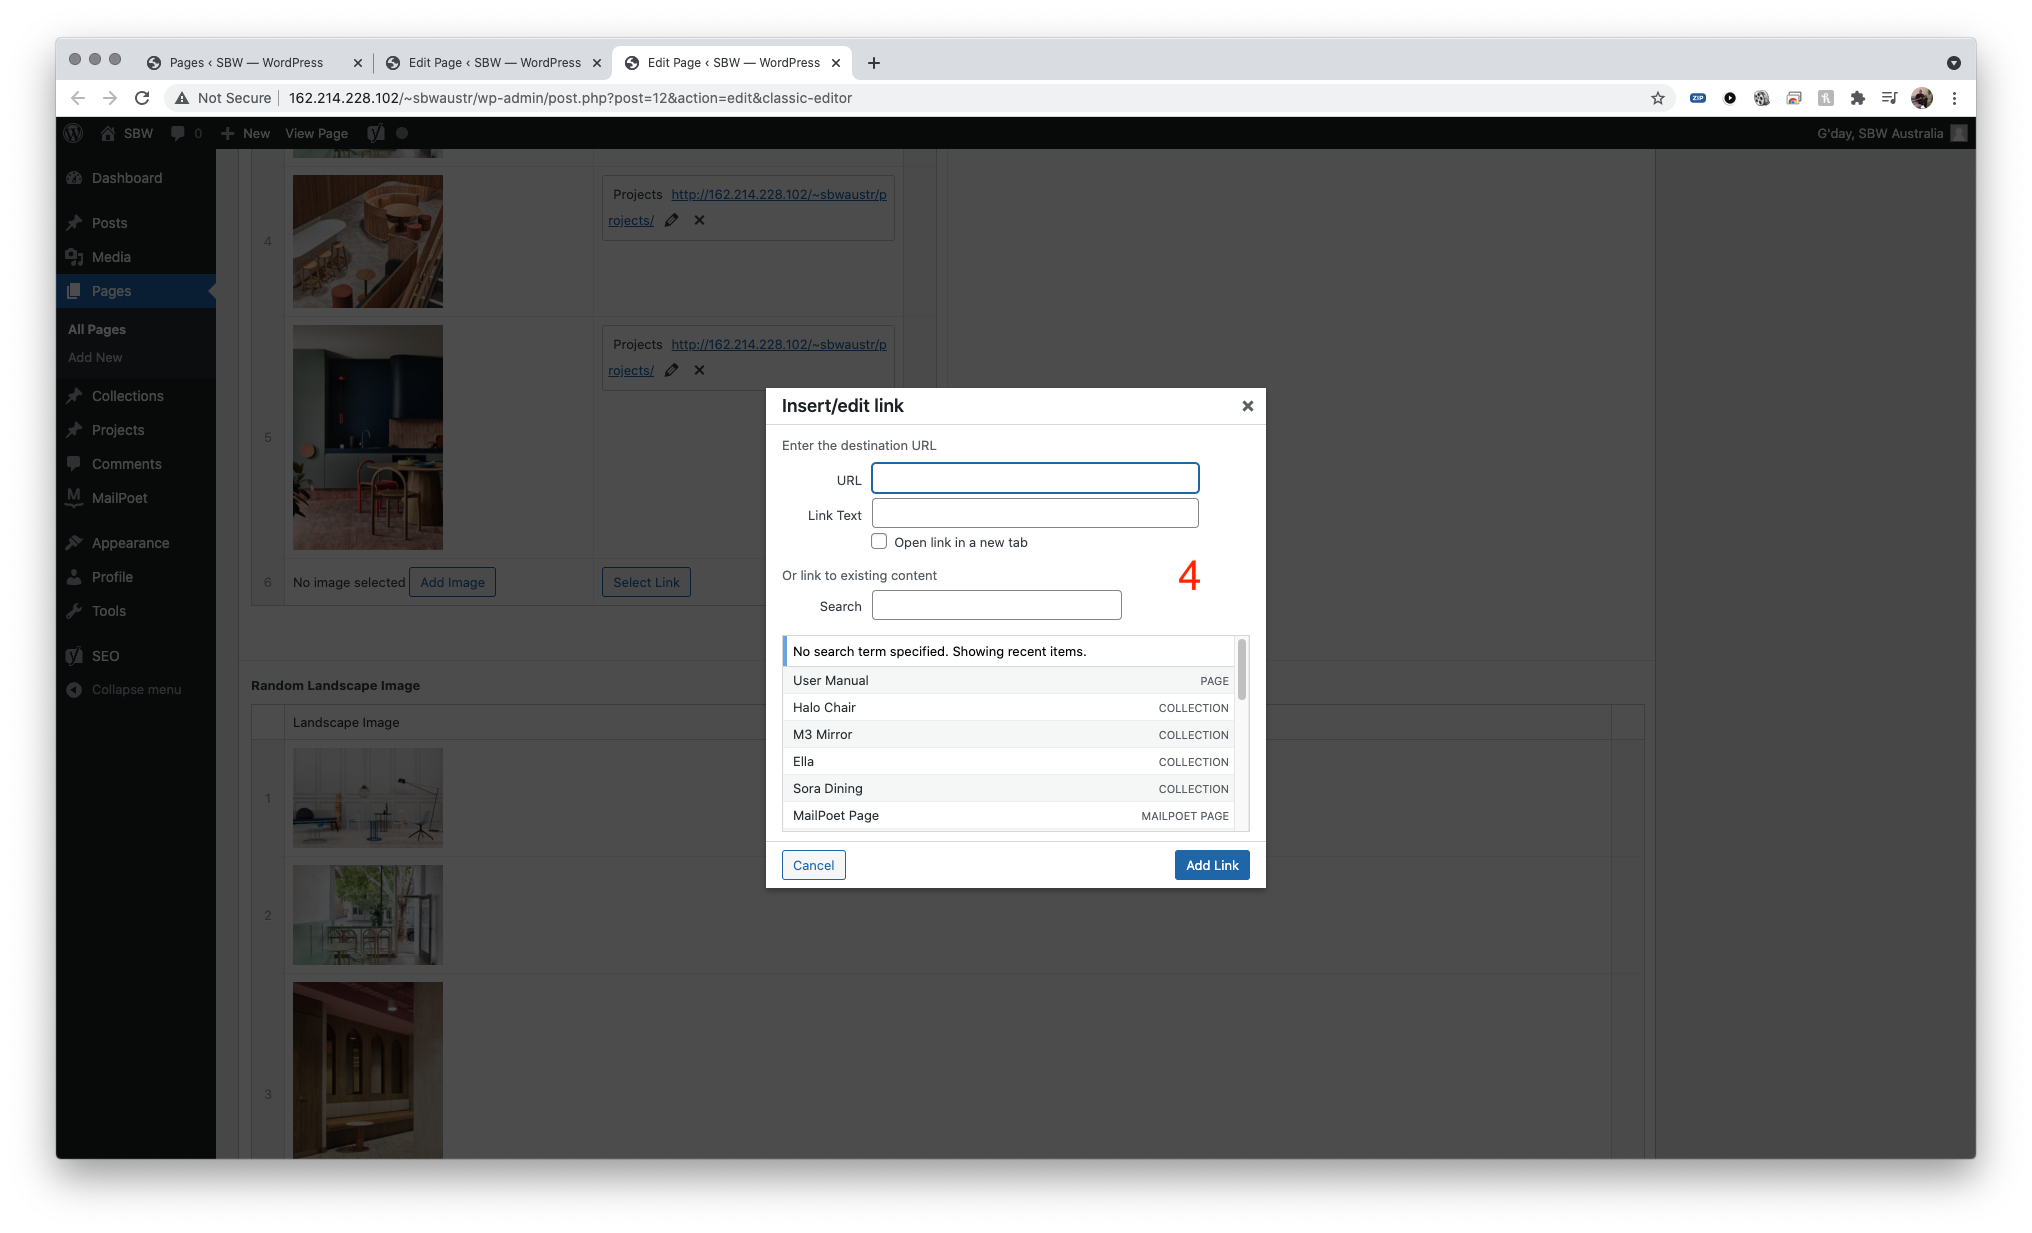
- Click on select link to add a link to this content
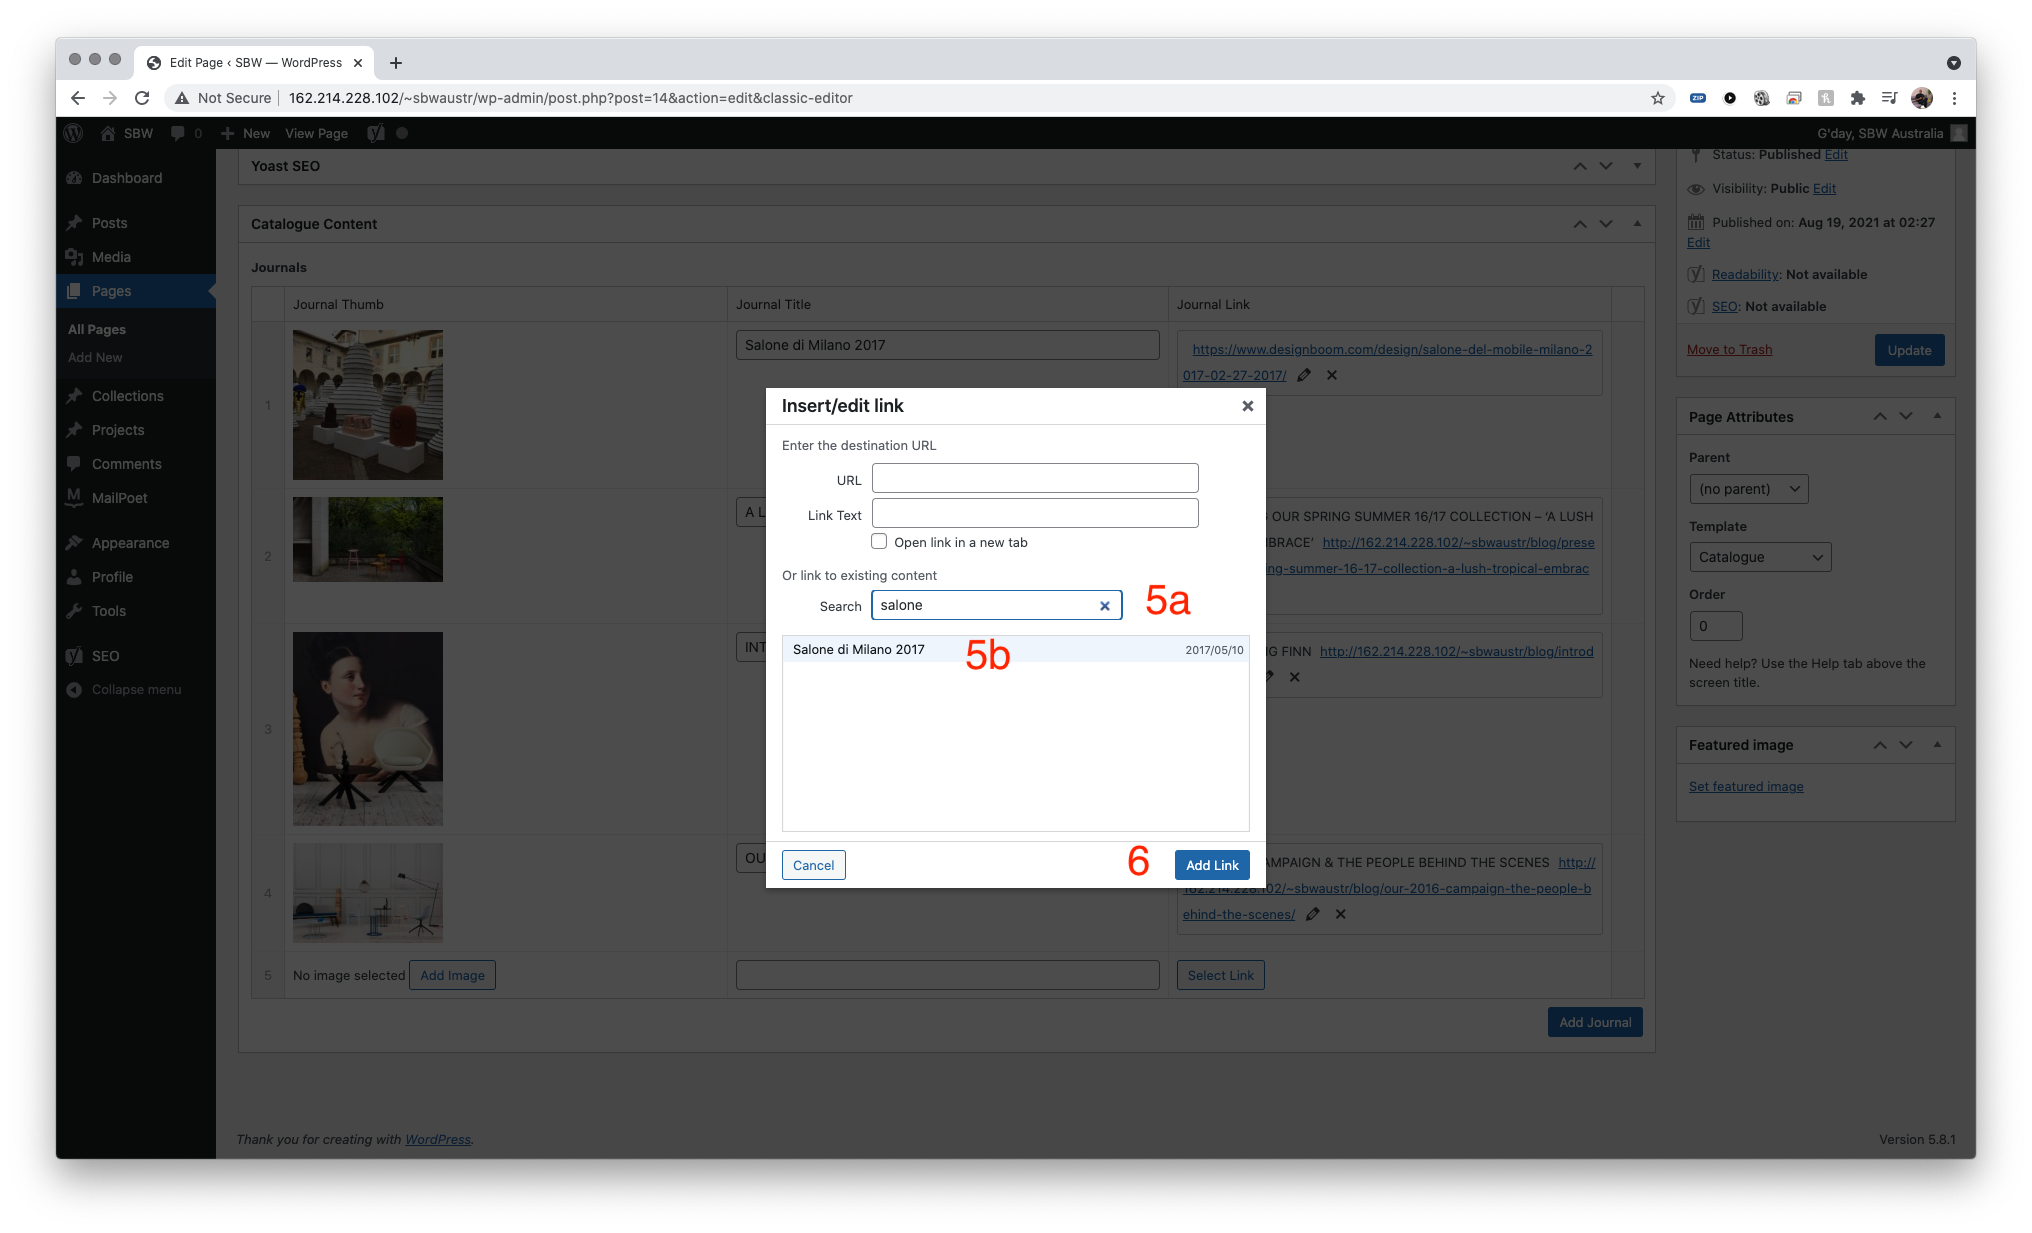
- a pop up will appear – this section has 2 different linking method
- 5a – existing content e.g internal journal. type in the journal title in the search box
- 5b – click on the post to select the journal – this should have date of published next to the title
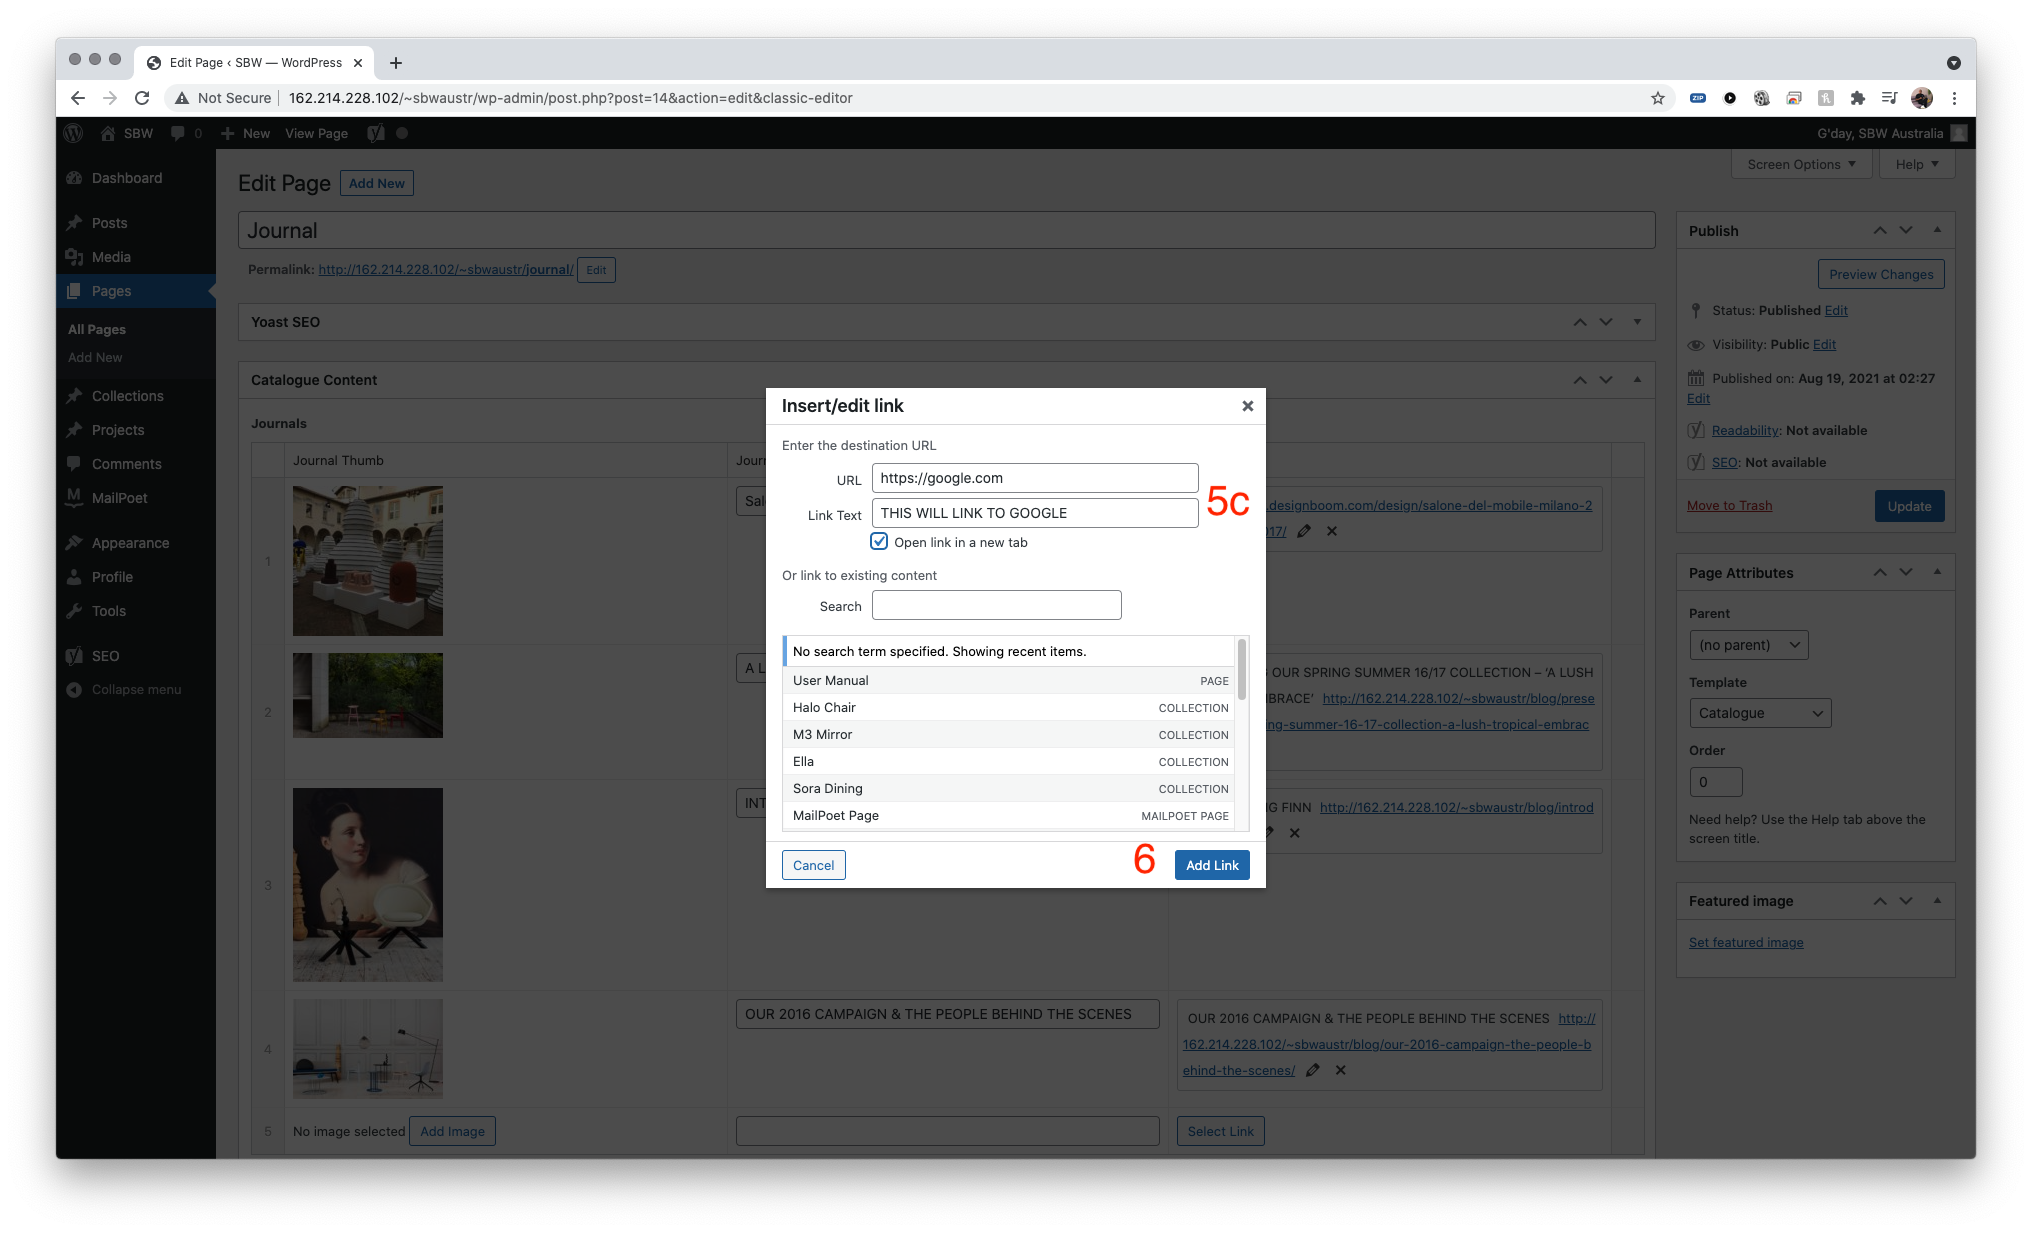
- 5c – external link. paste the URL in the URL box, and type in text. you can leave this link text blank. and ensure tick the open link in a new tab box.
- click ADD LINK to insert the link
- Click Update (as page is existed, and you just added new content so just update the page)
Projects Page - displaying new project entry

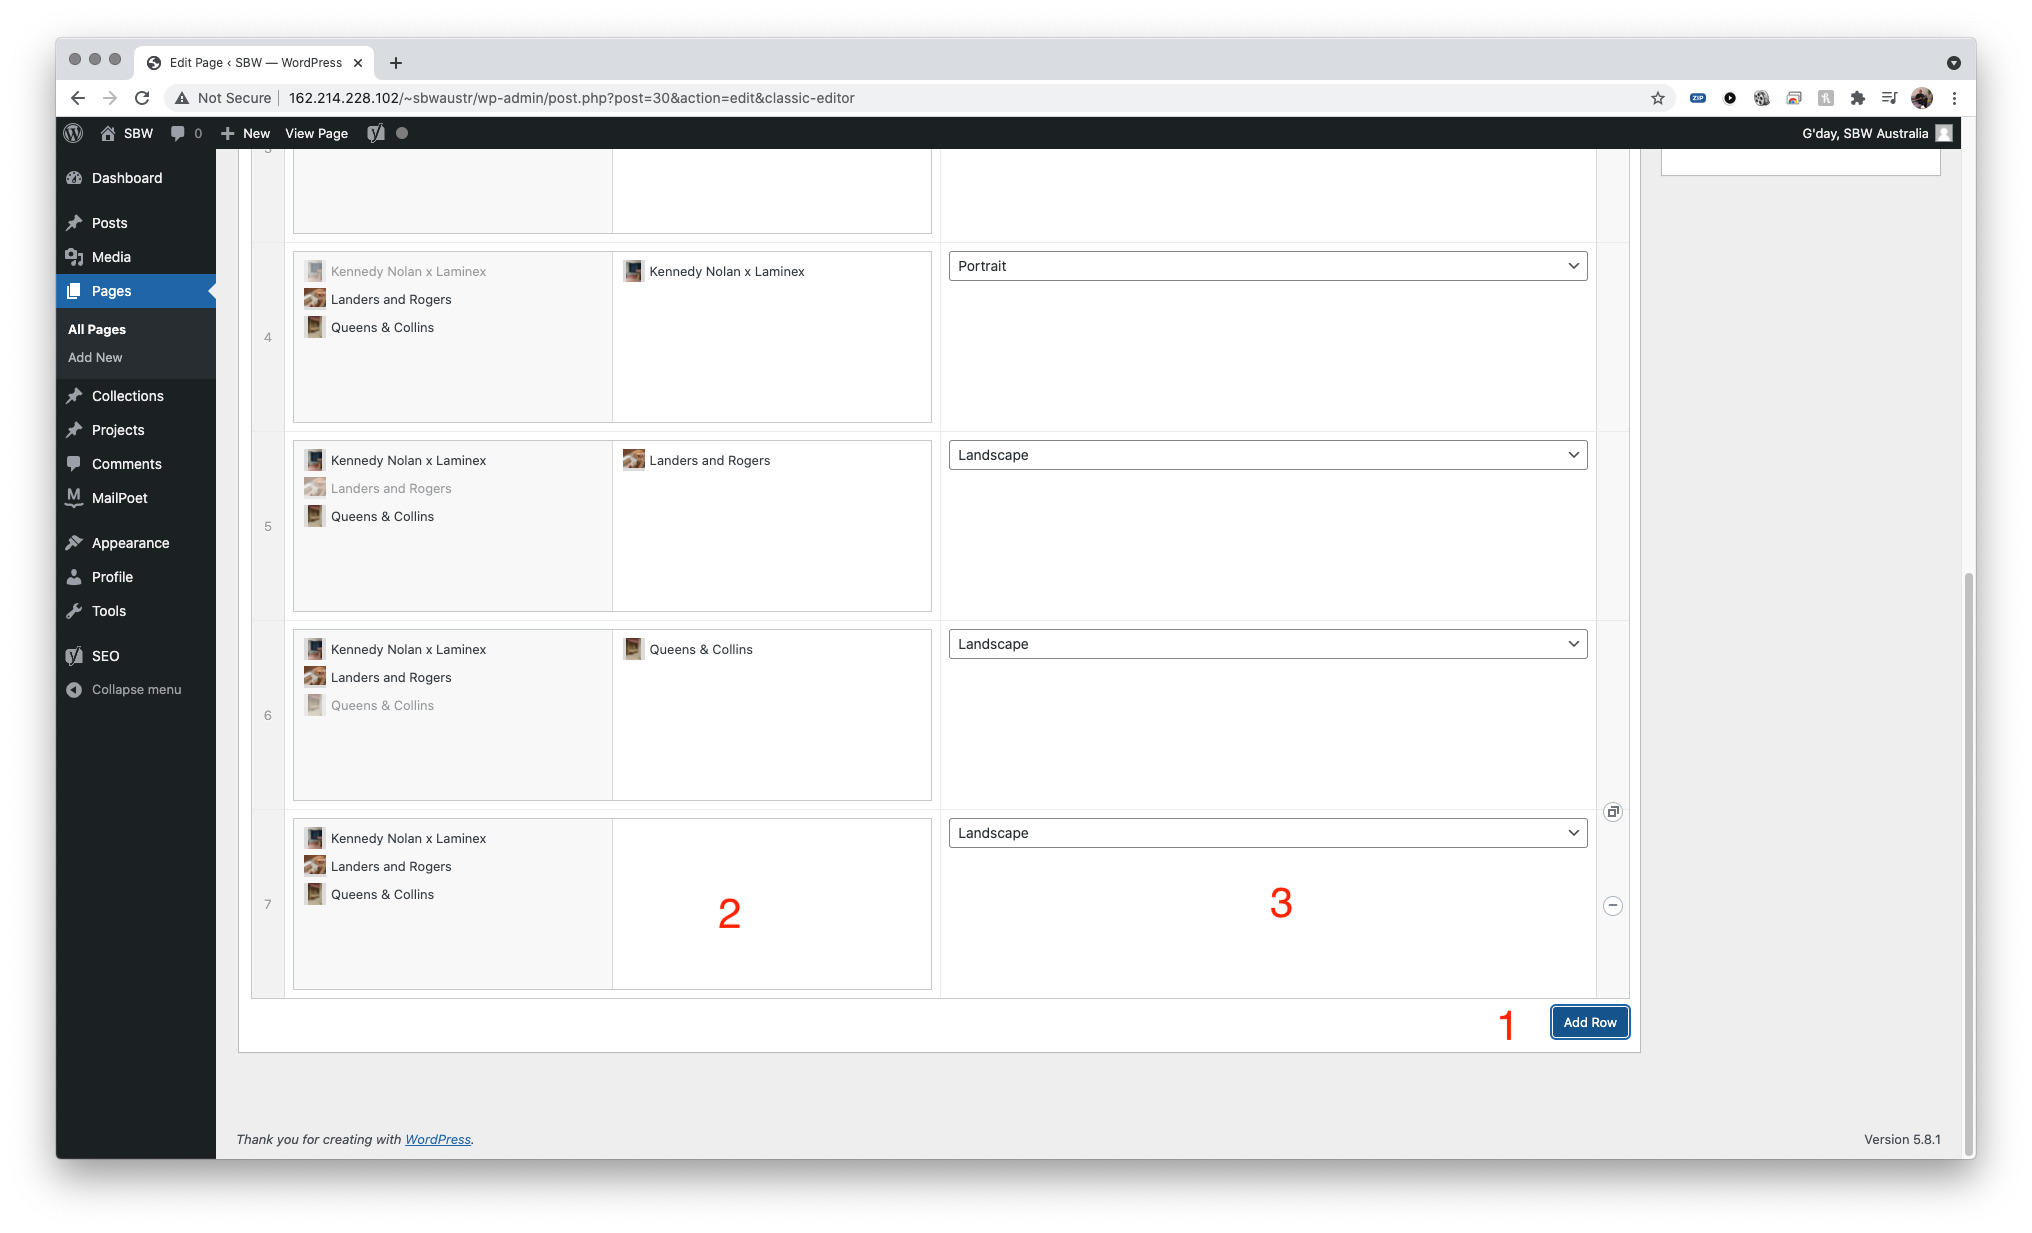
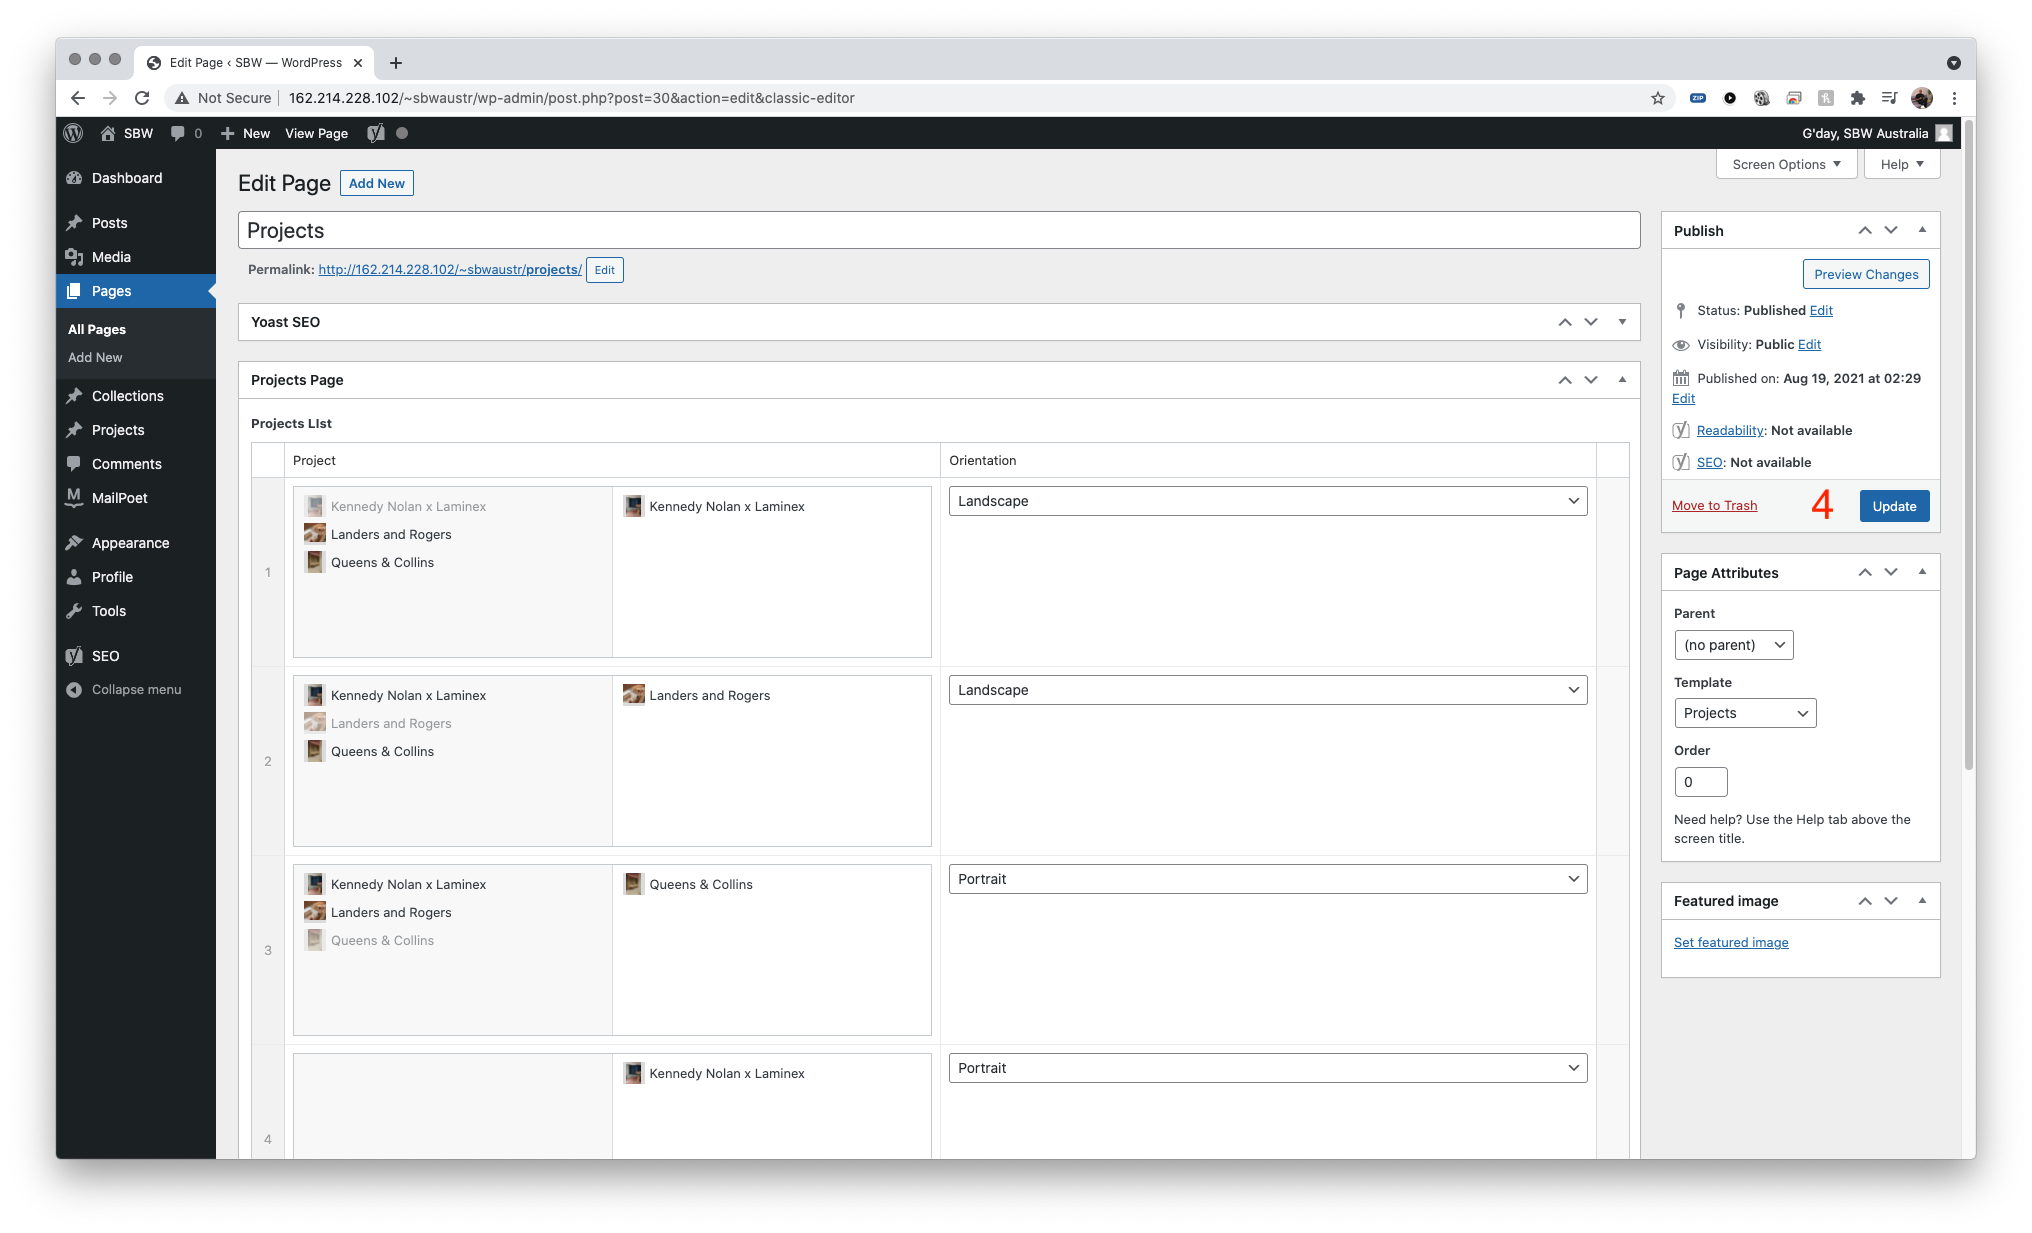
This is the page where all projects are displayed.
Navigate to Pages > All Pages > Projects
- Click on ADD ROW button to add a new row
- Select the project that will be displayed from the list – one project per row
- select the orientation: landscape or portrait – this is how the image will be displayed on the front end of the projects page
- once done, click UPDATE (since page already exists)
Home Page - Add/Edit Content
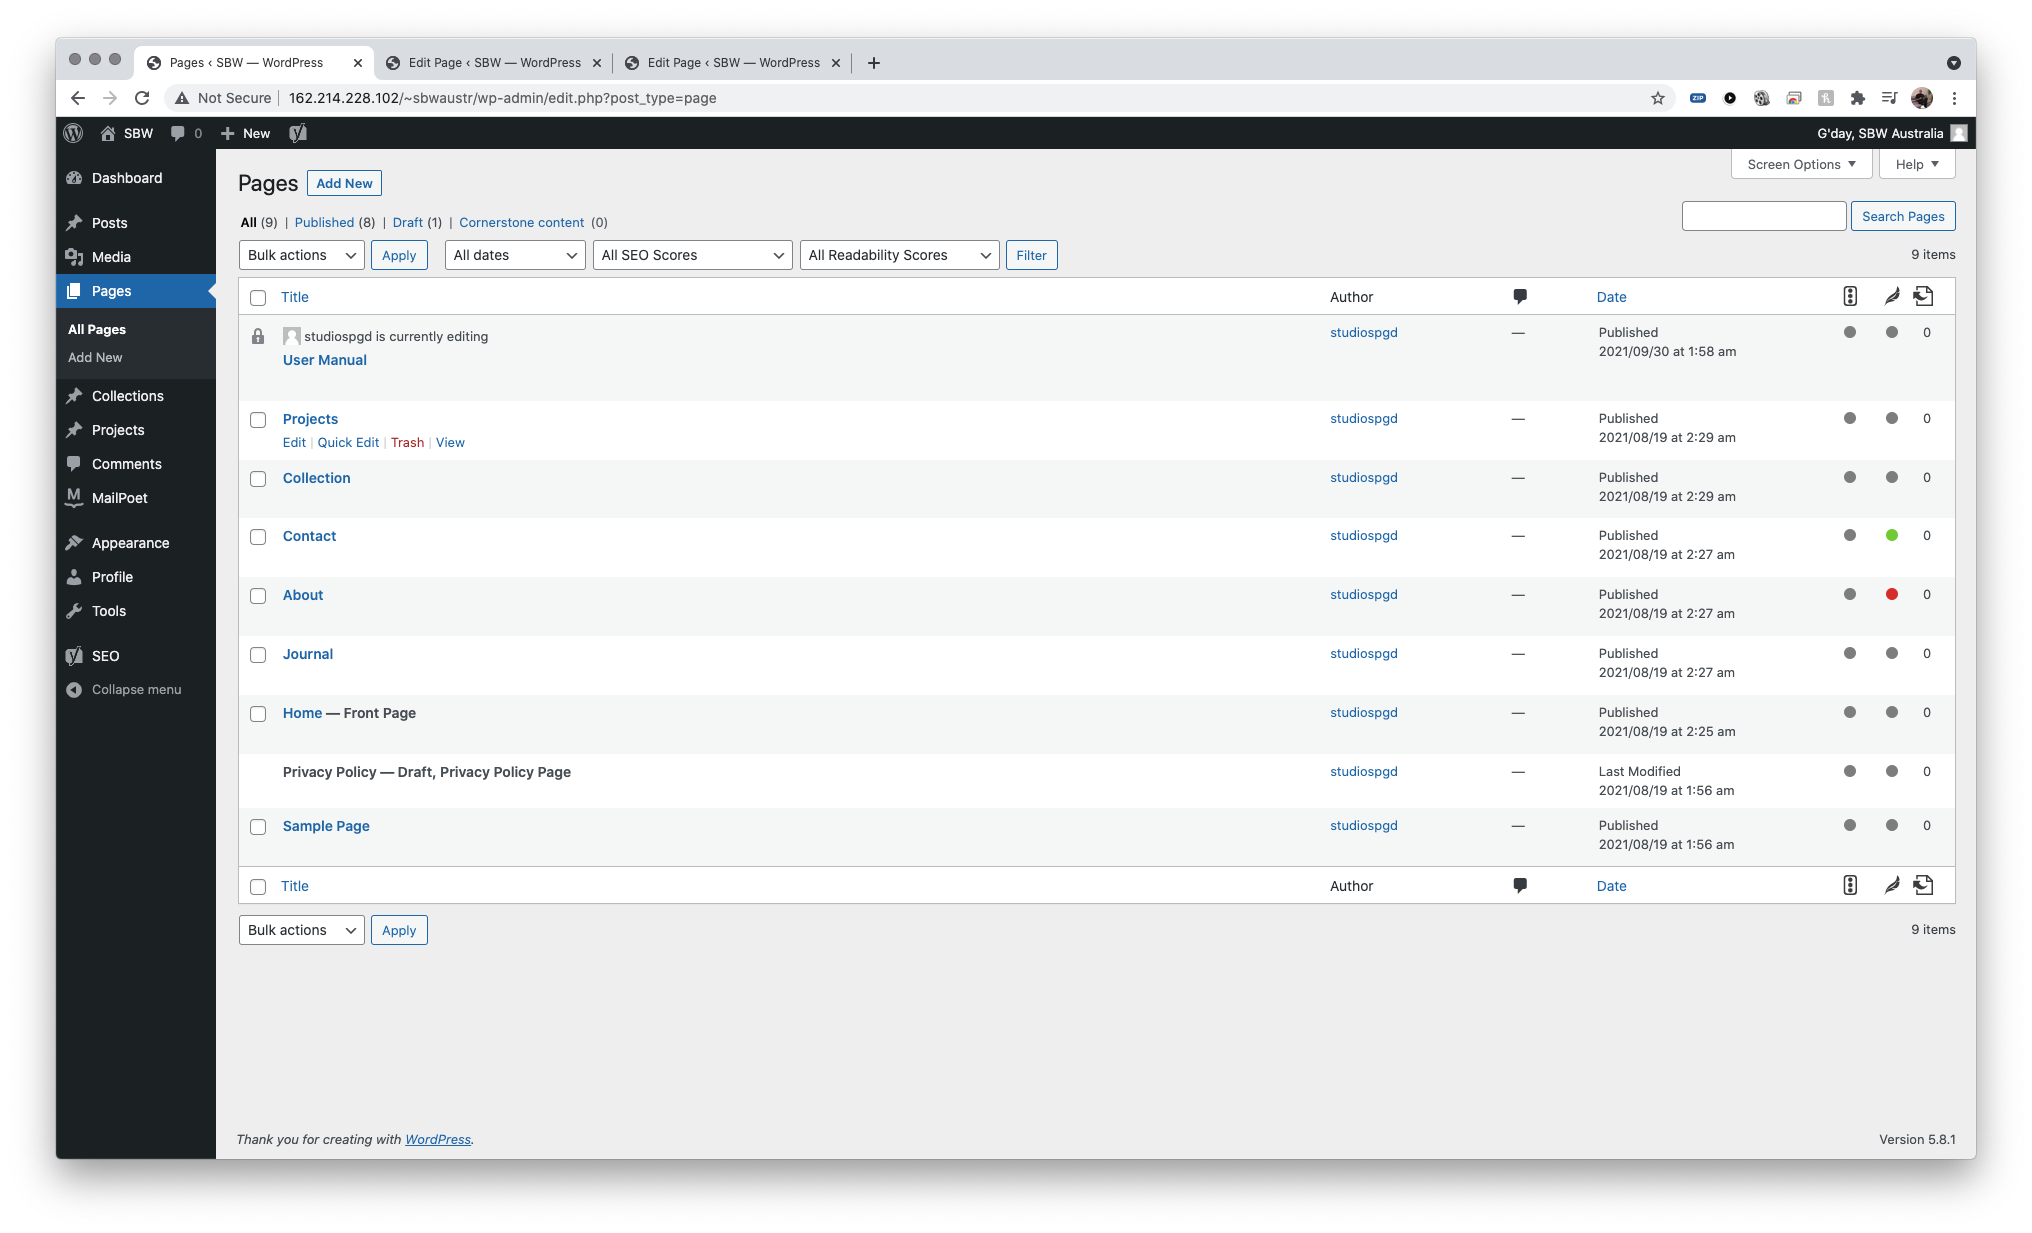
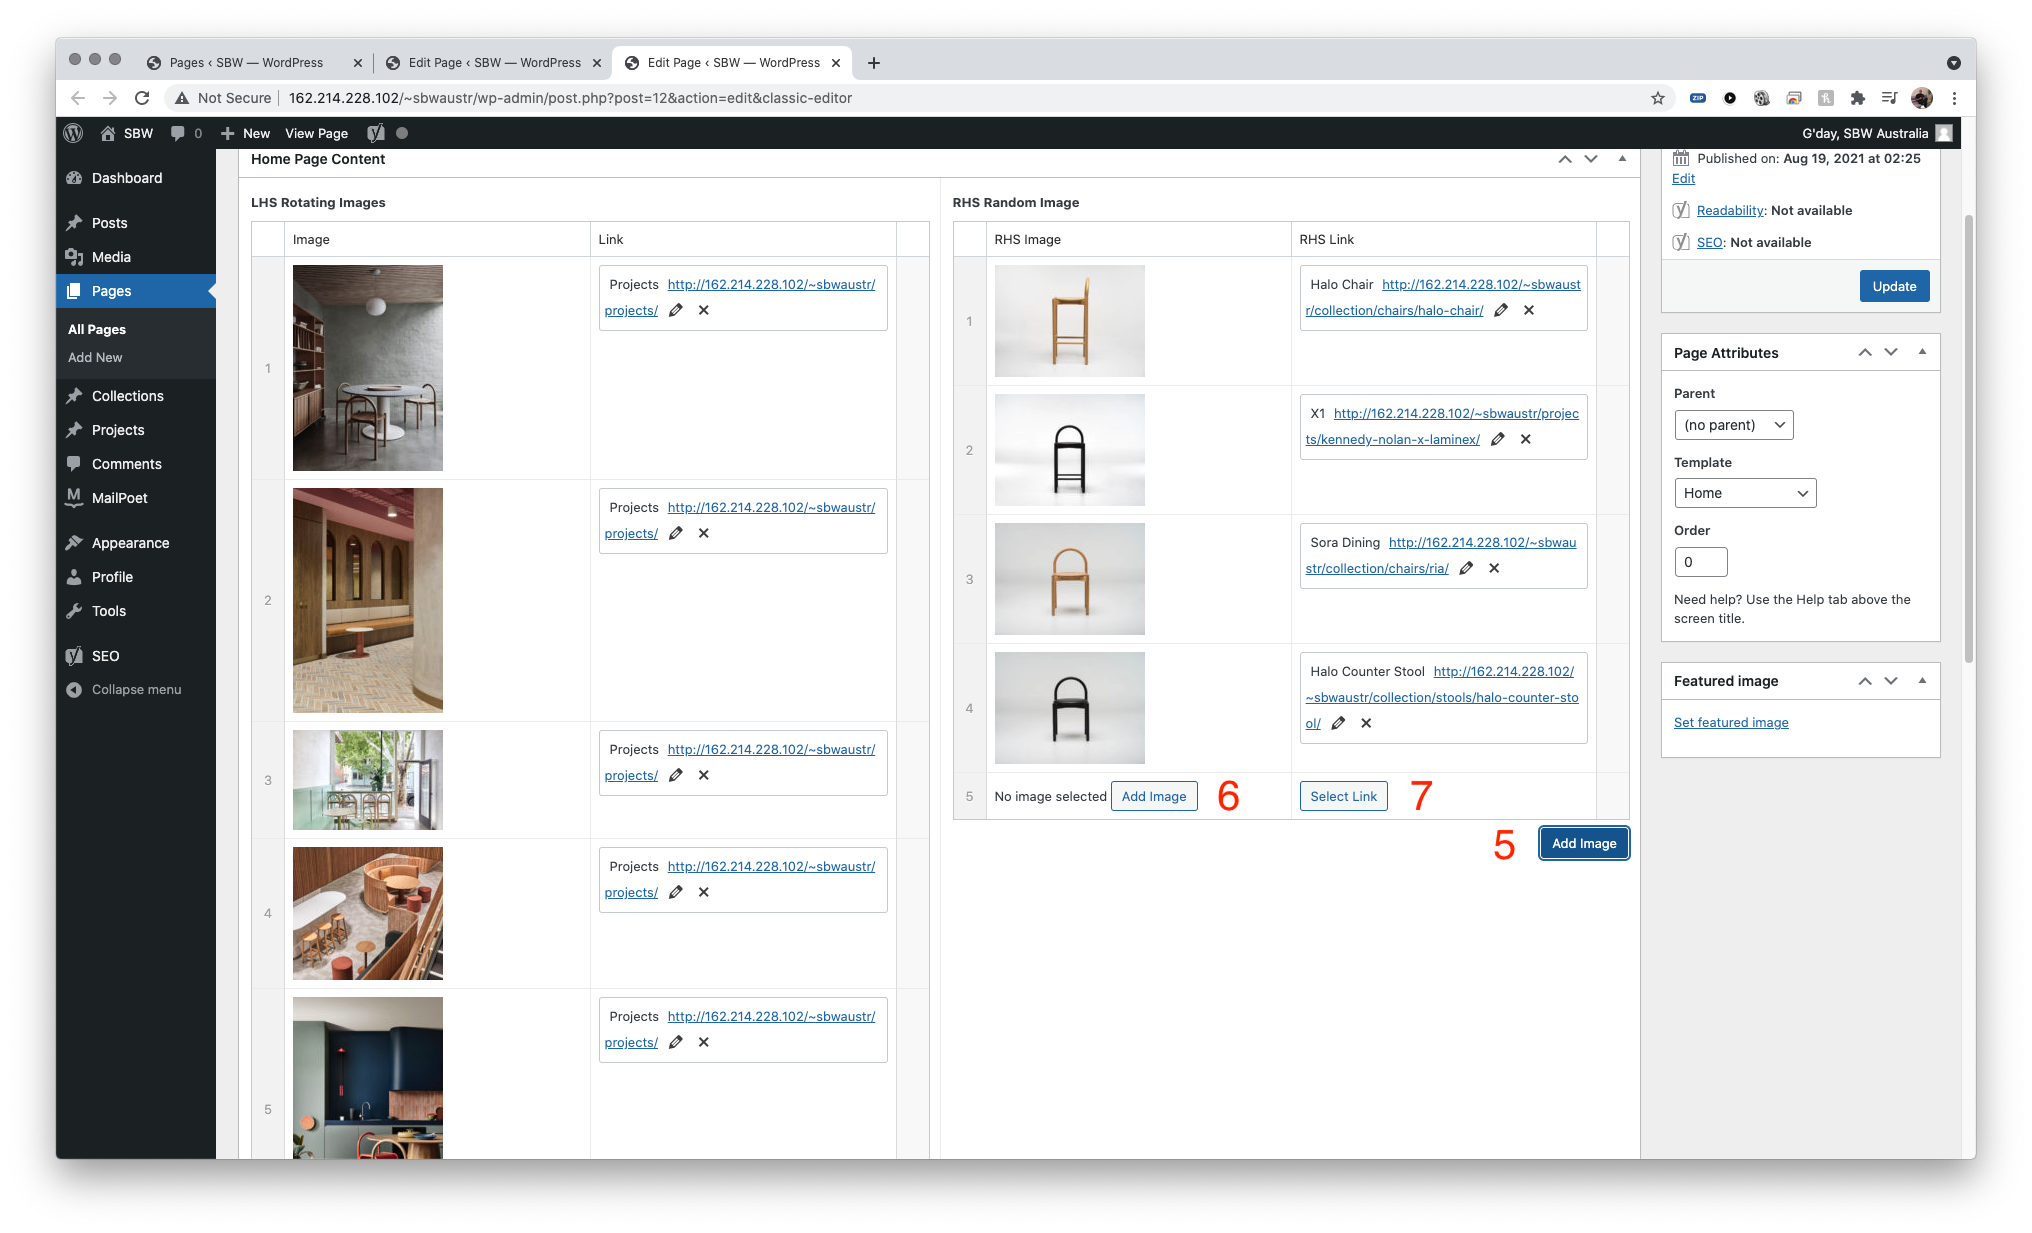

Navigate to Pages > All Pages > Home
- to add LHS rotating image, click on Add Images to create new row
- Click add Image to insert the image – process outlined in previous steps
- Click Select link to insert link
- search for the internal content in the search box. select the item and then click ADD LINK
- To add RHS random image list, click on Add Image to create new row
- click add Image to insert the image
- Click Select link to insert link
- select the content to be linked by searching in the search box, then ADD LINK – this will show any of the listed image at random
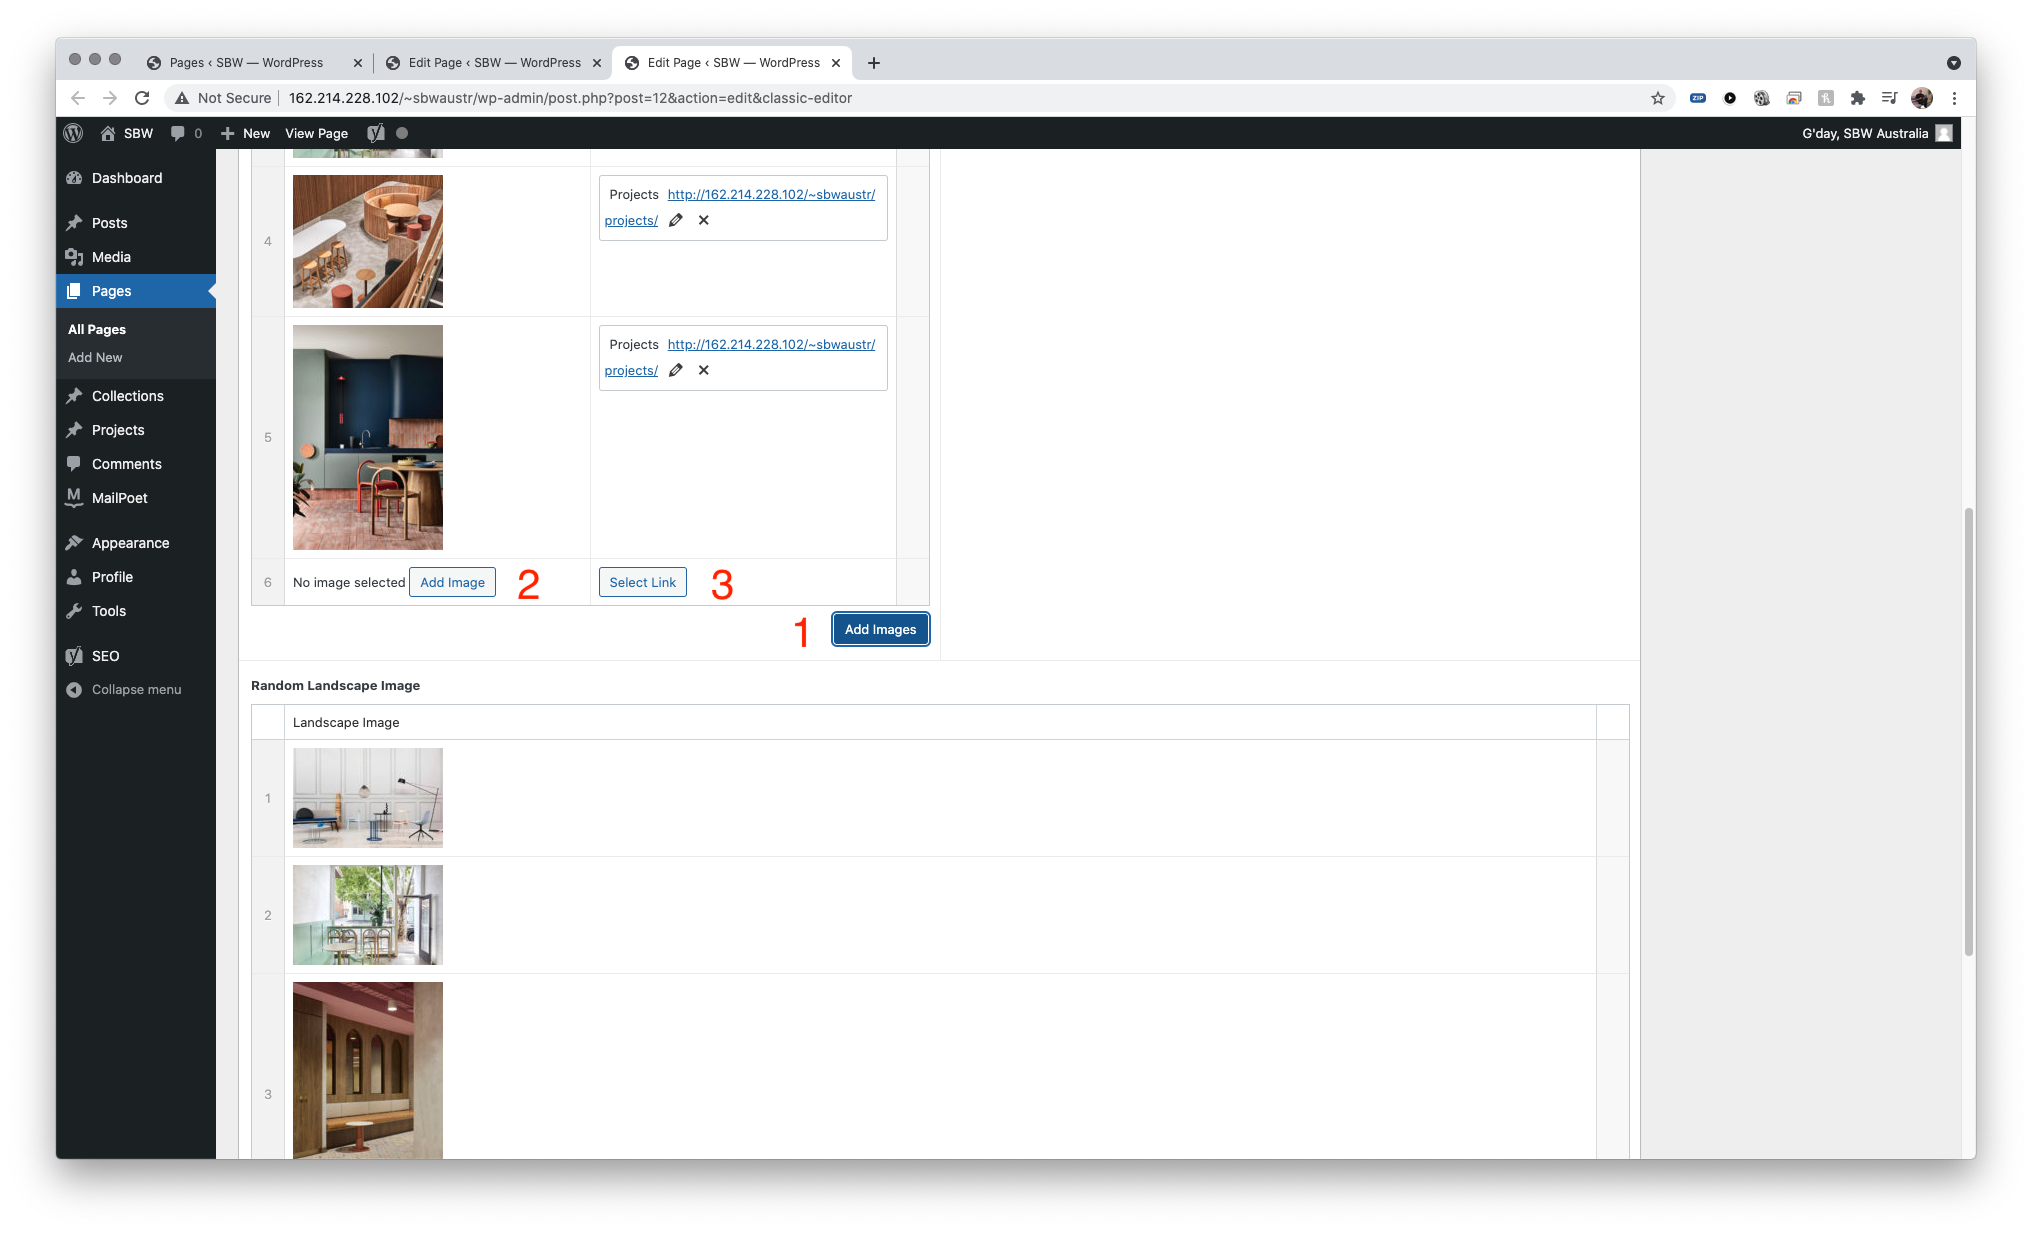
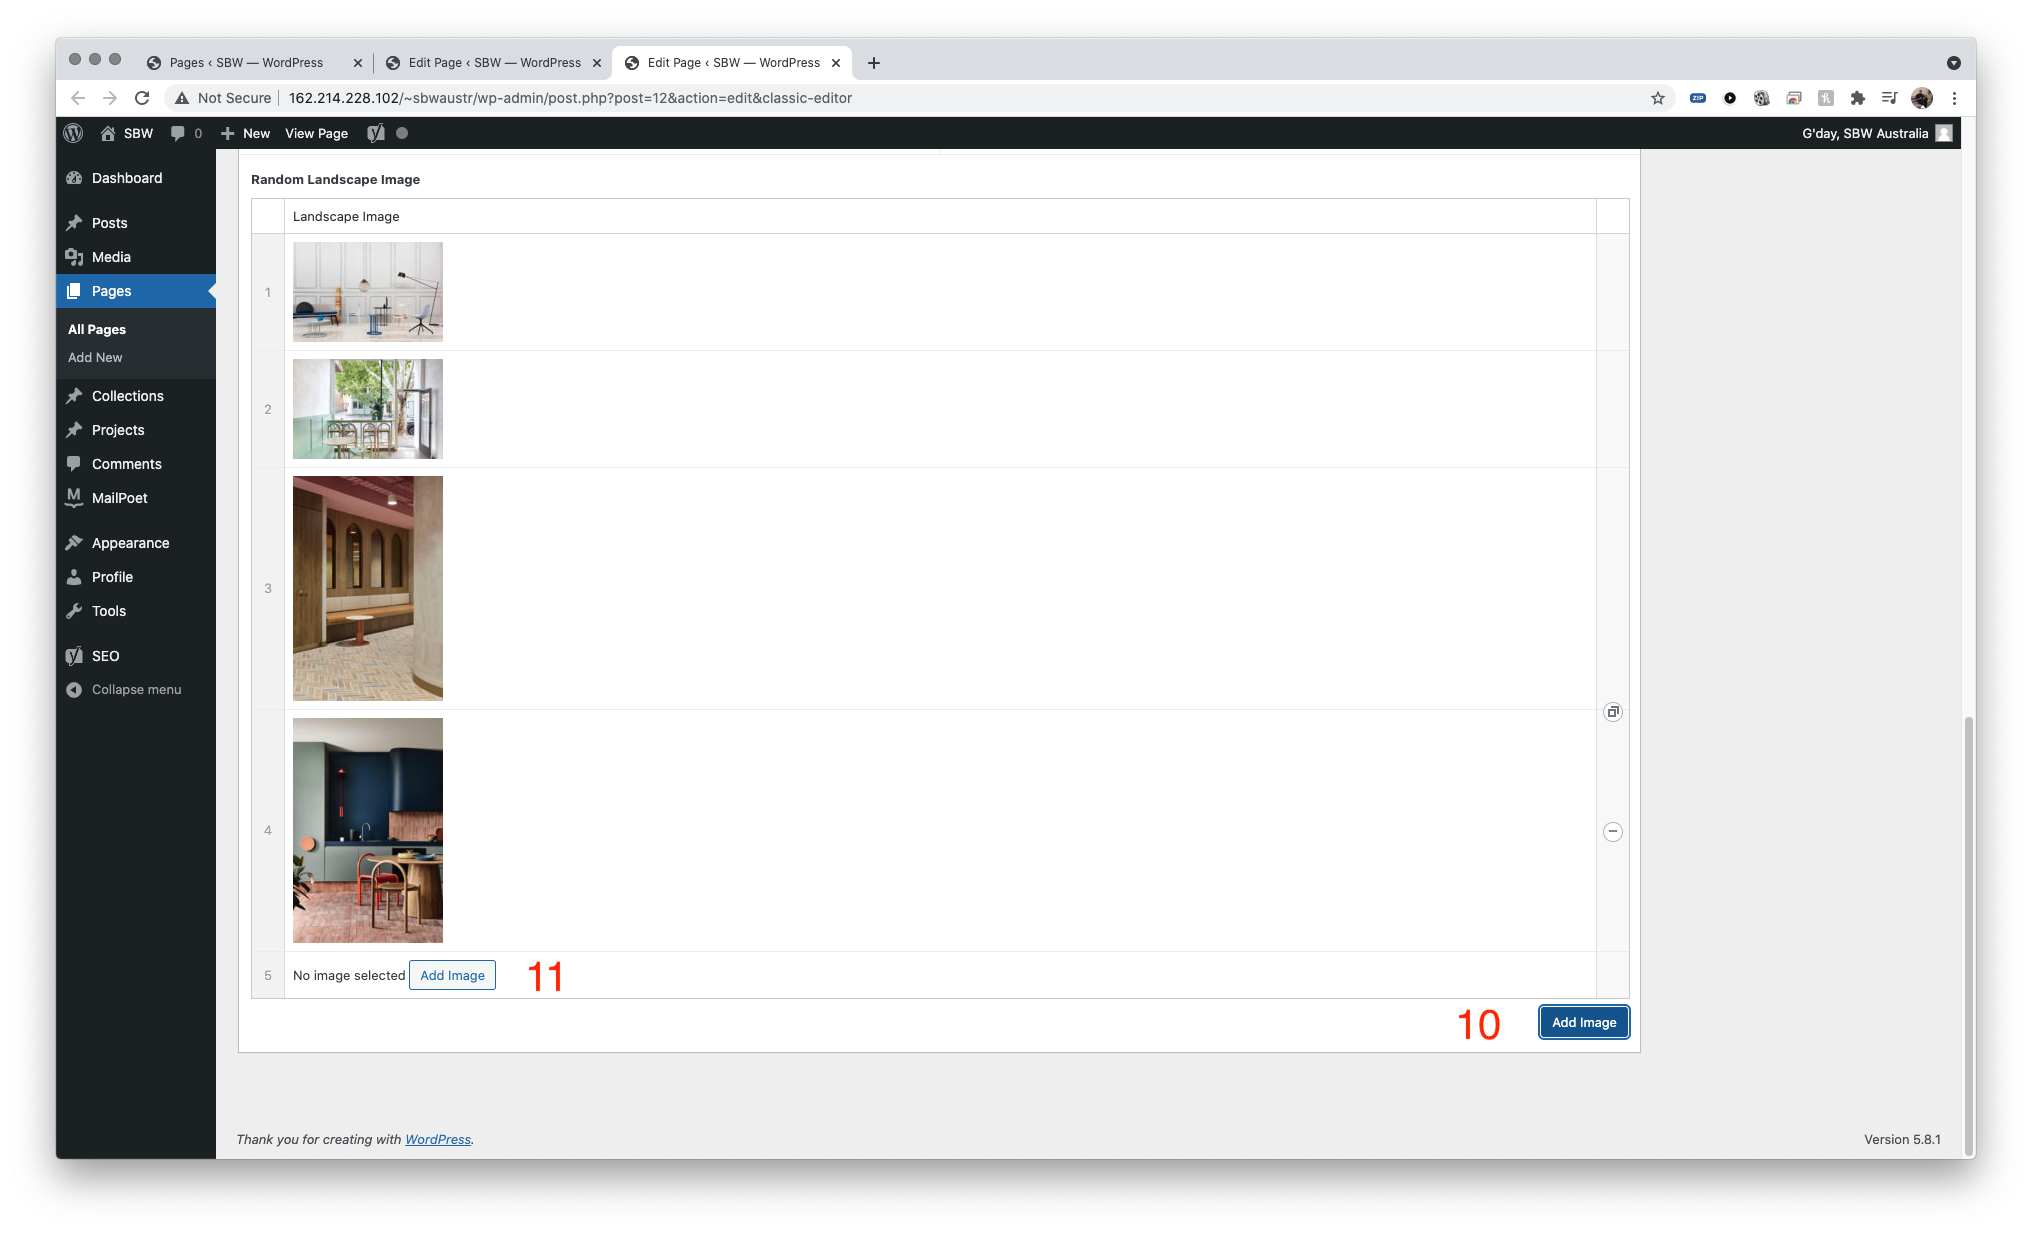
- Scroll down to Random Landscape Image section
- click Add Image to add new row
- click Add image inside this row to add another image to the random list – this will appear at random from the images on the list.
- once done click Update.
About Page - Editing content
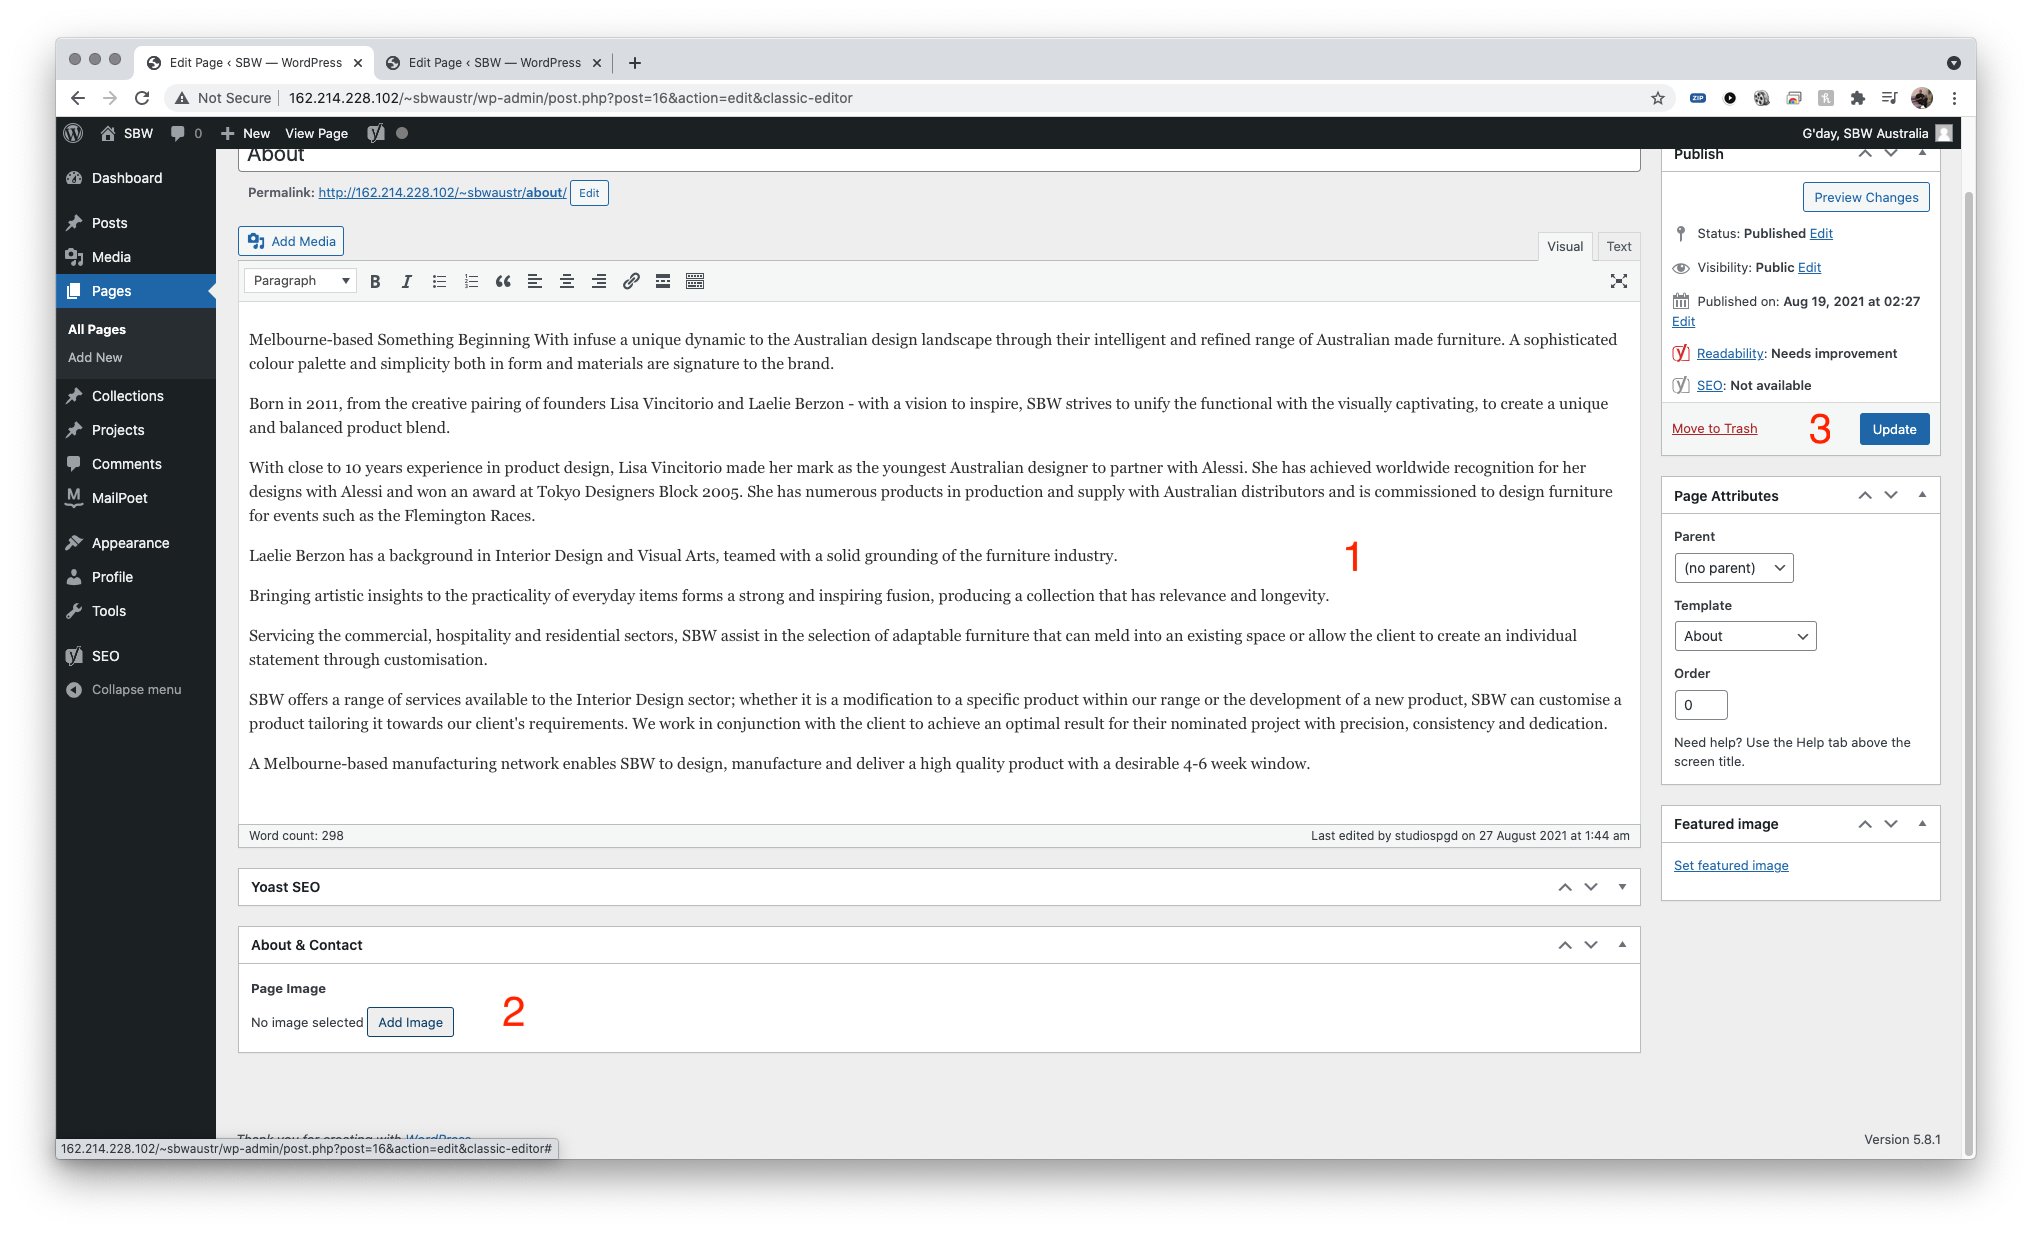
Navigate to Pages > All Pages > About
- This is where the description or text content can be edited.
- click add image to insert an image to the About page – suggested a portrait image to fill the space correctly. process outlined in previous sections
- click update when done
Contact Page - Editing content
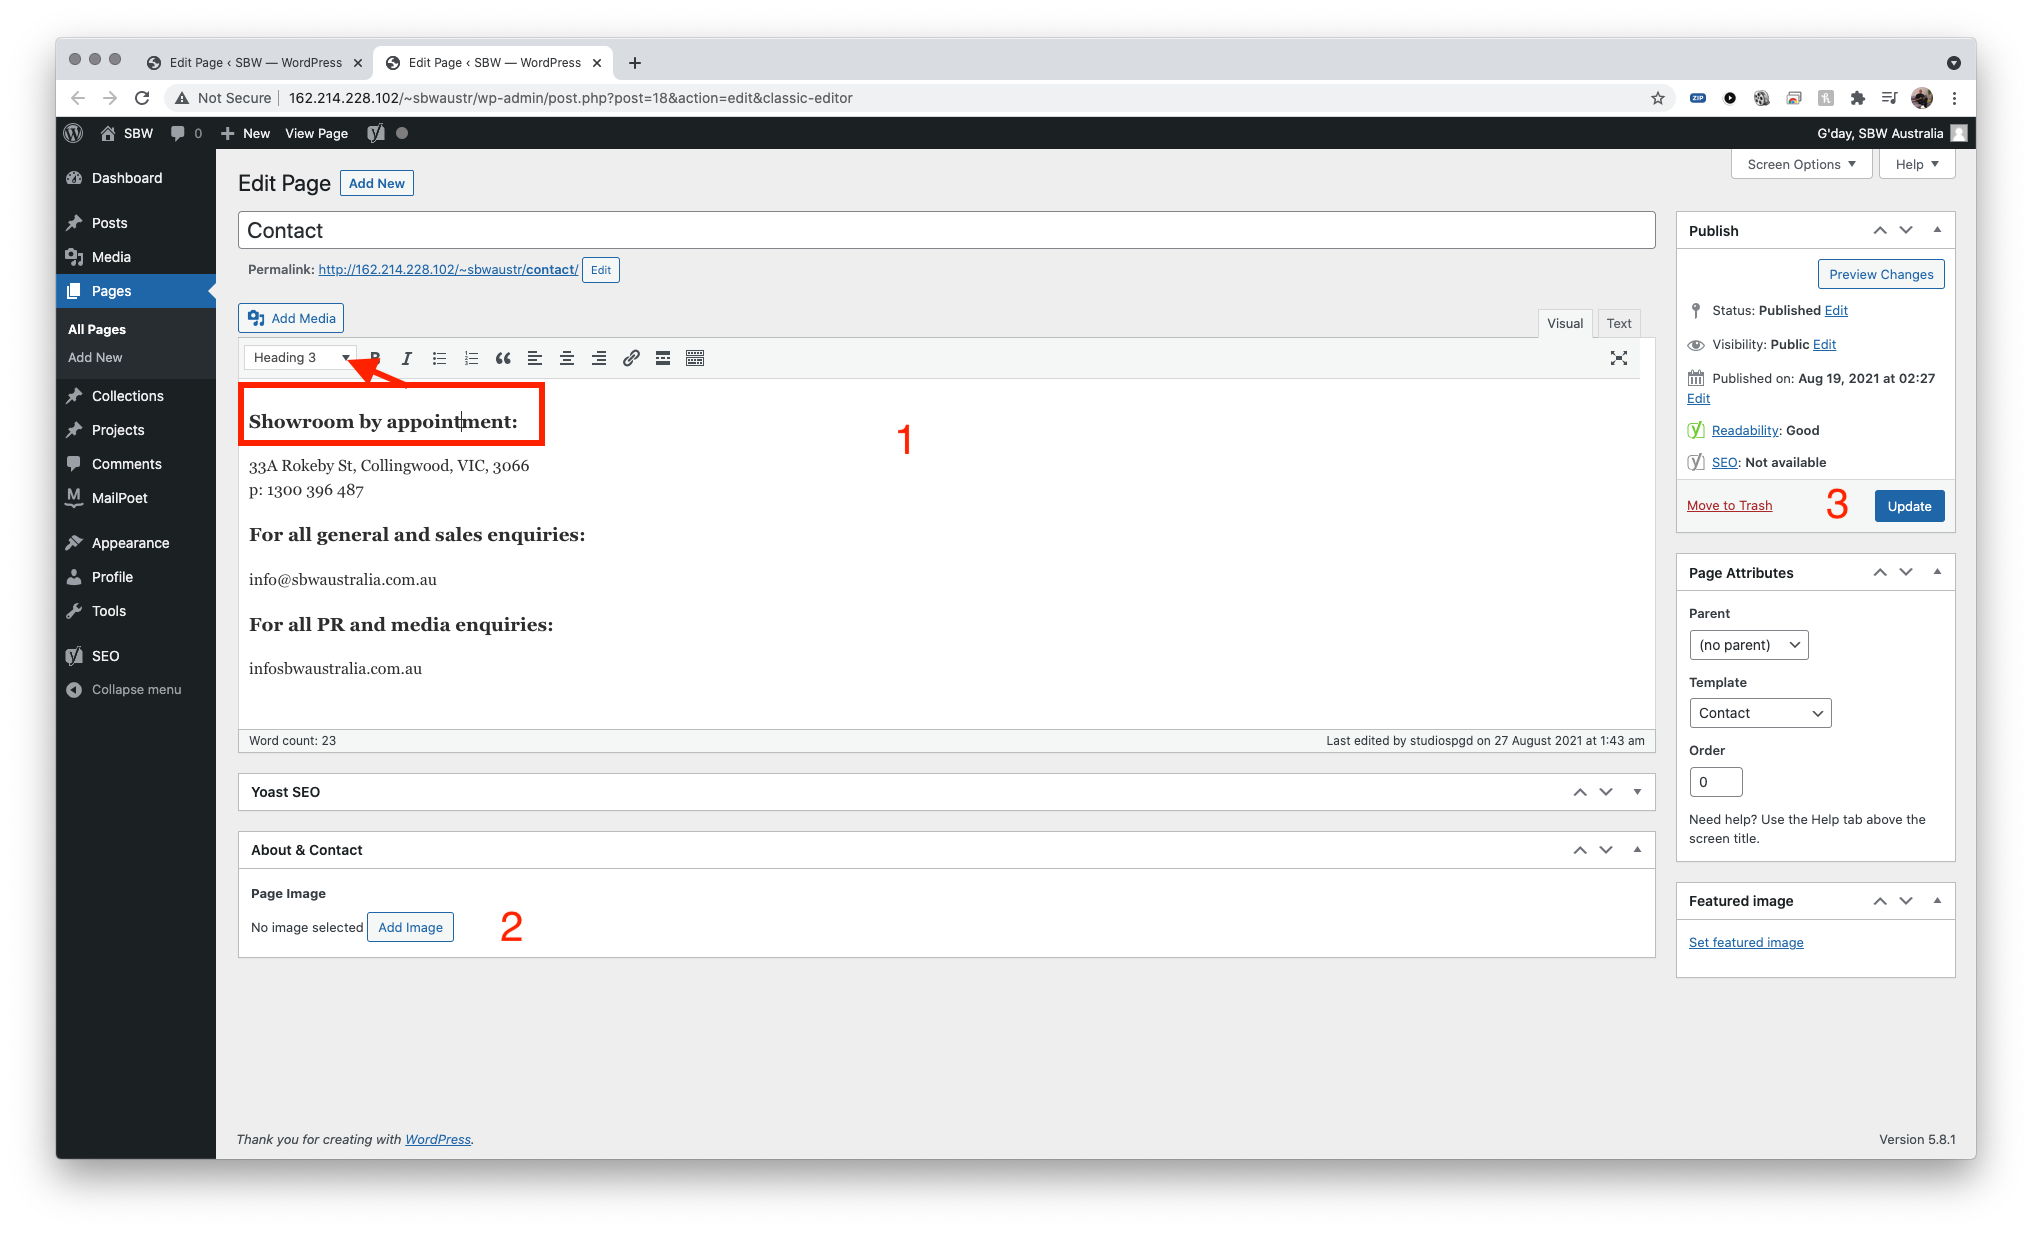
Navigate to Pages > All Pages > Contact
- This is where the contact details are listed. note the headings, they should be wrapped using HEADING 3 only. highlight the text to be used as heading and then select from the drop down.
- click add image to insert an image to the Contact page – suggested a portrait image to fill the space correctly. process outlined in previous sections
- click update when done
Menu Items
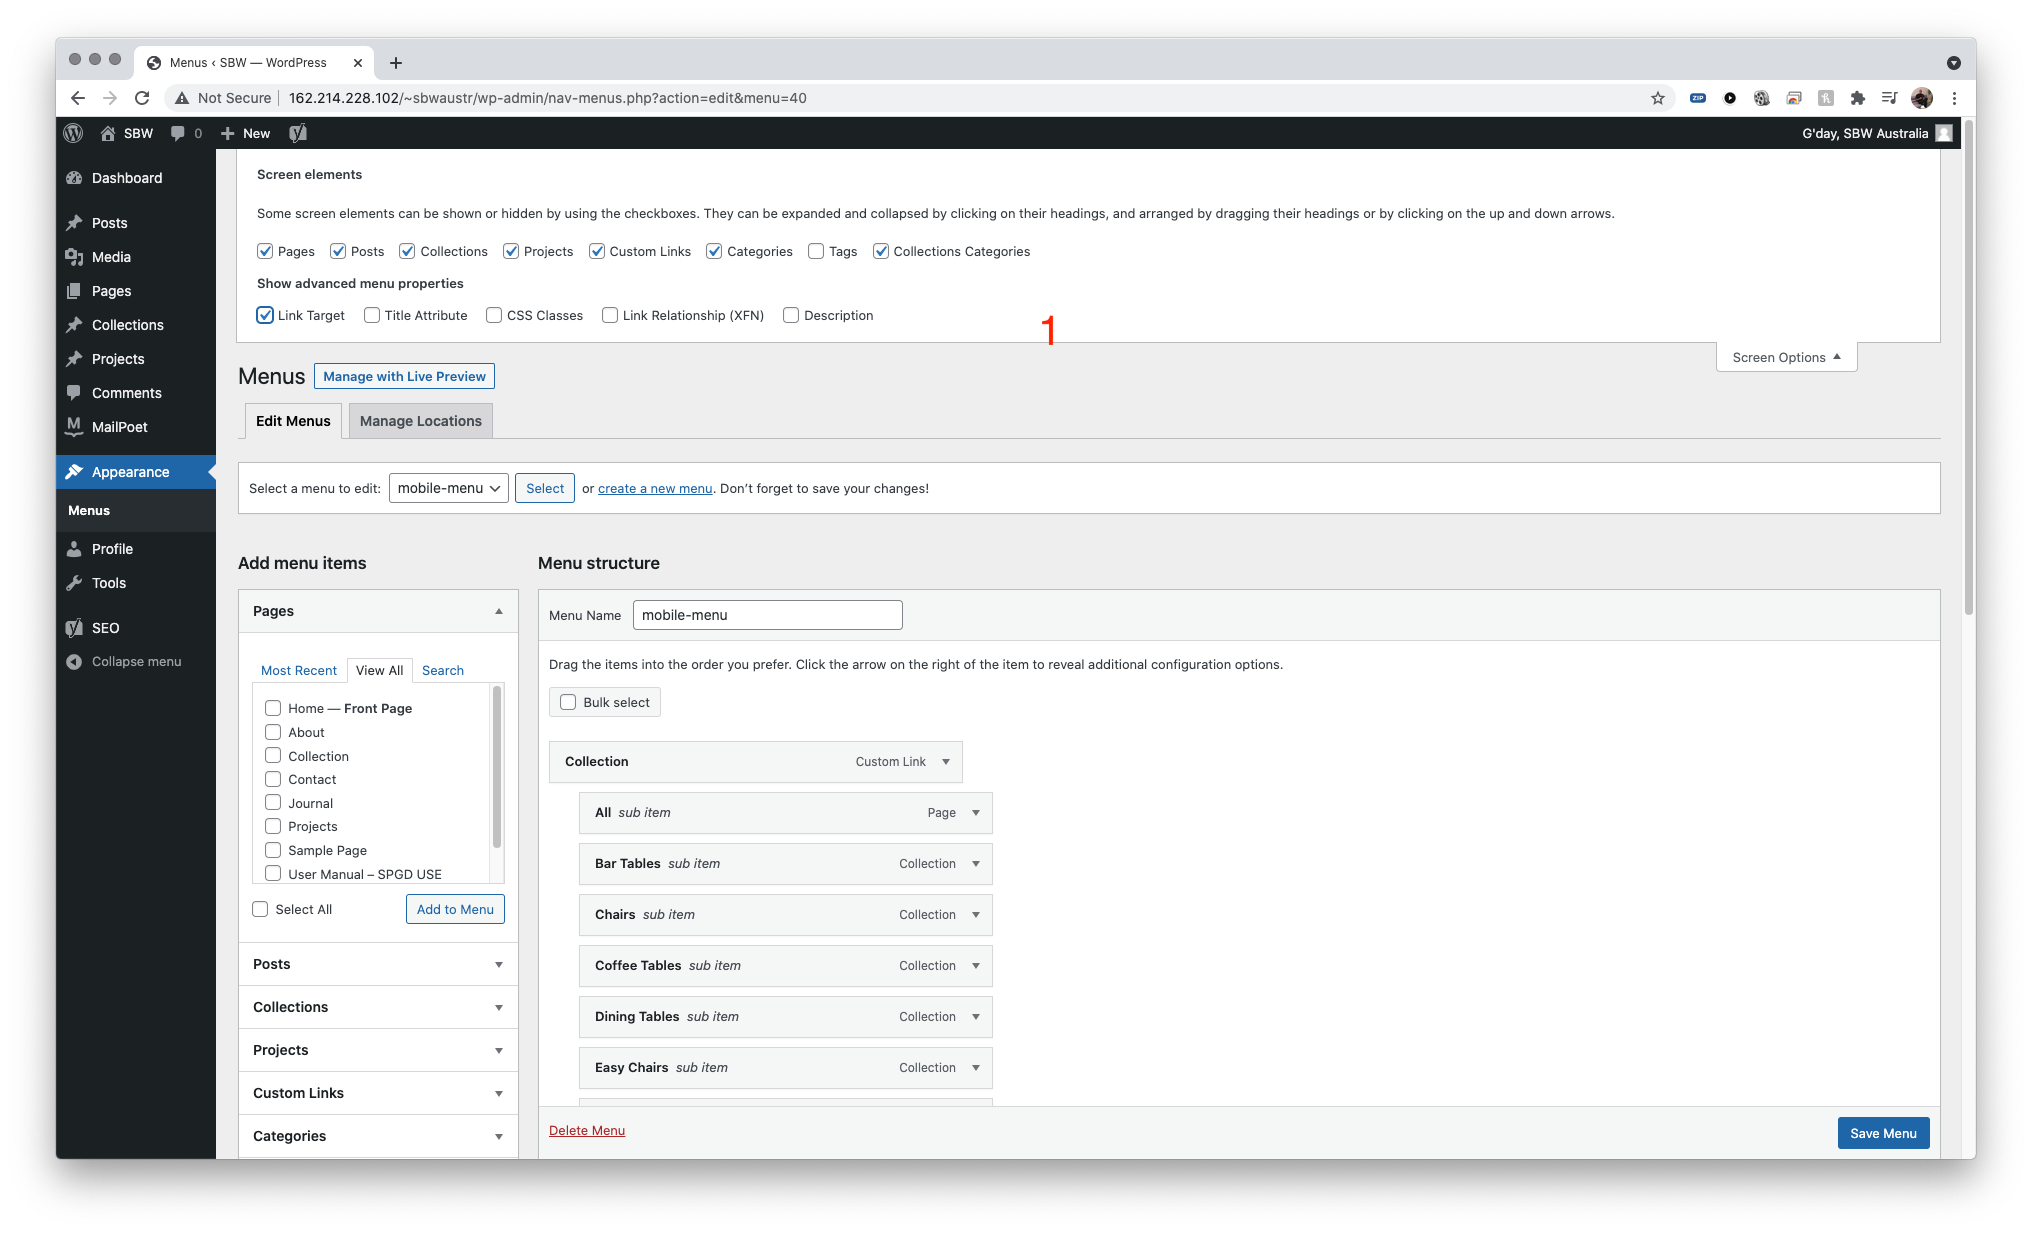
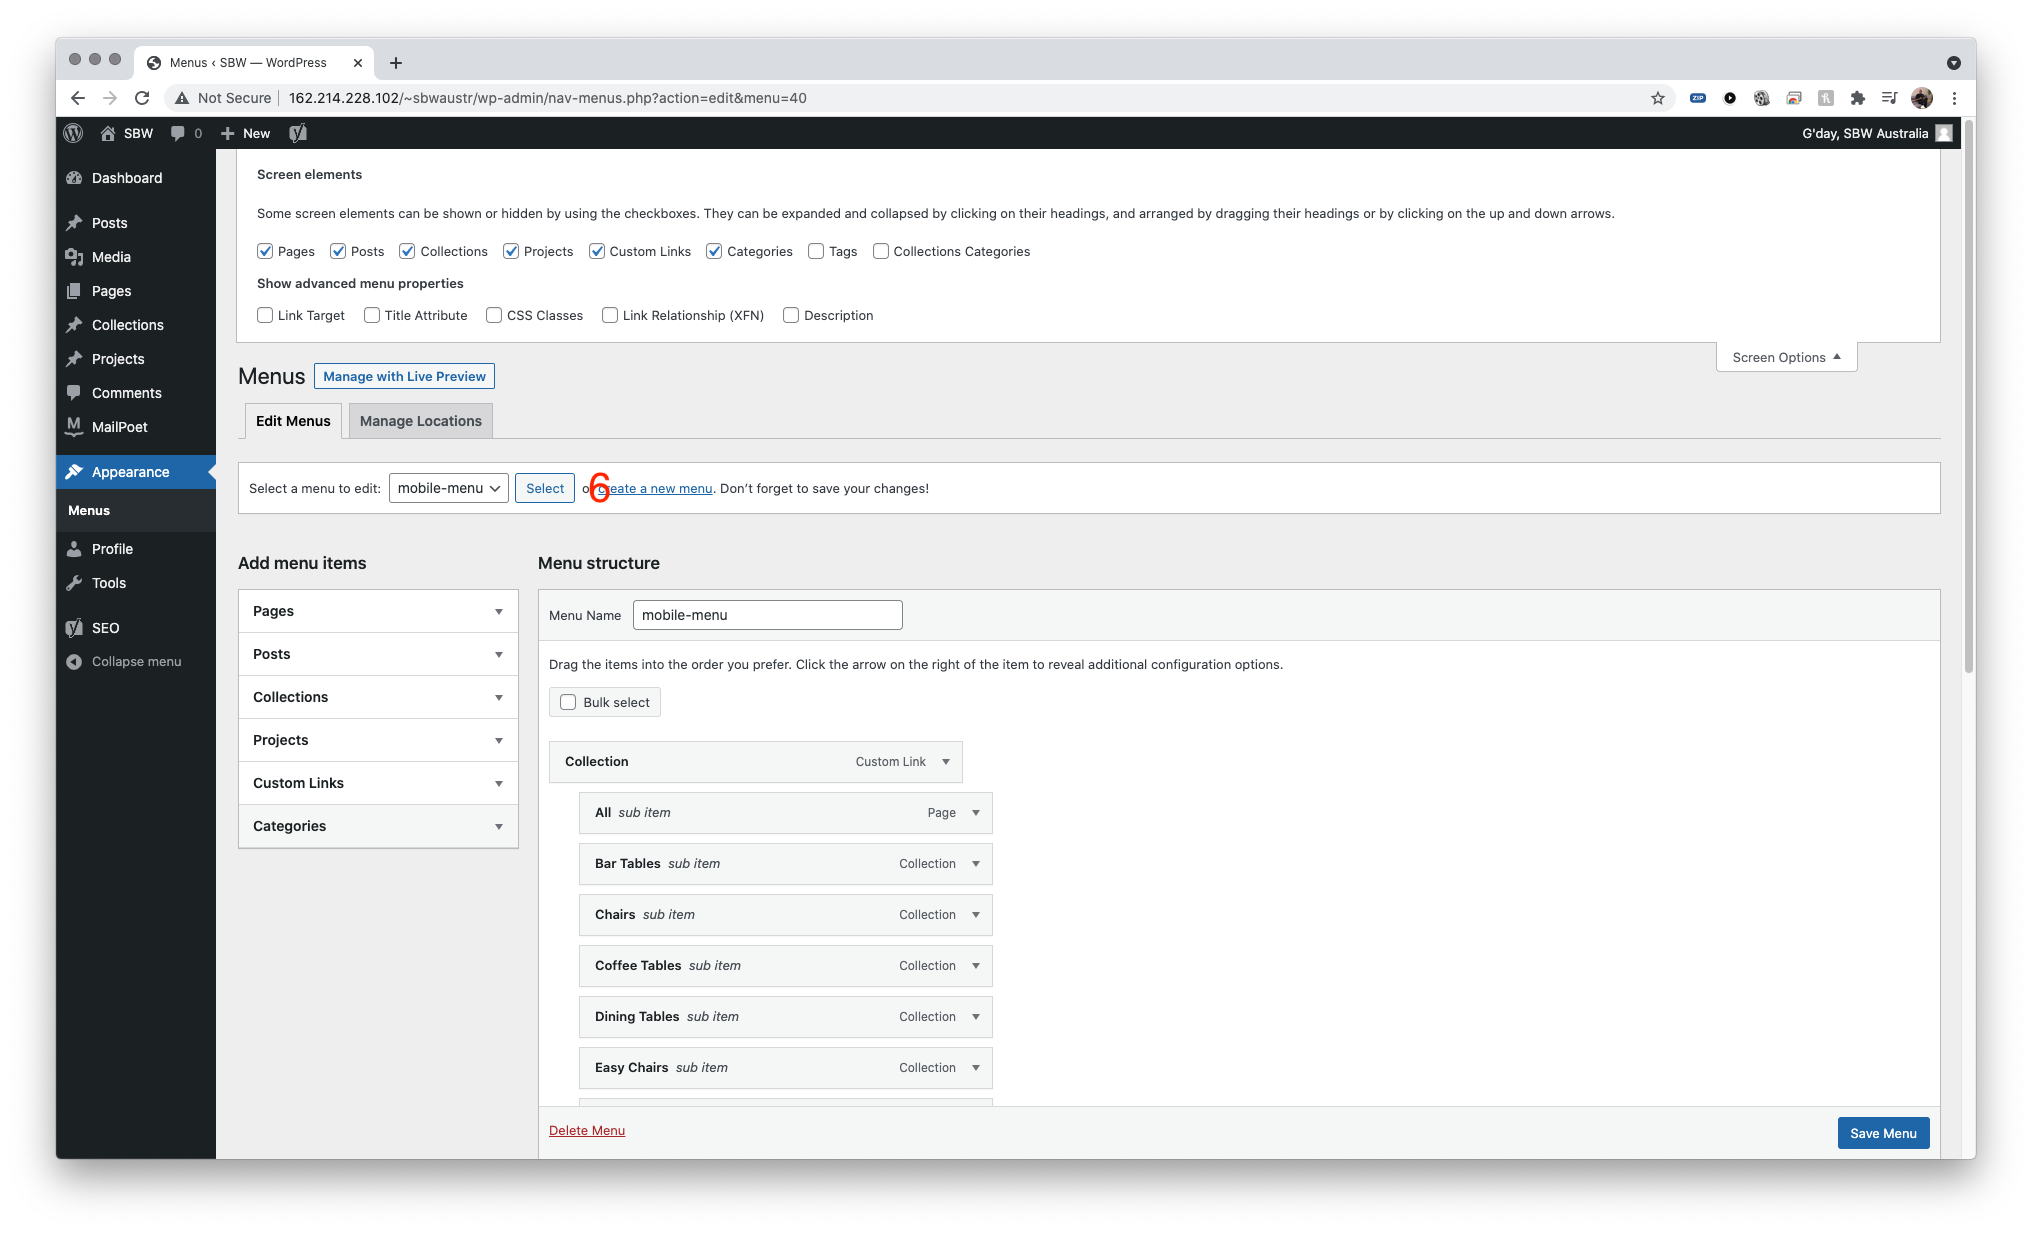
Navigate to Appearance > Menus
- Click on screen options on top right hand corner. ensure that these options are ticked as per screenshot
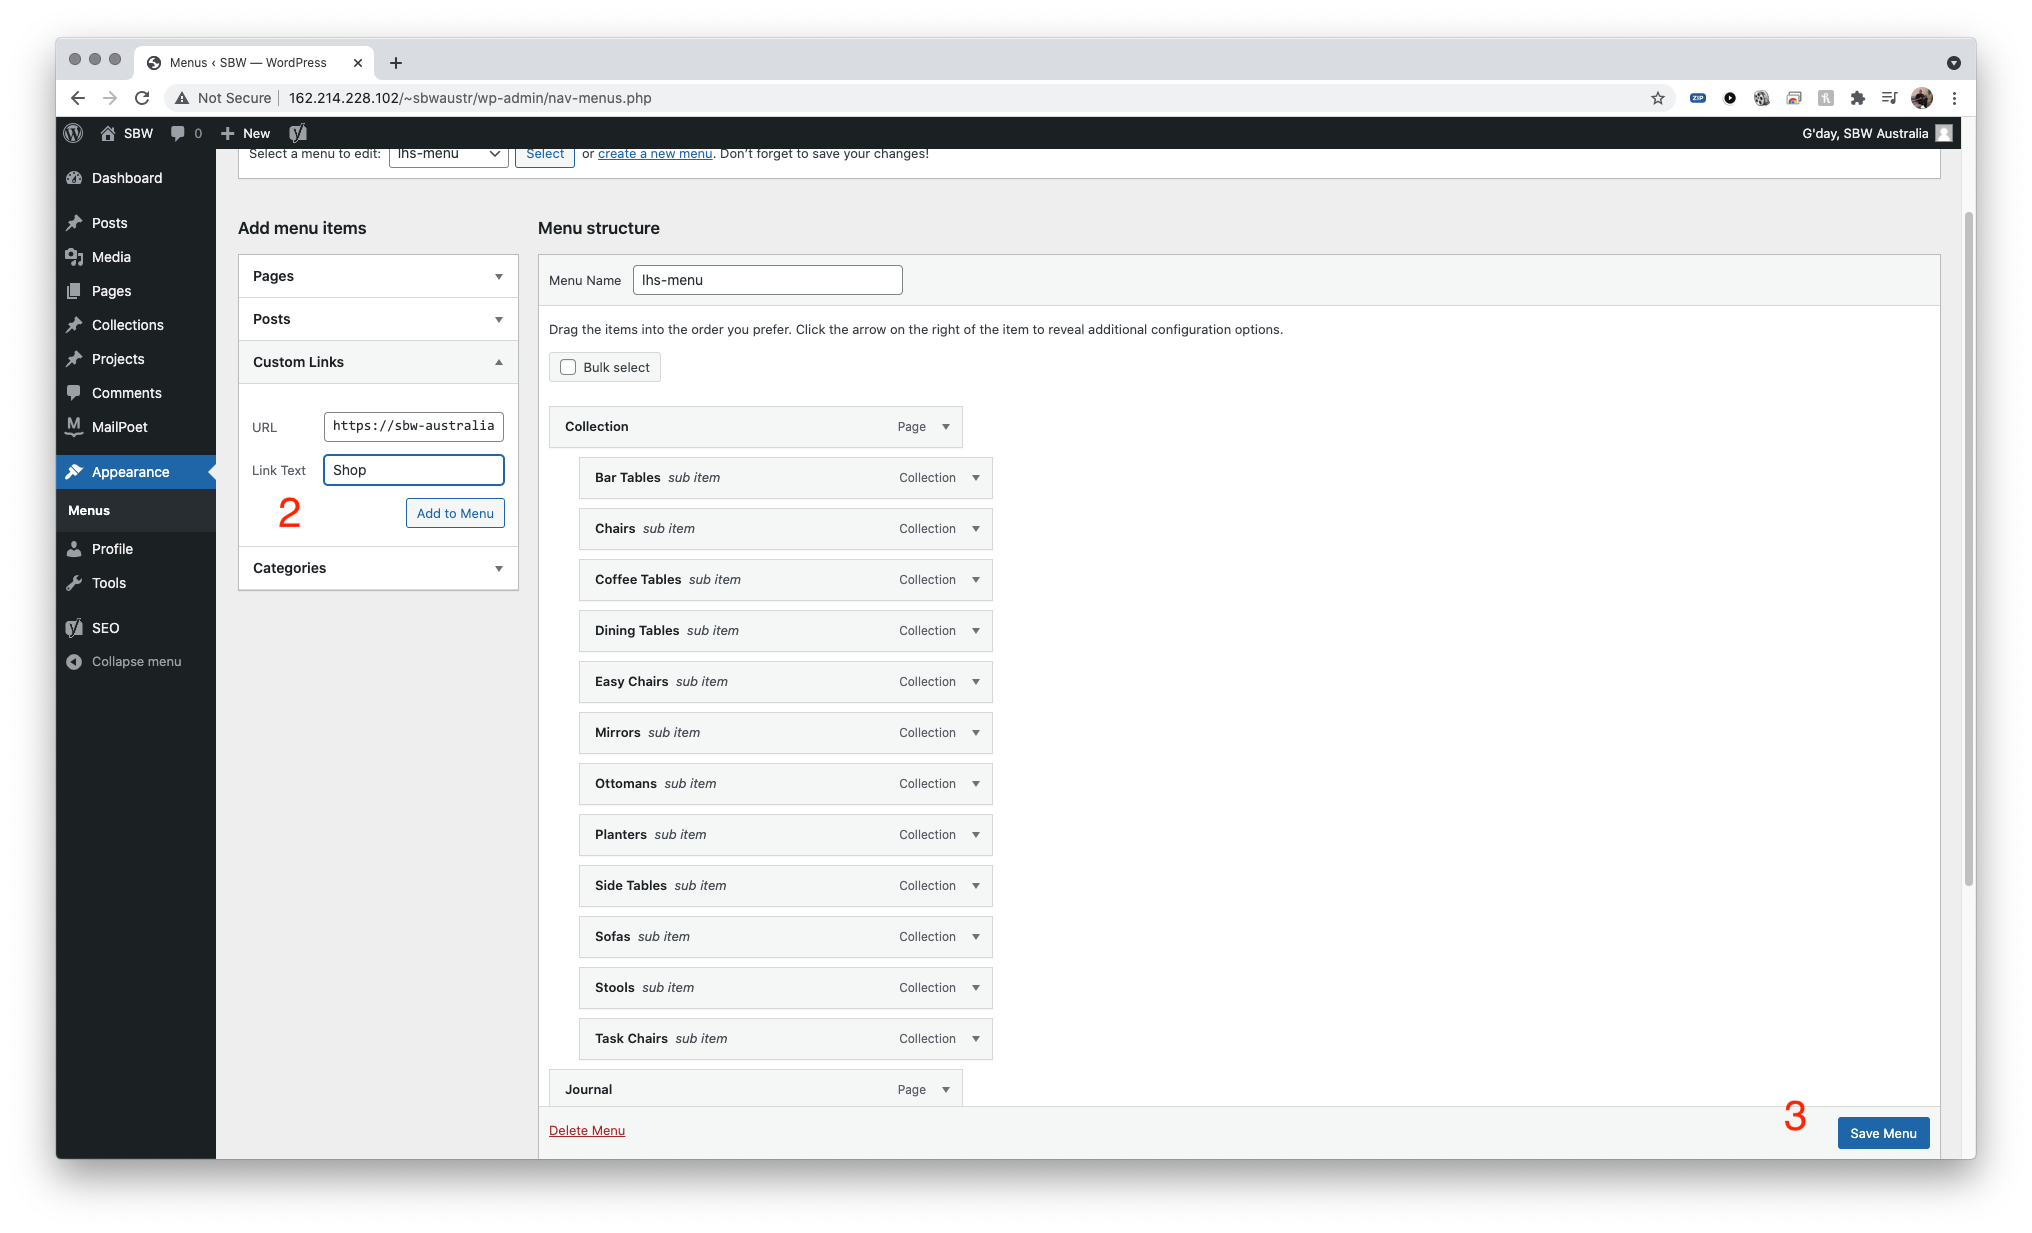
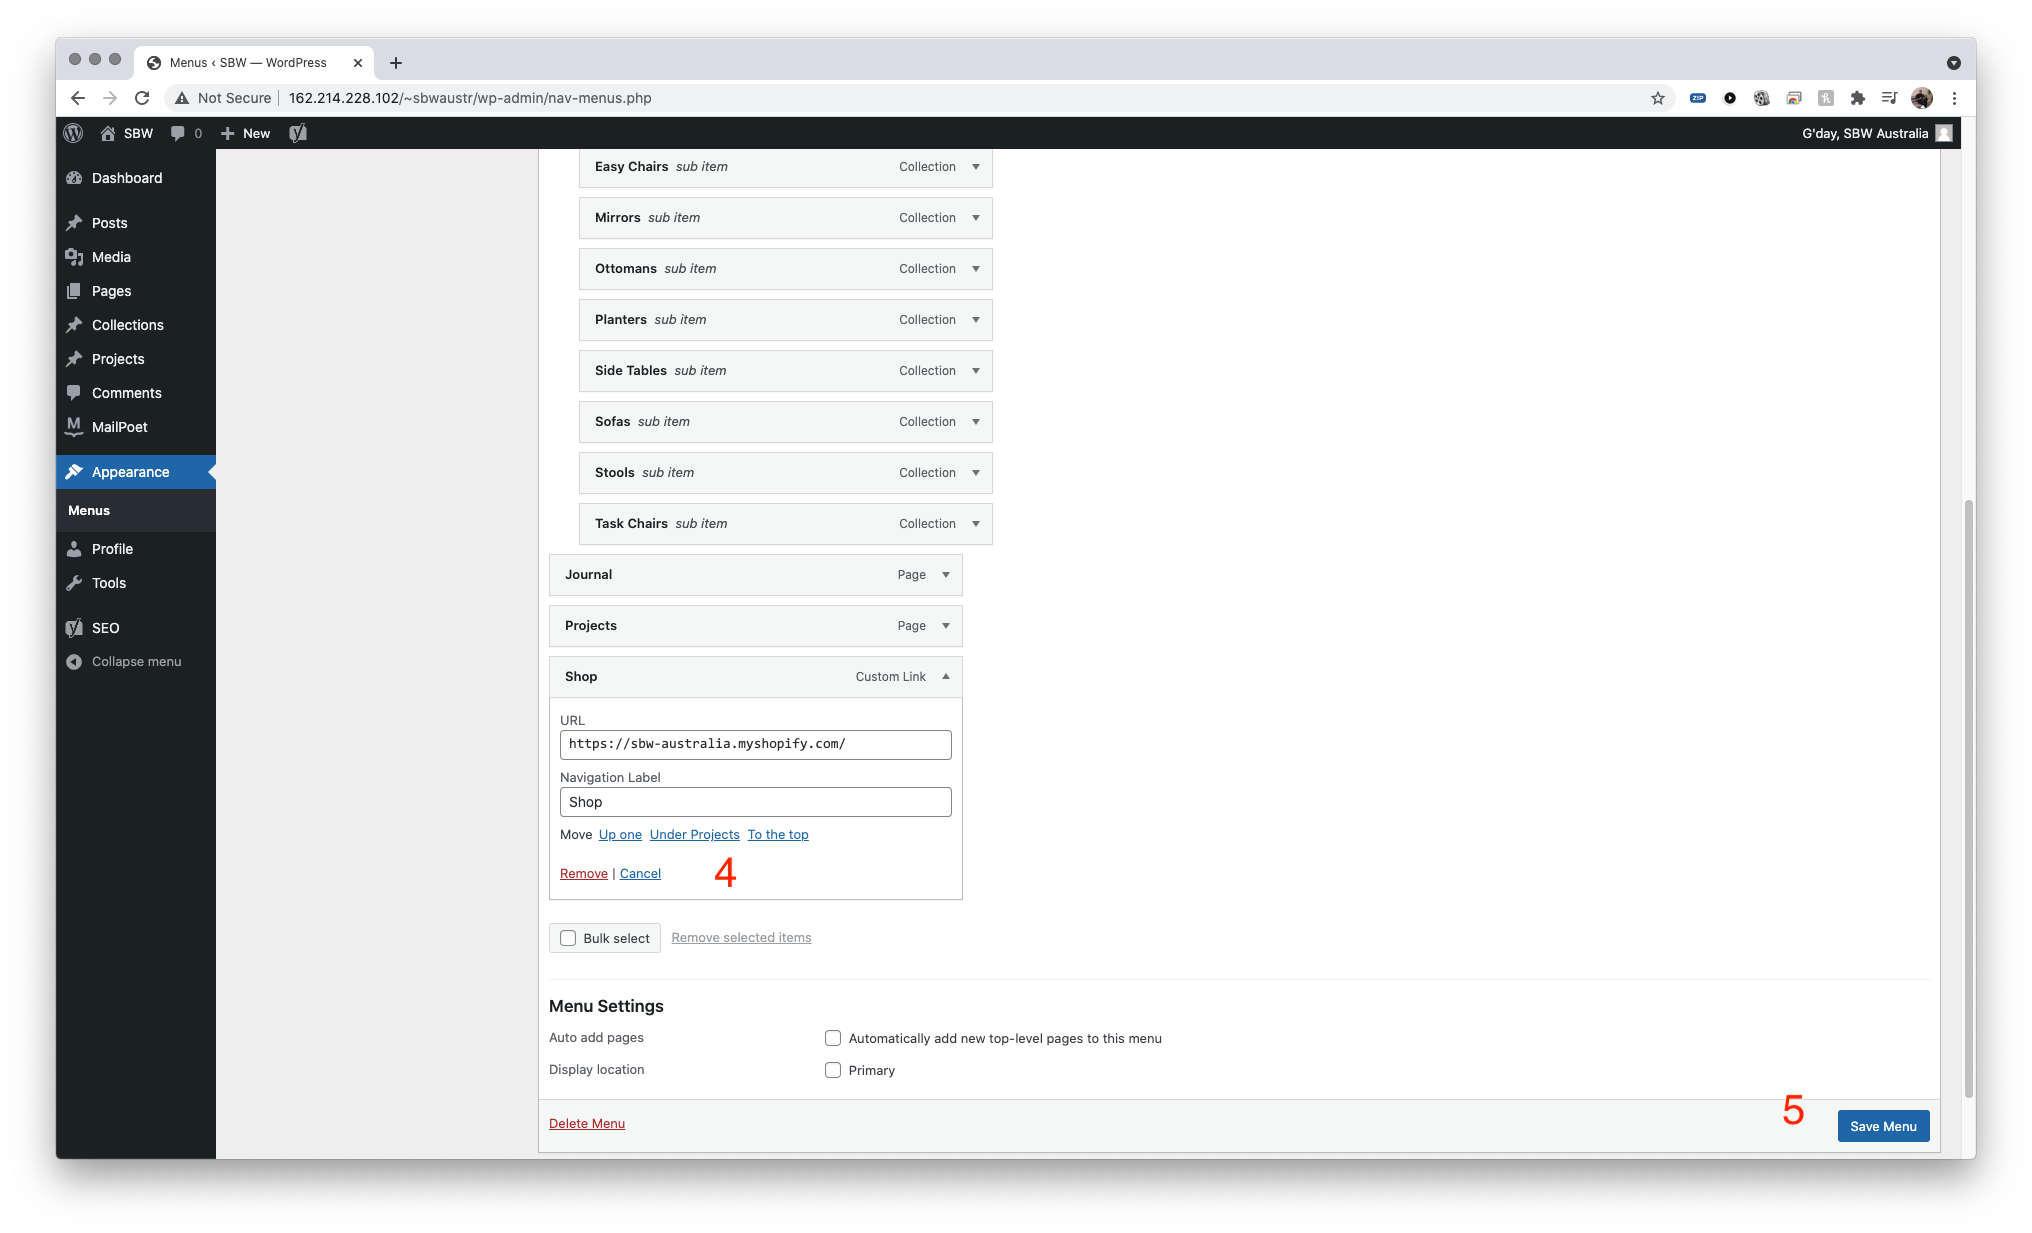
- To add custom link e.g Shop, click on CUSTOM LINKS, paste the URL on the URL box, and enter Link Text as how you would like it displayed.
- once the item is added to the structure, you can reorder by drag and drop. once the item is added, expand it and tick OPEN IN NEW TAB (especially shop link). Save menu once done
- To remove an item, click on the menu item to open the link, and click on remove button.
- save menu when done
- Mobile menu will need updating if any changes are made to main menu. click Mobile Menu on the select menu to edit menu, then click select. once displayed find the item that was changed / add the item to the menu. follow the same process as main menu. then save.